
Spring Cache扩展功能实现过程解析
两个需求缓存失效时间支持在方法的注解上指定
Spring Cache默认是不支持在@Cacheable上添加过期时间的,可以在配置缓存容器时统一指定:
@Bean
public CacheManager cacheManager(
    @SuppressWarnings("rawtypes") RedisTemplate redisTemplate) {
  CustomizedRedisCacheManager cacheManager= new CustomizedRedisCacheManager(redisTemplate);
  cacheManager.setDefaultExpiration(60);
  Map<String,Long> expiresMap=new HashMap<>();
  expiresMap.put("Product",5L);
  cacheManager.setExpires(expiresMap);
  return cacheManager;
}
想这样配置过期时间,焦点在value的格式上Product#5#2,详情下面会详细说明。
@Cacheable(value = {"Product#5#2"},key ="#id")
上面两种各有利弊,并不是说哪一种一定要比另外一种强,根据自己项目的实际情况选择。
在缓存即将过期时主动刷新缓存
一般缓存失效后,会有一些请求会打到后端的数据库上,这段时间的访问性能肯定是比有缓存的情况要差很多。所以期望在缓存即将过期的某一时间点后台主动去更新缓存以确保前端请求的缓存命中率,示意图如下:

Srping 4.3提供了一个sync参数。是当缓存失效后,为了避免多个请求打到数据库,系统做了一个并发控制优化,同时只有一个线程会去数据库取数据其它线程会被阻塞。
背景
我以Spring Cache +Redis为前提来实现上面两个需求,其它类型的缓存原理应该是相同的。
本文内容未在生产环境验证过,也许有不妥的地方,请多多指出。
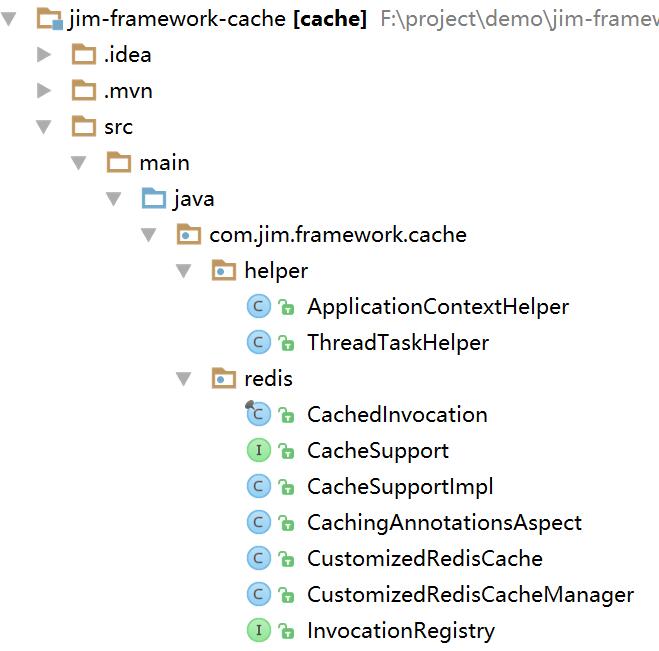
扩展RedisCacheManagerCustomizedRedisCacheManager
继承自RedisCacheManager,定义两个辅助性的属性:
/**
   * 缓存参数的分隔符
   * 数组元素0=缓存的名称
   * 数组元素1=缓存过期时间TTL
   * 数组元素2=缓存在多少秒开始主动失效来强制刷新
   */
  private String separator = "#";

  /**
   * 缓存主动在失效前强制刷新缓存的时间
   * 单位:秒
   */
  private long preloadSecondTime=0;
注解配置失效时间简单的方法就是在容器名称上动动手脚,通过解析特定格式的名称来变向实现失效时间的获取。比如第一个#后面的5可以定义为失效时间,第二个#后面的2是刷新缓存的时间,只需要重写getCache:
- 解析配置的value值,分别计算出真正的缓存名称,失效时间以及缓存刷新的时间
- 调用构造函数返回缓存对象
@Override
public Cache getCache(String name) {

  String[] cacheParams=name.split(this.getSeparator());
  String cacheName = cacheParams[0];

  if(StringUtils.isBlank(cacheName)){
    return null;
  }

  Long expirationSecondTime = this.computeExpiration(cacheName);

  if(cacheParams.length>1) {
    expirationSecondTime=Long.parseLong(cacheParams[1]);
    this.setDefaultExpiration(expirationSecondTime);
  }
  if(cacheParams.length>2) {
    this.setPreloadSecondTime(Long.parseLong(cacheParams[2]));
  }

  Cache cache = super.getCache(cacheName);
  if(null==cache){
    return cache;
  }
  logger.info("expirationSecondTime:"+expirationSecondTime);
  CustomizedRedisCache redisCache= new CustomizedRedisCache(
      cacheName,
      (this.isUsePrefix() ? this.getCachePrefix().prefix(cacheName) : null),
      this.getRedisOperations(),
      expirationSecondTime,
      preloadSecondTime);
  return redisCache;

}
CustomizedRedisCache
主要是实现缓存即将过期时能够主动触发缓存更新,核心是下面这个get方法。在获取到缓存后再次取缓存剩余的时间,如果时间小余我们配置的刷新时间就手动刷新缓存。为了不影响get的性能,启用后台线程去完成缓存的刷新。
public ValueWrapper get(Object key) {

  ValueWrapper valueWrapper= super.get(key);
  if(null!=valueWrapper){
    Long ttl= this.redisOperations.getExpire(key);
    if(null!=ttl&& ttl<=this.preloadSecondTime){
      logger.info("key:{} ttl:{} preloadSecondTime:{}",key,ttl,preloadSecondTime);
      ThreadTaskHelper.run(new Runnable() {
        @Override
        public void run() {
          //重新加载数据
          logger.info("refresh key:{}",key);
CustomizedRedisCache.this.getCacheSupport().refreshCacheByKey(CustomizedRedisCache.super.getName(),key.toString());
        }
      });

    }
  }
  return valueWrapper;
}
ThreadTaskHelper是个帮助类,但需要考虑重复请求问题,及相同的数据在并发过程中只允许刷新一次,这块还没有完善就不贴代码了。
拦截@Cacheable,并记录执行方法信息
上面提到的缓存获取时,会根据配置的刷新时间来判断是否需要刷新数据,当符合条件时会触发数据刷新。但它需要知道执行什么方法以及更新哪些数据,所以就有了下面这些类。
CacheSupport
刷新缓存接口,可刷新整个容器的缓存也可以只刷新指定键的缓存。
public interface CacheSupport {

	/**
	 * 刷新容器中所有值
	 * @param cacheName
   */
	void refreshCache(String cacheName);

	/**
	 * 按容器以及指定键更新缓存
	 * @param cacheName
	 * @param cacheKey
   */
	void refreshCacheByKey(String cacheName,String cacheKey);

}
InvocationRegistry
执行方法注册接口,能够在适当的地方主动调用方法执行来完成缓存的更新。
public interface InvocationRegistry {

	void registerInvocation(Object invokedBean, Method invokedMethod, Object[] invocationArguments, Set<String> cacheNames);

}
CachedInvocation
执行方法信息类,这个比较简单,就是满足方法执行的所有信息即可。
public final class CachedInvocation {

  private Object key;
  private final Object targetBean;
  private final Method targetMethod;
  private Object[] arguments;

  public CachedInvocation(Object key, Object targetBean, Method targetMethod, Object[] arguments) {
    this.key = key;
    this.targetBean = targetBean;
    this.targetMethod = targetMethod;
    if (arguments != null && arguments.length != 0) {
      this.arguments = Arrays.copyOf(arguments, arguments.length);
    }
  }

}
CacheSupportImpl
这个类主要实现上面定义的缓存刷新接口以及执行方法注册接口
刷新缓存
获取cacheManager用来操作缓存:
@Autowired
private CacheManager cacheManager;
实现缓存刷新接口方法:
@Override
public void refreshCache(String cacheName) {
	this.refreshCacheByKey(cacheName,null);
}

@Override
public void refreshCacheByKey(String cacheName, String cacheKey) {
	if (cacheToInvocationsMap.get(cacheName) != null) {
		for (final CachedInvocation invocation : cacheToInvocationsMap.get(cacheName)) {
			if(!StringUtils.isBlank(cacheKey)&&invocation.getKey().toString().equals(cacheKey)) {
				refreshCache(invocation, cacheName);
			}
		}
	}
}
反射来调用方法:
private Object invoke(CachedInvocation invocation)
			throws ClassNotFoundException, NoSuchMethodException, InvocationTargetException, IllegalAccessException {
	final MethodInvoker invoker = new MethodInvoker();
	invoker.setTargetObject(invocation.getTargetBean());
	invoker.setArguments(invocation.getArguments());
	invoker.setTargetMethod(invocation.getTargetMethod().getName());
	invoker.prepare();
	return invoker.invoke();
}
缓存刷新最后实际执行是这个方法,通过invoke函数获取到最新的数据,然后通过cacheManager来完成缓存的更新操作。
private void refreshCache(CachedInvocation invocation, String cacheName) {

	boolean invocationSuccess;
	Object computed = null;
	try {
		computed = invoke(invocation);
		invocationSuccess = true;
	} catch (Exception ex) {
		invocationSuccess = false;
	}
	if (invocationSuccess) {
		if (cacheToInvocationsMap.get(cacheName) != null) {
			cacheManager.getCache(cacheName).put(invocation.getKey(), computed);
		}
	}
}
执行方法信息注册
定义一个Map用来存储执行方法的信息:
private Map<String, Set<CachedInvocation>> cacheToInvocationsMap;
实现执行方法信息接口,构造执行方法对象然后存储到Map中。
@Override
public void registerInvocation(Object targetBean, Method targetMethod, Object[] arguments, Set<String> annotatedCacheNames) {

	StringBuilder sb = new StringBuilder();
	for (Object obj : arguments) {
		sb.append(obj.toString());
	}

	Object key = sb.toString();

	final CachedInvocation invocation = new CachedInvocation(key, targetBean, targetMethod, arguments);
	for (final String cacheName : annotatedCacheNames) {
		String[] cacheParams=cacheName.split("#");
		String realCacheName = cacheParams[0];
		if(!cacheToInvocationsMap.containsKey(realCacheName)) {
			this.initialize();
		}
		cacheToInvocationsMap.get(realCacheName).add(invocation);
	}
}
CachingAnnotationsAspect
拦截@Cacheable方法信息并完成注册,将使用了缓存的方法的执行信息存储到Map中,key是缓存容器的名称,value是不同参数的方法执行实例,核心方法就是registerInvocation。
@Around("pointcut()")
public Object registerInvocation(ProceedingJoinPoint joinPoint) throws Throwable{

	Method method = this.getSpecificmethod(joinPoint);

	List<Cacheable> annotations=this.getMethodAnnotations(method,Cacheable.class);

	Set<String> cacheSet = new HashSet<String>();
	for (Cacheable cacheables : annotations) {
		cacheSet.addAll(Arrays.asList(cacheables.value()));
	}
	cacheRefreshSupport.registerInvocation(joinPoint.getTarget(), method, joinPoint.getArgs(), cacheSet);
	return joinPoint.proceed();
}
客户端调用
指定5秒后过期,并且在缓存存活3秒后如果请求命中,会在后台启动线程重新从数据库中获取数据来完成缓存的更新。理论上前端不会存在缓存不命中的情况,当然如果正好最后两秒没有请求那也会出现缓存失效的情况。
@Cacheable(value = {"Product#5#2"},key ="#id")
public Product getById(Long id) {
  //...
}
代码
可以从项目中下载。
引用
刷新缓存的思路取自于这个开源项目。https://github.com/yantrashala/spring-cache-self-refresh
以上就是本文的全部内容,希望对大家的学习有所帮助,也希望大家多多支持脚本之家。
相关文章
 在本篇文章里小编给大家整理的是一篇关于Java SPI 机制知识点总结内容,需要的朋友们可以参考下。2020-02-02
 本文主要介绍了Java中lambda表达式实现aop切面功能,文中通过示例代码介绍的非常详细,具有一定的参考价值,感兴趣的小伙伴们可以参考一下2022-02-02
 这篇文章主要为大家介绍了netty对proxy protoco代理协议的支持详解,有需要的朋友可以借鉴参考下,希望能够有所帮助,祝大家多多进步,早日升职加薪2022-07-07
springboot+mybatis-plus实现内置的CRUD使用详解
这篇文章主要介绍了springboot+mybatis-plus实现内置的CRUD使用详解,文中通过示例代码介绍的非常详细,对大家的学习或者工作具有一定的参考学习价值,需要的朋友们下面随着小编来一起学习学习吧2020-12-12
Spring中property-placeholder的使用与解析详解
本篇文章主要介绍了Spring中property-placeholder的使用与解析详解,小编觉得挺不错的,现在分享给大家,也给大家做个参考。一起跟随小编过来看看吧2018-05-05 今天小编就为大家分享一篇关于SpringBoot整合freemarker的讲解,小编觉得内容挺不错的,现在分享给大家,具有很好的参考价值,需要的朋友一起跟随小编来看看吧2019-01-01
 下面小编就为大家带来一篇Java用数组实现循环队列的示例。小编觉得挺不错的,现在就分享给大家,也给大家做个参考。一起跟随小编过来看看吧2017-09-09
 这篇文章主要介绍了Java实现的汉语拼音工具类,结合完整实例形式分析了java基于pinyin4j包实现编码转换的相关操作技巧,需要的朋友可以参考下2017-11-11
 这篇文章主要介绍了formfile文件上传使用示例,代码已加注释,需要的朋友可以参考下2014-03-03
 Thrift最大的优势就是可以实现跨语言RPC调用,尤其在一些大厂,微服务各模块之间使用不同的语言是很常见的,本文就将使用java作为服务端,用python作为客户端,实现不同语言之间的RPC调用,需要的可以参考下2023-10-10


最新评论