
Python imgaug库安装与使用教程(图片加模糊光雨雪雾等特效)
更新时间:2022年11月12日 15:04:59 作者:国服最强貂蝉
imgaug机器学习实验中的图像增强库,特别是卷积神经网络,支持以多种不同方式增强图像、关键点/地标、边界框、热图和分割图,这篇文章主要介绍了Python imgaug库 安装与使用教程(图片加模糊光雨雪雾等特效),需要的朋友可以参考下
简介
imgaug:机器学习实验中的图像增强库,特别是卷积神经网络。支持以多种不同方式增强图像、关键点/地标、边界框、热图和分割图。
安装
在anaconda prompt里进行
pip install imgaug
看了几篇文章,出错的话可以先安装依赖库shapely
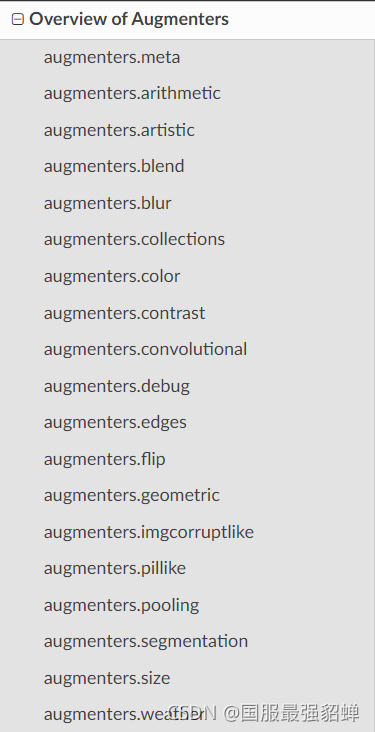
Overview
特效
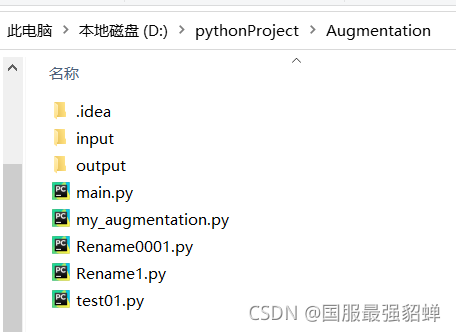
Project 结构
程序
图片放入input

参考的源代码(来源于网络)
main.py
# ###################源代码####################
# !usr/bin/python
# -*- coding: utf-8 -*-
import cv2
from imgaug import augmenters as iaa
import os

# Sometimes(0.5, ...) 所有情况的 50% 中应用给定的增强器
# e.g. Sometimes(0.5, GaussianBlur(0.3)) would blur roughly every second image.
sometimes = lambda aug: iaa.Sometimes(0.5, aug)

# 定义一组变换方法.
seq = iaa.Sequential([

    # 选择0到5种方法做变换
    iaa.SomeOf((0, 5),
               [
                   iaa.Fliplr(0.5),  # 对50%的图片进行水平镜像翻转
                   iaa.Flipud(0.5),  # 对50%的图片进行垂直镜像翻转

                   # superpixel representation 将一些图像转换为它们的超像素表示,每张图像采样 20 到 200 个超像素,但不要用它们的平均值替换所有超像素,只替换其中的一些(p_replace)。
                   sometimes(
                       iaa.Superpixels(
                           p_replace=(0, 1.0),
                           n_segments=(20, 200)
                       )
                   ),

                   # Blur each image with varying strength using
                   # gaussian blur (sigma between 0 and 3.0),
                   # average/uniform blur (kernel size between 2x2 and 7x7)
                   # median blur (kernel size between 3x3 and 11x11).
                   iaa.OneOf([
                       iaa.GaussianBlur((0, 3.0)),
                       iaa.AverageBlur(k=(2, 7)),
                       iaa.MedianBlur(k=(3, 11)),
                   ]),

                   # Sharpen each image, overlay the result with the original
                   # image using an alpha between 0 (no sharpening) and 1
                   # (full sharpening effect).
                   iaa.Sharpen(alpha=(0, 1.0), lightness=(0.75, 1.5)),

                   # Same as sharpen, but for an embossing effect.
                   iaa.Emboss(alpha=(0, 1.0), strength=(0, 2.0)),

                   # Add gaussian noise to some images.
                   # In 50% of these cases, the noise is randomly sampled per
                   # channel and pixel.
                   # In the other 50% of all cases it is sampled once per
                   # pixel (i.e. brightness change).
                   iaa.AdditiveGaussianNoise(
                       loc=0, scale=(0.0, 0.05 * 255)
                   ),

                   # Invert each image's chanell with 5% probability.
                   # This sets each pixel value v to 255-v.
                   iaa.Invert(0.05, per_channel=True),  # invert color channels

                   # Add a value of -10 to 10 to each pixel.
                   iaa.Add((-10, 10), per_channel=0.5),

                   # Add random values between -40 and 40 to images, with each value being sampled per pixel:
                   iaa.AddElementwise((-40, 40)),

                   # Change brightness of images (50-150% of original value).
                   iaa.Multiply((0.5, 1.5)),

                   # Multiply each pixel with a random value between 0.5 and 1.5.
                   iaa.MultiplyElementwise((0.5, 1.5)),

                   # Improve or worsen the contrast of images.
                   iaa.ContrastNormalization((0.5, 2.0)),
                   iaa.imgcorruptlike.Saturate(severity=3),

               ],
               # do all of the above augmentations in random order
               random_order=True
               )

], random_order=True)  # apply augmenters in random order

# 图片文件相关路径
path = './input/'
savedpath = './output/'

imglist = []
filelist = os.listdir(path)

# 遍历要增强的文件夹,把所有的图片保存在imglist中
for item in filelist:
    img = cv2.imread(path + item)
    # print('item is ',item)
    # print('img is ',img)
    # images = load_batch(batch_idx)
    imglist.append(img)
# print('imglist is ' ,imglist)
print('all the picture have been appent to imglist')

# 对文件夹中的图片进行增强操作,循环10次
for count in range(10):
    images_aug = seq.augment_images(imglist)
    for index in range(len(images_aug)):
        filename = str(count) + str(index) + '.jpg'
        # 保存图片
        cv2.imwrite(savedpath + filename, images_aug[index])
        print('image of count%s index%s has been writen' % (count, index))
简易变换 试效果
test01.py
# ##############简易变换#################

# https://imgaug.readthedocs.io/en/latest/source/overview_of_augmenters.html
import cv2
from imgaug import augmenters as iaa
import os

# Sometimes(0.5, ...) applies the given augmenter in 50% of all cases,
# e.g. Sometimes(0.5, GaussianBlur(0.3)) would blur roughly every second image.
# sometimes = lambda aug: iaa.Sometimes(0.5, aug)

# 定义一组变换方法.
seq = iaa.Sequential([
    iaa.MotionBlur(k=15),  # 运动模糊
    # iaa.Clouds(),  # 云雾
    # iaa.imgcorruptlike.Fog(severity=1),  # 多雾/霜
    # iaa.imgcorruptlike.Snow(severity=2),  # 下雨、大雪
    # iaa.Rain(drop_size=(0.10, 0.20), speed=(0.2, 0.3)),  # 雨
    # iaa.Rain(speed=(0.3, 0.5)),  # 雨
    # iaa.Snowflakes(flake_size=(0.6, 0.7), speed=(0.02, 0.03)), # 雪点
    # iaa.imgcorruptlike.Spatter(severity=2),  # 溅 123水滴、45泥
    # iaa.contrast.LinearContrast((0.5, 2.0), per_channel=0.5),# 对比度变为原来的一半或者二倍
    # iaa.imgcorruptlike.Brightness(severity=2),  # 亮度增加
    # iaa.imgcorruptlike.Saturate(severity=3),  # 色彩饱和度
    # iaa.FastSnowyLandscape(lightness_threshold=(100, 255),lightness_multiplier=(1.5, 2.0)), # 雪地   亮度阈值是从 uniform(100, 255)(每张图像)和来自 uniform(1.5, 2.0)(每张图像)的乘数采样的。
    # iaa.Cartoon(blur_ksize=3, segmentation_size=1.0, saturation=2.0, edge_prevalence=1.0), # 卡通

])

# 图片文件相关路径
path = './input/'
savedpath = './output_show/'

imglist = []
filelist = os.listdir(path)

# 遍历要增强的文件夹,把所有的图片保存在imglist中
for item in filelist:
    img = cv2.imread(path + item)
    # print('item is ',item)
    # print('img is ',img)
    # images = load_batch(batch_idx)
    imglist.append(img)
# print('imglist is ' ,imglist)
print('all the picture have been appent to imglist')

# 对文件夹中的图片进行增强操作,循环1次
for count in range(1):
    images_aug = seq.augment_images(imglist)
    for index in range(len(images_aug)):
        # filename = str(count) + str(index) + '.jpg'
        # 保存图片
        filename = str(filelist[index])
        cv2.imwrite(savedpath + filename, images_aug[index])
        print('image of count%s index%s has been writen' % (count, index))
使用 模糊光雨雪雾
运动模糊+雨雪雾天气 2-3种
&
对比度 亮度 饱和度 选其一
my_augmentation.py
import cv2
from imgaug import augmenters as iaa
import os

# sometimes = lambda aug: iaa.Sometimes(0.5, aug)   # 所有情况的 50% 中应用给定的增强器

seq = iaa.Sequential([
    # 选择2到3种方法做变换
    iaa.SomeOf((2, 3),
               [
                   iaa.imgcorruptlike.MotionBlur(severity=(1, 2)),  # 运动模糊
                   # iaa.Clouds(),  # 云雾
                   iaa.imgcorruptlike.Fog(severity=1),  # 多雾/霜
                   # iaa.imgcorruptlike.Snow(severity=2),  # 下雨、大雪
                   iaa.Rain(drop_size=(0.10, 0.15), speed=(0.1, 0.2)),  # 雨
                   iaa.Snowflakes(flake_size=(0.1, 0.4), speed=(0.01, 0.03)), # 雪点
                   # iaa.FastSnowyLandscape(lightness_threshold=(100, 255),lightness_multiplier=(1.5, 2.0)), # 雪地   亮度阈值是从 uniform(100, 255)(每张图像)和来自 uniform(1.5, 2.0)(每张图像)的乘数采样的。 这似乎产生了良好而多样的结果。
                   # iaa.imgcorruptlike.Spatter(severity=5),  # 溅 123水滴、45泥

                   # 对比度 亮度 饱和度 选其一
                   iaa.SomeOf((1, 1),
                       [
                           iaa.imgaug.augmenters.contrast.LinearContrast((0.5, 2.0), per_channel=0.5),  # 对比度变为原来的一半或者二倍
                           iaa.imgcorruptlike.Brightness(severity=(1, 2)),  # 亮度增加
                           iaa.imgcorruptlike.Saturate(severity=(1, 3)),  # 色彩饱和度
                       ]
                   )
               ],
               # 随机顺序运行augmentations
               random_order=True
               )
], random_order=True)  # 随机运行augmenters数量

# 图片文件相关路径
path = './input/'
savedpath = './output/'

imglist = []
filelist = os.listdir(path)

# 遍历要增强的文件夹,把所有的图片保存在imglist中
for item in filelist:
    img = cv2.imread(path + item)
    # print('item is ',item)
    # print('img is ',img)
    # images = load_batch(batch_idx)
    imglist.append(img)
# print('imglist is ' ,imglist)
print('all the picture have been appent to imglist')


for count in range(1):
    images_aug = seq.augment_images(imglist)
    for index in range(len(images_aug)):
        # 保存图片 文件名和源文件相同
        filename = str(filelist[index])
        cv2.imwrite(savedpath + filename, images_aug[index])
        print('image of count%s index%s has been writen' % (count, index))
else
对input里的原图像重命名:00001.jpg或者1.jpg
重命名00001.jpg
Rename0001.py
# ###################文件重命名#################

import os
import re
import sys

path = r"./input"
filelist = os.listdir(path)
filetype = '.jpg'
for file in filelist:
    print(file)
for file in filelist:
    Olddir = os.path.join(path, file)
    print(Olddir)
    if os.path.isdir(Olddir):
        continue

    # os.path.splitext("path"):分离文件名与扩展名
    filename = os.path.splitext(file)[0]
    filetype = os.path.splitext(file)[1]

    # zfill() 方法返回指定长度的字符串,原字符串右对齐,前面填充0
    Newdir = os.path.join(path, filename.zfill(5) + filetype)  # 数字5是定义为5位数,可随意修改需要的
    os.rename(Olddir, Newdir)
重命名1.jpg
Rename1.py
# ###################文件重命名################
import os
class BatchRename():

    def __init__(self):
        self.path = './input/'  # 图片的路径

    def rename(self):
        filelist = os.listdir(self.path)
        filelist.sort()
        total_num = len(filelist)  # 获取文件中有多少图片
        i = 0  # 文件命名从哪里开始(即命名从哪里开始)
        for item in filelist:
            if item.endswith('.png'):
                src = os.path.join(self.path, item)
                dst = os.path.join(os.path.abspath(self.path), str(i) + '.png')

                try:
                    os.rename(src, dst)
                    print('converting %s to %s ...' % (src, dst))
                    i = i + 1
                except Exception as e:
                    print(e)
                    print('rename dir fail\r\n')

        print('total %d to rename & converted %d jpgs' % (total_num, i))


if __name__ == '__main__':
    demo = BatchRename()  # 创建对象
    demo.rename()  # 调用对象的方法
效果图
input示例 00001.jpg

output示例 00001.jpg

input示例 00005.jpg

output示例 00005.jpg

到此这篇关于Python imgaug库 安装与使用教程(图片加模糊光雨雪雾等特效)的文章就介绍到这了,更多相关Python imgaug库安装使用内容请搜索脚本之家以前的文章或继续浏览下面的相关文章希望大家以后多多支持脚本之家!
相关文章
 这篇文章主要介绍了Python可视化神器pyecharts绘制饼状图,饼图是用圆形及圆内扇形的角度来表示数值大小的图形,它主要用于表示一个样本中各组成部分的数据占全部数据的比例2022-07-07
keras获得model中某一层的某一个Tensor的输出维度教程
今天小编就为大家分享一篇keras获得model中某一层的某一个Tensor的输出维度教程,具有很好的参考价值,希望对大家有所帮助。一起跟随小编过来看看吧2020-01-01 这篇文章主要介绍了python解释器spython使用及原理解析,文中通过示例代码介绍的非常详细,对大家的学习或者工作具有一定的参考学习价值,需要的朋友可以参考下2019-08-08
![通过实例简单了解Python sys.argv[]使用方法](//img.jbzj.com/images/xgimg/bcimg3.png) 这篇文章主要介绍了通过实例简单了解Python sys.argv[]使用方法,文中通过示例代码介绍的非常详细,对大家的学习或者工作具有一定的参考学习价值,需要的朋友可以参考下2020-08-08
这篇文章主要介绍了通过实例简单了解Python sys.argv[]使用方法,文中通过示例代码介绍的非常详细,对大家的学习或者工作具有一定的参考学习价值,需要的朋友可以参考下2020-08-08 这篇文章主要介绍了pytorch中backward()方法如何自动求梯度问题,具有很好的参考价值,希望对大家有所帮助。如有错误或未考虑完全的地方,望不吝赐教2023-02-02
 这篇文章主要介绍了python中使用pyhook实现键盘监控的例子,包含pyhook的下载地址和手册地址及一个Windows下的监控实例,需要的朋友可以参考下2014-07-07
python数据库开发之MongoDB安装及Python3操作MongoDB数据库详细方法与实例
这篇文章主要介绍了python数据库开发之MongoDB安装及Python3操作MongoDB数据库详细方法与实例,需要的朋友可以参考下2020-03-03 这篇文章主要为大家详细介绍了python反转单链表算法题,文中示例代码介绍的非常详细,具有一定的参考价值,感兴趣的小伙伴们可以参考一下2022-05-05
 可以使用简单的方法匹配某个目录下的所有子目录或文件,用法也很简单。2008-12-12
 心情不好的时候,来用Python和Turtle库画棵樱花树送给自己吧,自己也要好好爱自己才对!文中的示例代码讲解详细,感兴趣的小伙伴可以动手试一试2022-02-02


![通过实例简单了解Python sys.argv[]使用方法](http://img.jbzj.com/images/xgimg/bcimg3.png)


最新评论