
IOS实现点击滑动抽屉效果
更新时间:2016年02月27日 10:09:32 投稿:lijiao
这篇文章主要为大家详细介绍了IOS实现点击滑动抽屉效果的相关资料,文中示例代码介绍的非常详细,具有一定的参考价值,感兴趣的小伙伴们可以参考一下
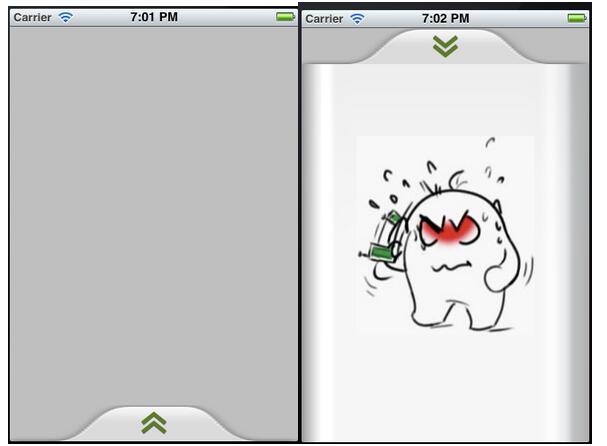
最近,看到好多Android上的抽屉效果,也忍不住想要自己写一个。在Android里面可以用SlidingDrawer,很方便的实现。IOS上面就只有自己写了。其实原理很简单就是 UIView 的移动,和一些手势的操作。
效果图:
//
// DrawerView.h
// DrawerDemo
//
// Created by Zhouhaifeng on 12-3-27.
// Copyright (c) 2012年 CJLU. All rights reserved.
//

#import <UIKit/UIKit.h>

typedef enum
{
 DrawerViewStateUp = 0,
 DrawerViewStateDown
}DrawerViewState;

@interface DrawerView : UIView<UIGestureRecognizerDelegate>
{
 UIImageView *arrow;   //向上拖拽时显示的图片

 CGPoint upPoint;   //抽屉拉出时的中心点
 CGPoint downPoint;   //抽屉收缩时的中心点

 UIView *parentView;   //抽屉所在的view
 UIView *contentView;  //抽屉里面显示的内容

 DrawerViewState drawState; //当前抽屉状态
}

- (id)initWithView:(UIView *) contentview parentView :(UIView *) parentview;
- (void)handlePan:(UIPanGestureRecognizer *)recognizer;
- (void)handleTap:(UITapGestureRecognizer *)recognizer;
- (void)transformArrow:(DrawerViewState) state;

@property (nonatomic,retain) UIView *parentView;
@property (nonatomic,retain) UIView *contentView;
@property (nonatomic,retain) UIImageView *arrow;
@property (nonatomic) DrawerViewState drawState;

@end
//
// DrawerView.m
// DrawerDemo
//
// Created by Zhouhaifeng on 12-3-27.
// Copyright (c) 2012年 CJLU. All rights reserved.
//

#import "DrawerView.h"

@implementation DrawerView
@synthesize contentView,parentView,drawState;
@synthesize arrow;

- (id)initWithView:(UIView *) contentview parentView :(UIView *) parentview;
{
 self = [super initWithFrame:CGRectMake(0,0,contentview.frame.size.width, contentview.frame.size.height+40)];
 if (self) {
  // Initialization code
  contentView = contentview;
  parentView = parentview;

  //一定要开启
  [parentView setUserInteractionEnabled:YES];

  //嵌入内容区域的背景
  UIImage *drawer_bg = [UIImage imageNamed:@"drawer_content.png"];
  UIImageView *view_bg = [[UIImageView alloc]initWithImage:drawer_bg];
  [view_bg setFrame:CGRectMake(0,40,contentview.frame.size.width, contentview.bounds.size.height+40)];
  [self addSubview:view_bg];

  //头部拉拽的区域背景
  UIImage *drawer_handle = [UIImage imageNamed:@"drawer_handlepng.png"];
  UIImageView *view_handle = [[UIImageView alloc]initWithImage:drawer_handle];
  [view_handle setFrame:CGRectMake(0,0,contentview.frame.size.width,40)];
  [self addSubview:view_handle];

  //箭头的图片
  UIImage *drawer_arrow = [UIImage imageNamed:@"drawer_arrow.png"];
  arrow = [[UIImageView alloc]initWithImage:drawer_arrow];
  [arrow setFrame:CGRectMake(0,0,28,28)];
  arrow.center = CGPointMake(contentview.frame.size.width/2, 20);
  [self addSubview:arrow];

  //嵌入内容的UIView
  [contentView setFrame:CGRectMake(0,40,contentview.frame.size.width, contentview.bounds.size.height+40)];
  [self addSubview:contentview];

  //移动的手势
  UIPanGestureRecognizer *panRcognize=[[UIPanGestureRecognizer alloc] initWithTarget:self action:@selector(handlePan:)];
  panRcognize.delegate=self;
  [panRcognize setEnabled:YES];
  [panRcognize delaysTouchesEnded];
  [panRcognize cancelsTouchesInView];

  [self addGestureRecognizer:panRcognize];

  //单击的手势
  UITapGestureRecognizer *tapRecognize = [[UITapGestureRecognizer alloc]initWithTarget:self action:@selector(handleTap:)];
  tapRecognize.numberOfTapsRequired = 1;
  tapRecognize.delegate = self;
  [tapRecognize setEnabled :YES];
  [tapRecognize delaysTouchesBegan];
  [tapRecognize cancelsTouchesInView];

  [self addGestureRecognizer:tapRecognize];

  //设置两个位置的坐标
  downPoint = CGPointMake(parentview.frame.size.width/2, parentview.frame.size.height+contentview.frame.size.height/2-40);
  upPoint = CGPointMake(parentview.frame.size.width/2, parentview.frame.size.height-contentview.frame.size.height/2-40);
  self.center = downPoint;

  //设置起始状态
  drawState = DrawerViewStateDown;
 }
 return self;
}


#pragma UIGestureRecognizer Handles
/*
 * 移动图片处理的函数
 * @recognizer 移动手势
 */
- (void)handlePan:(UIPanGestureRecognizer *)recognizer {


 CGPoint translation = [recognizer translationInView:parentView];
 if (self.center.y + translation.y < upPoint.y) {
  self.center = upPoint;
 }else if(self.center.y + translation.y > downPoint.y)
 {
  self.center = downPoint;
 }else{
  self.center = CGPointMake(self.center.x,self.center.y + translation.y);
 }
 [recognizer setTranslation:CGPointMake(0, 0) inView:parentView];

 if (recognizer.state == UIGestureRecognizerStateEnded) {
  [UIView animateWithDuration:0.75 delay:0.15 options:UIViewAnimationOptionCurveEaseOut animations:^{
    if (self.center.y < downPoint.y*4/5) {
     self.center = upPoint;
     [self transformArrow:DrawerViewStateUp];
    }else
    {
     self.center = downPoint;
     [self transformArrow:DrawerViewStateDown];
    }

  } completion:nil];

 }
}

/*
 * handleTap 触摸函数
 * @recognizer UITapGestureRecognizer 触摸识别器
 */
-(void) handleTap:(UITapGestureRecognizer *)recognizer
{
  [UIView animateWithDuration:0.75 delay:0.15 options:UIViewAnimationOptionTransitionCurlUp animations:^{
   if (drawState == DrawerViewStateDown) {
    self.center = upPoint;
    [self transformArrow:DrawerViewStateUp];
   }else
   {
    self.center = downPoint;
    [self transformArrow:DrawerViewStateDown];
   }
  } completion:nil];

}

/*
 * transformArrow 改变箭头方向
 * state DrawerViewState 抽屉当前状态
 */
-(void)transformArrow:(DrawerViewState) state
{
  //NSLog(@"DRAWERSTATE :%d STATE:%d",drawState,state);
  [UIView animateWithDuration:0.3 delay:0.35 options:UIViewAnimationOptionCurveEaseOut animations:^{
   if (state == DrawerViewStateUp){
     arrow.transform = CGAffineTransformMakeRotation(M_PI);
    }else
    {
      arrow.transform = CGAffineTransformMakeRotation(0);
    }
  } completion:^(BOOL finish){
    drawState = state;
  }];


}

@end
以上就是本文的全部内容,希望对大家的学习有所帮助。
相关文章

浅谈Unity中IOS Build Settings选项的作用
下面小编就为大家分享一篇浅谈Unity中IOS Build Settings选项的作用,具有很好的参考价值,希望对大家有所帮助。一起跟随小编过来看看吧2018-01-01
在iOS应用中使用UIWebView创建简单的网页浏览器界面
这篇文章主要介绍了在iOS应用中使用UIWebView创建简单的网页浏览器界面的方法,包括动态获取UIWebView高度的实现,需要的朋友可以参考下2016-01-01 下面小编就为大家带来一篇快速解决iOS10不能跳转系统WiFi列表的问题。小编觉得挺不错的,现在就分享给大家,也给大家做个参考。一起跟随小编过来看看吧2017-04-04
 作为苹果iOS9的重要特性之一,Spotlight搜索如今重新回到主界面最左侧(同样支持主界面下滑呼出),通过API的支持,还带来了全新的Universal Search通用搜索功能,除了网络以及系统本身内容之外,还能直接搜索第三方应用内的相关内容。下面我们就来详细研究下Spotlight2015-11-11
 这篇文章主要给大家介绍了关于iOS如何获取最顶层ViewController的相关资料,文中通过示例代码介绍的非常详细,对大家的学习或者工作具有一定的参考学习价值,需要的朋友们下面随着小编来一起学习学习吧2020-09-09
iOS10语音识别框架SpeechFramework应用详解
在iOS10系统了,apple开放了与语音识别相关的接口,开发者可以将其应用到自己的App中,实现用户通过语音进行功能操作。 这篇文章主要介绍了iOS10语音识别框架SpeechFramework应用,需要的朋友可以参考下2016-09-09 这篇文章主要介绍了IOS 常见的循环引用总结的相关资料,循环引用,指的是多个对象相互引用时,使得引用形成一个环形,导致外部无法真正是否掉这块环形内存。其实有点类似死锁,需要的朋友可以参考下2017-03-03
iOS开发之topLayoutGuide和bottomLayoutGuide的使用小技巧分享
这篇文章主要给大家介绍了关于iOS开发之topLayoutGuide和bottomLayoutGuide使用的一些小技巧,需要的朋友可以参考下2017-11-11 这篇文章给大家介绍了ios中的ipa重签名知识以及错误原因及解决俄方案,需要的朋友参考下吧2018-01-01
解决ios h5 input输入框被输入法弹出一块区域的问题
今天小编就为大家分享一篇解决ios h5 input输入框被输入法弹出一块区域的问题,具有很好的参考价值,希望对大家有所帮助。一起跟随小编过来看看吧2018-08-08


最新评论