
react基于Ant Desgin Upload实现导入导出
更新时间:2024年01月07日 15:55:37 作者:夏林夕
本文主要介绍了react基于Ant Desgin Upload实现导入导出,文中通过示例代码介绍的非常详细,对大家的学习或者工作具有一定的参考学习价值,需要的朋友们下面随着小编来一起学习学习吧
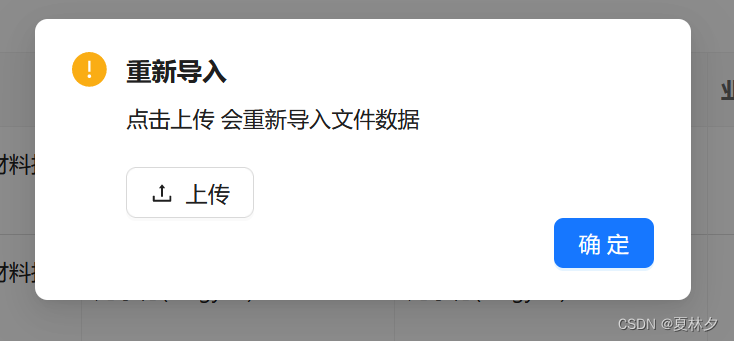
效果图:
导入:
导出:

导入代码:
    const propsConfig = {
    name: 'file',
    action: importDataExcelApi,   //后端接口
    headers: {
        authorization: 'authorization-text',
        loginUserId: sessionStorage.getItem('userLogin')
            ? JSON.parse(sessionStorage.getItem('userLogin')).userId : null
    },
    onChange(info) {
        if (info.file.status !== 'uploading') {
            console.log("++++++", info.file, "-------------" + info.fileList);
            console.log(info.file.response.success);
        }
        if (info.file.status === 'done') {
            message.success(`${info.file.name} 文件上传成功!`).then(r => {
            });
            importDataRef.current(); // 调用 importData 方法
            console.warn(sessionStorage.getItem('userLogin'))
        } else if (info.file.status === 'error') {
            // 不再触发 importDataExcelApi,因为文件格式有误
            message.error('文件格式有误,导入失败!').then(r => {
            });
        }
    },
};


const isUpload = () => {
        Modal.warn({
            title: '重新导入',
            content: (
                <div style={{width: '500px'}}>
                    <div style={{marginBottom: '20px'}}>
                        点击上传 会重新导入文件数据
                    </div>
                    <Upload
                        {...propsConfig}
                        direction="vertical" maxCount={1}
                        showUploadList={false}
                    >
                        <Button
                            onClick={againImport}
                            icon={<UploadOutlined/>}>
                            上传
                        </Button>
                    </Upload>
                </div>
            ),
            onOk() {
                // 在弹窗点击确认后执行的操作

            },
            okText: '确定', // 修改确定按钮的文字
            // style: {width: '1000px', height: '500px'}, // 设置宽度和高度
        });
    };


           <Button type="primary" onClick={isUpload} icon={<UploadOutlined/>}
                    >
                        重新导入
                    </Button>
导出代码
const config2 = {
    title: '导出配置人员信息',
    content: (
        <>
            <ReachableContext.Consumer>{() => `是否要导出配置人员信息`}</ReachableContext.Consumer>
        </>
    ),
}

    const exportData = () => {
        exportDataExcel(screeningDate).then((res) => {
            if (res.data === 'false') {
                message.error("导出失败").then(r => {})
                return;
            }
            console.log('Export response:', res);
            //设置下载文件类型为xlsx 不同的类型type也不一样,创建URL对象
            let url = window.URL.createObjectURL(new Blob([res],
                {type: 'application/vnd.openxmlformats-officedocument.spreadsheetml.sheet'}))
            // 创建A标签
            let link = document.createElement('a')
            link.style.display = 'none'
            link.href = url
            // 设置的下载文件文件名
            const fileName = "配置人员信息";
            // 触发点击方法
            link.setAttribute('download', fileName)
            document.body.appendChild(link)
            link.click()
            message.success("导出成功").then(r => {
            });

        });
    }


  <Button type="primary" style={{marginBottom: '30px'}}
                                        onClick={async () => {
                                            const confirmed = await modal.confirm(config2);
                                            if (confirmed) {
                                                // 调用另一个方法
                                                exportData();
                                            }
                                        }}
                                >
                                    导出
                                </Button>
到此这篇关于react基于Ant Desgin Upload实现导入导出的文章就介绍到这了,更多相关react 导入导出内容请搜索脚本之家以前的文章或继续浏览下面的相关文章希望大家以后多多支持脚本之家!
相关文章
 这篇文章主要介绍了React Native Modal 的封装与使用,本文通过实例代码图文相结合给大家介绍的非常详细,对大家的学习或工作具有一定的参考借鉴价值,需要的朋友可以参考下2022-09-09
react中关于函数调用()与bind this的原因及分析
这篇文章主要介绍了react中关于函数调用()与bind this的原因及分析,具有很好的参考价值,希望对大家有所帮助。如有错误或未考虑完全的地方,望不吝赐教2023-02-02
React Refs 的使用forwardRef 源码示例解析
这篇文章主要为大家介绍了React 之 Refs 的使用和 forwardRef 的源码解读,有需要的朋友可以借鉴参考下,希望能够有所帮助,祝大家多多进步,早日升职加薪2022-11-11
react-router v6实现权限管理+自动替换页面标题的案例
这篇文章主要介绍了react-router v6实现权限管理+自动替换页面标题,这次项目是有三种权限,分别是用户,商家以及管理员,这次写的权限管理是高级权限能访问低级权限的所有页面,但是低级权限不能访问高级权限的页面,需要的朋友可以参考下2023-05-05 这篇文章主要为大家介绍了react native图片解析流程详解,有需要的朋友可以借鉴参考下,希望能够有所帮助,祝大家多多进步,早日升职加薪2023-01-01
 这篇文章主要介绍了React添加或移除类的操作方法,本文通过示例代码给大家介绍的非常详细,对大家的学习或工作具有一定的参考借鉴价值,需要的朋友可以参考下2023-05-05
 这篇文章主要介绍了简易的redux createStore手写实现示例,有需要的朋友可以借鉴参考下,希望能够有所帮助,祝大家多多进步,早日升职加薪2022-10-10
React Native使用百度Echarts显示图表的示例代码
本篇文章主要介绍了React Native使用百度Echarts显示图表的示例代码,小编觉得挺不错的,现在分享给大家,也给大家做个参考。一起跟随小编过来看看吧2017-11-11 这篇文章主要介绍了详解操作虚拟dom模拟react视图渲染,小编觉得挺不错的,现在分享给大家,也给大家做个参考。一起跟随小编过来看看吧2018-07-07
 本文主要介绍了antd table动态修改表格高度的实现,文中通过示例代码介绍的非常详细,对大家的学习或者工作具有一定的参考学习价值,需要的朋友们下面随着小编来一起学习学习吧2023-07-07


最新评论