
SpringBoot中的自定义Starter解读
1、说明
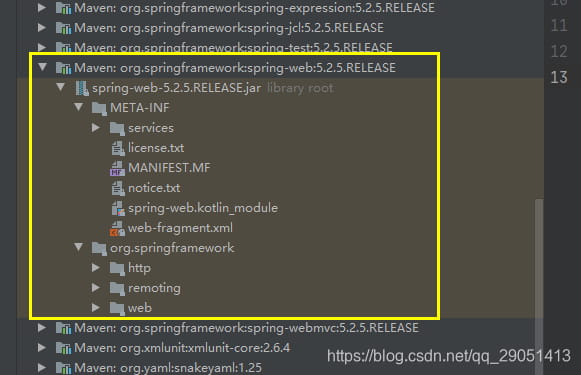
启动器模块其实是一个空的jar文件,里面没有什么类、接口,仅仅是提供辅助性依赖管理,这些依赖可能用于自动装配或者其他类库;
官方的命名方式是:spring-boot-starter-xxx,例如:spring-boot-starter-web。
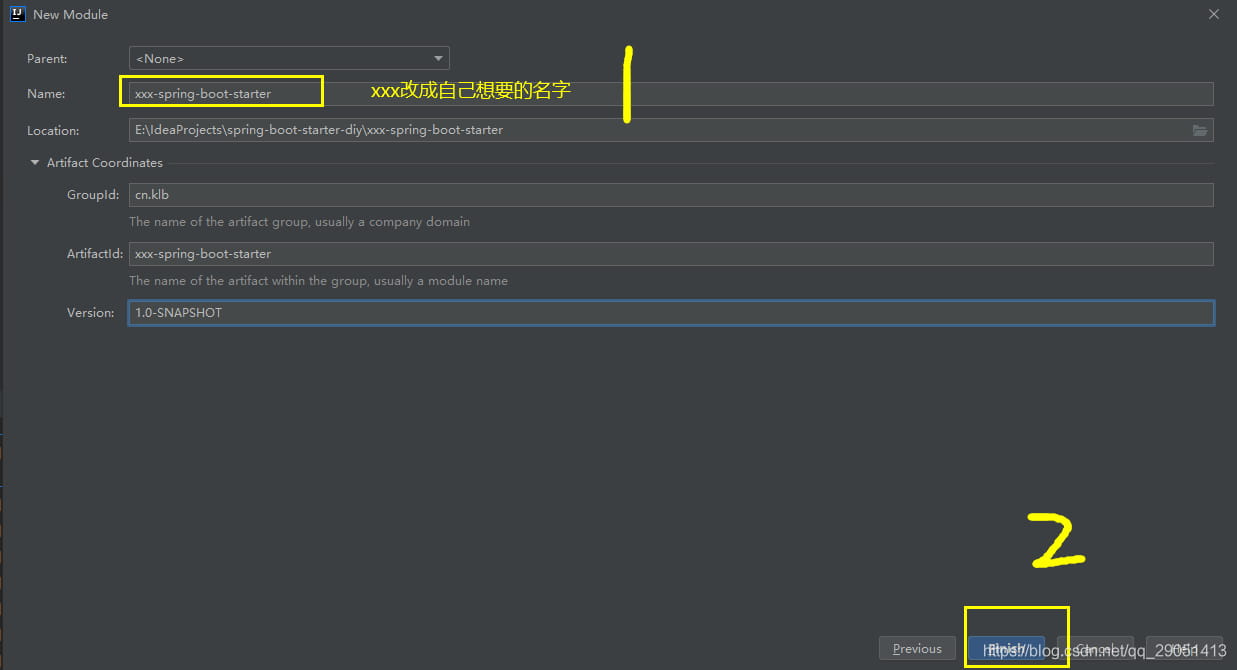
官方提倡的自定义starter命名方式要和他们区分开,官方的xxx是在最后面,提议第三方自定义的starter的xxx放在最前面
即:xxx-spring-boot-starter,例如:mybatis-spring-boot-starter。
2、自定义starter
2.1 工程构建
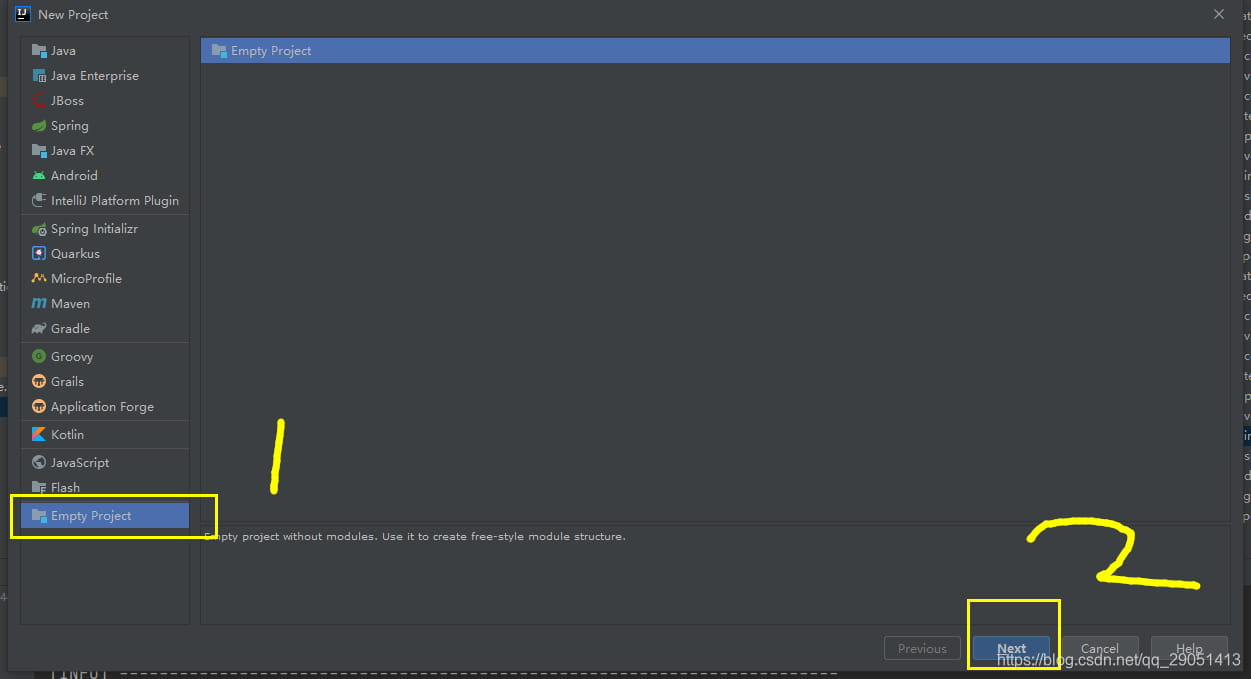
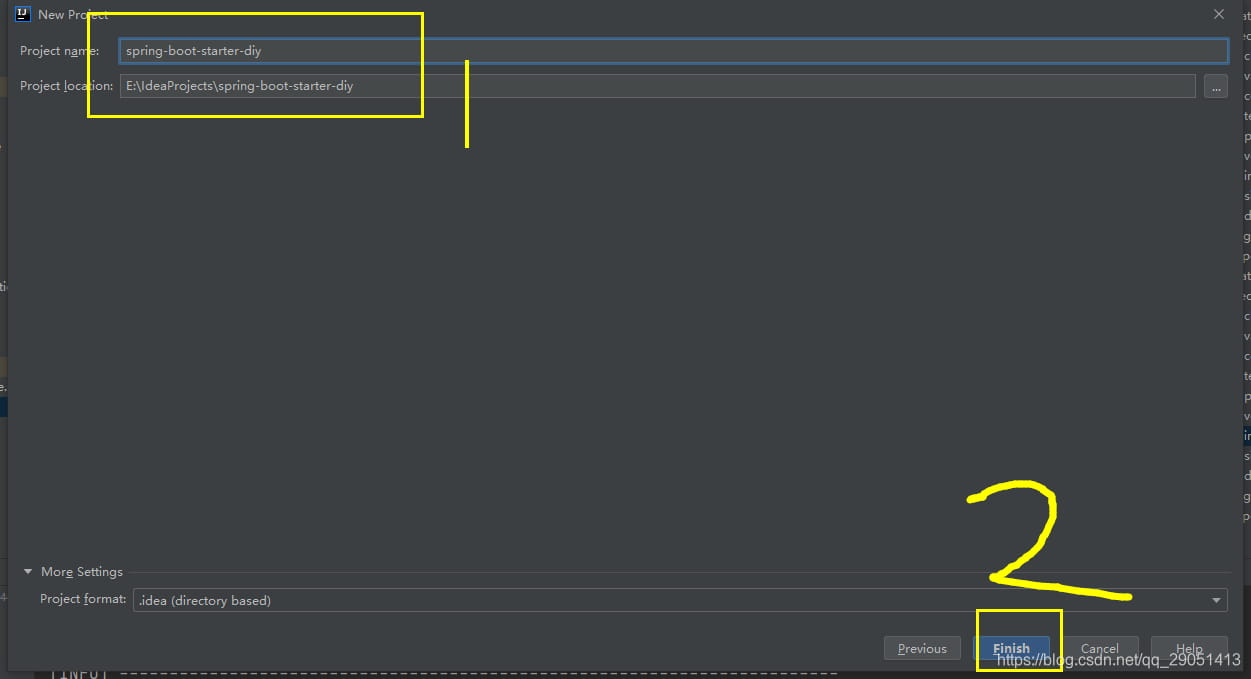
IDEA新建普通java空项目:
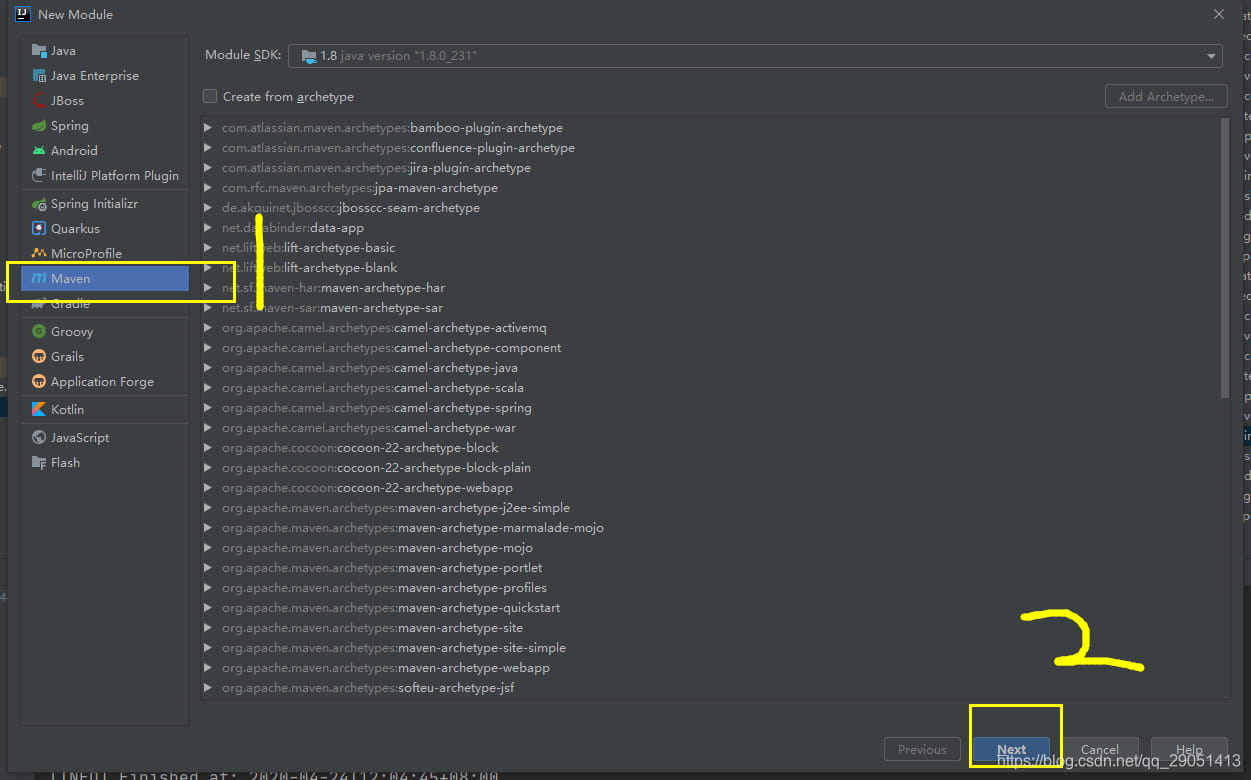
1、新建一个普通maven模块:
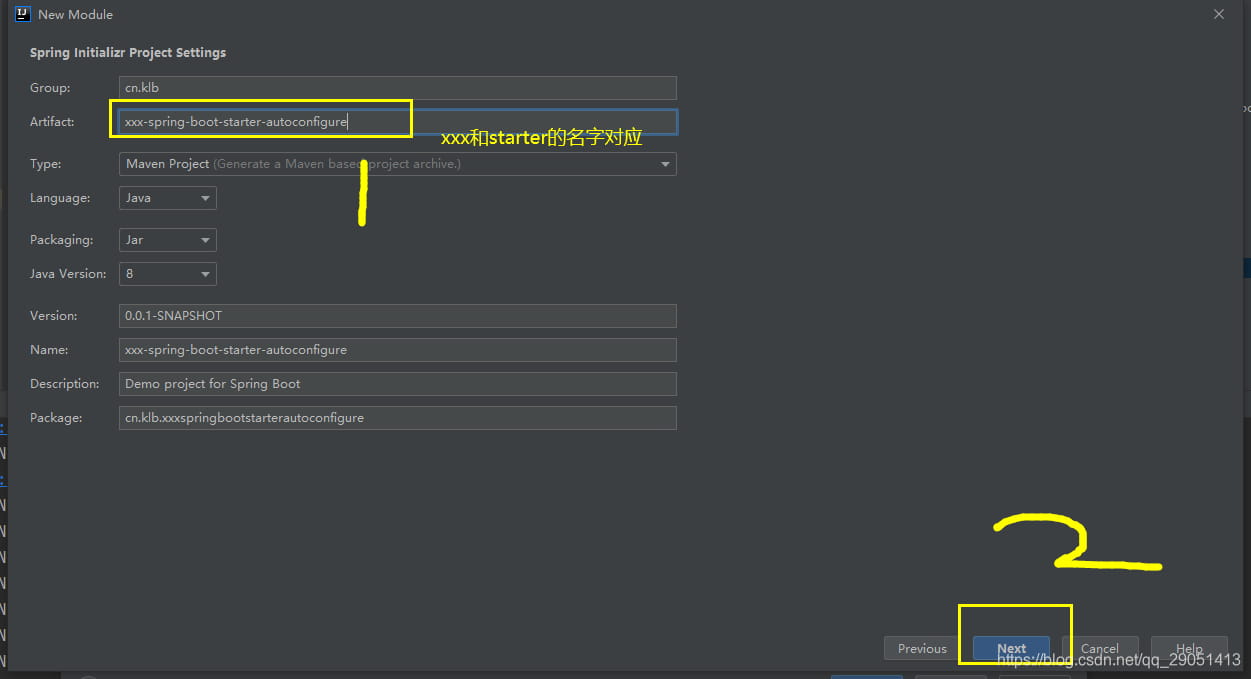
2、新建一个SpringBoot模块:
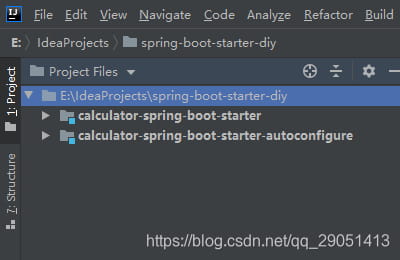
构建好了后,结构如下:
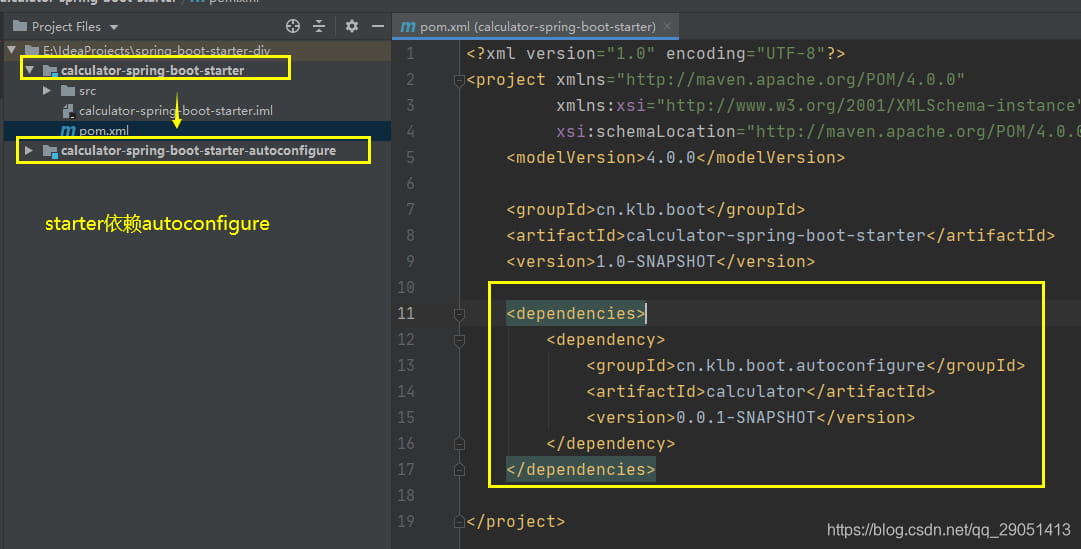
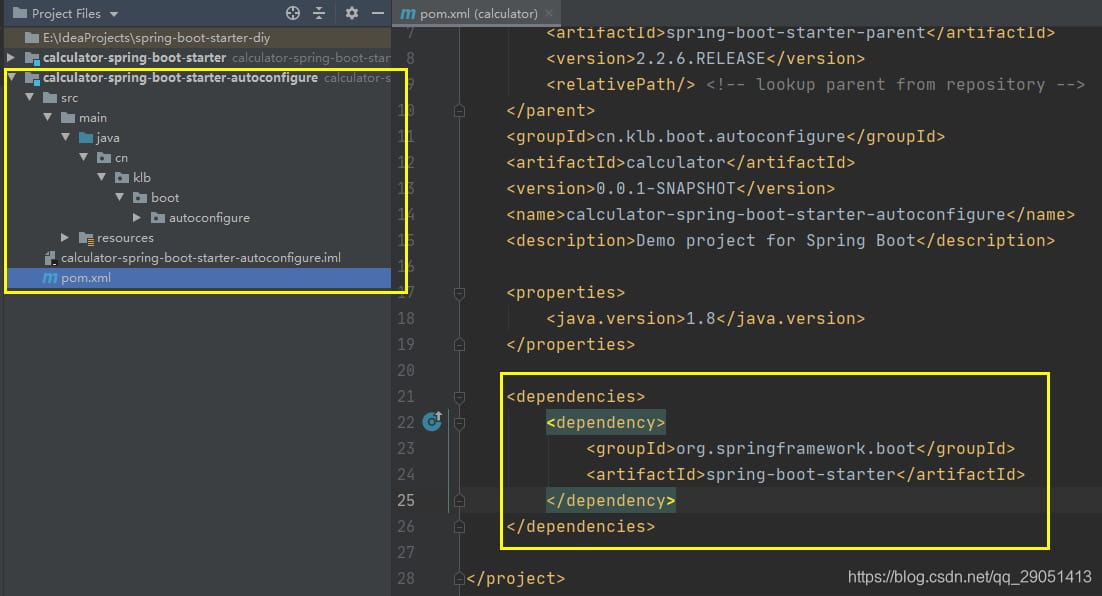
2.2 starter模块导入autoconfigure模块的依赖
2.3 清理autoconfigure模块
新建的空SpringBoot模块删除其他无关的文件和文件夹,同时pom.xml只留下sarter:
2.4 编辑autoconfigure模块
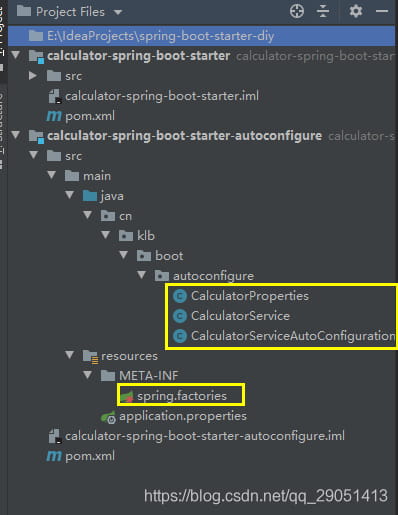
autoconfigure模块总共要写三个文件:service、properties和antoconfiguration。这三个分别的作用是:提供服务、配置类(定义服务相关的属性配置)和自动配置功能。
2.4.1 编写服务
package cn.klb.boot.autoconfigure;
/**
 * @Author: Konglibin
 * @Description:
 * @Date: Create in 2020/4/24 11:21
 * @Modified By:
 */
public class CalculatorService {
    CalculatorProperties properties;
    public CalculatorProperties getProperties() {
        return properties;
    }
    public void setProperties(CalculatorProperties properties) {
        this.properties = properties;
    }
    public String getAreaOfCircle(Double radius) {
        Double area = properties.getPi() * radius * radius;
        return Double.toString(area);
    }
}
2.4.2 编写配置类
package cn.klb.boot.autoconfigure;
import org.springframework.boot.context.properties.ConfigurationProperties;
/**
 * @Author: Konglibin
 * @Description:
 * @Date: Create in 2020/4/24 11:21
 * @Modified By:
 */
@ConfigurationProperties(prefix = "calculator.constant")
public class CalculatorProperties {
    private Double pi;
    private Double e;
    public Double getPi() {
        return pi;
    }
    public void setPi(Double pi) {
        this.pi = pi;
    }
    public Double getE() {
        return e;
    }
    public void setE(Double e) {
        this.e = e;
    }
}
2.4.3 编写自动配置并注入bean
package cn.klb.boot.autoconfigure;
import org.springframework.beans.factory.annotation.Autowired;
import org.springframework.boot.autoconfigure.condition.ConditionalOnWebApplication;
import org.springframework.boot.context.properties.EnableConfigurationProperties;
import org.springframework.context.annotation.Bean;
import org.springframework.context.annotation.Configuration;
/**
 * @Author: Konglibin
 * @Description:
 * @Date: Create in 2020/4/24 11:22
 * @Modified By:
 */
@Configuration
@ConditionalOnWebApplication
@EnableConfigurationProperties(CalculatorProperties.class)
public class CalculatorServiceAutoConfiguration {
    @Autowired
    CalculatorProperties properties;
    @Bean
    public CalculatorService getCalculatorService(){
        CalculatorService service = new CalculatorService();
        service.setProperties(properties);
        return service;
    }
}
2.4.4 编写自己的spring.factories
# Auto Configure
org.springframework.boot.autoconfigure.EnableAutoConfiguration=\
cn.klb.boot.autoconfigure.CalculatorServiceAutoConfiguration
2.5 统一打包安装
大部分工作都是在编辑autoconfigure模块,编辑好之后工程如下:
执行maven的install命令(注意先安装autoconfigure再安装starter,否则会找不到包)。
3、测试
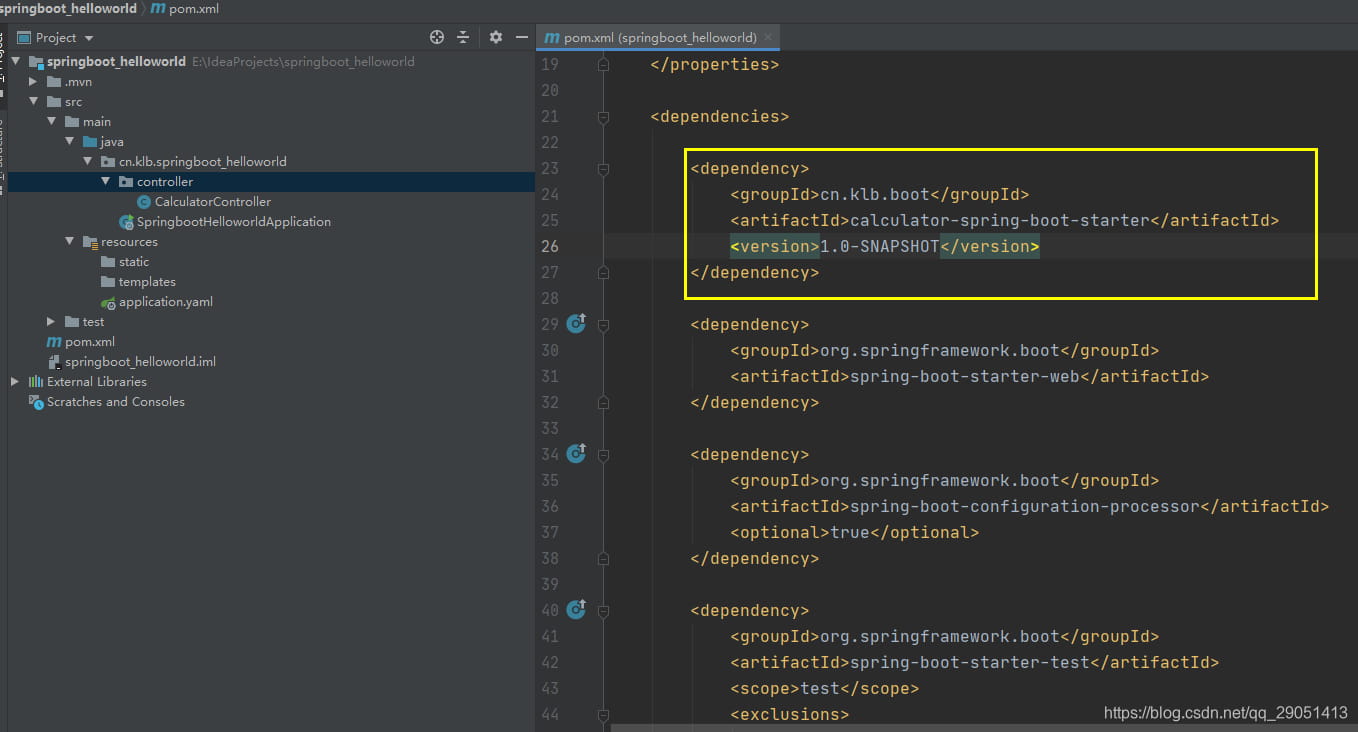
新建一个SpringBoot工程,并导入我们自己写的启动器:
编写一个控制器:
package cn.klb.springboot_helloworld.controller;
import cn.klb.boot.autoconfigure.CalculatorService;
import org.springframework.beans.factory.annotation.Autowired;
import org.springframework.web.bind.annotation.RequestMapping;
import org.springframework.web.bind.annotation.RestController;
/**
 * @Author: Konglibin
 * @Description:
 * @Date: Create in 2020/4/24 11:44
 * @Modified By:
 */
@RestController
public class CalculatorController {
    @Autowired
    CalculatorService service;
    @RequestMapping("/cal")
    public String calculateArea(){
        return service.getAreaOfCircle(2.0);
    }
}
application.yaml配置文件配置属性:
calculator:
  constant:
    pi: 3.14
    e: 2.0
启动后浏览器输入自己定义的地址,得到结果如下:
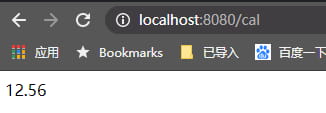
结果成功!
到此这篇关于SpringBoot中的自定义Starter解读的文章就介绍到这了,更多相关自定义Starter内容请搜索脚本之家以前的文章或继续浏览下面的相关文章希望大家以后多多支持脚本之家!
相关文章
 当涉及位操作和位级运算时,Java 提供了一组特殊的运算符,即左移(<<)和右移(>>)运算符,下面小编就带大家深入了解一下它们的具体应用吧2023-08-08
 当下载一个很大的文件时,如果下载到一半暂停,如果继续下载呢?断点下载就是解决这个问题的。本文将用Java语言实现断点下载,需要的可以参考一下2022-05-05
 今天给大家带来的文章是Java设计模式的相关知识点,文中对桥接模式作了非常详细的介绍及代码示例,对正在学习的小伙伴们很有帮助,需要的朋友可以参考下2021-06-06
SpringBoot @DS注解实现多数据源配置以及问题解决办法
这篇文章主要给大家介绍了关于SpringBoot @DS注解实现多数据源配置以及问题解决办法,所谓多数据源就是一个Java EE项目中采用了不同数据库实例中的多个库,或者是同一个数据库实例中的多个不同库,需要的朋友可以参考下2023-11-11 构造方法作用就是对类进行初始化。 如果你没有定议任何构造方法的形式,程式会为你取一个不带任何参数的构造函数,那么你产生类的对像时只能用不带参数的方法.下面小编和大家来一起学习一下吧2019-06-06
 这篇文章主要介绍了 java 深拷贝与浅拷贝机制详解的相关资料,需要的朋友可以参考下2017-02-02
 本文主要介绍了SpringBoot整合Redis缓存的实现方法,文中通过示例代码介绍的非常详细,具有一定的参考价值,感兴趣的小伙伴们可以参考一下2022-07-07
 这篇文章主要介绍了Java遍历Map四种方式讲解,本篇文章通过简要的案例,讲解了该项技术的了解与使用,以下就是详细内容,需要的朋友可以参考下2021-08-08
 在高并发和大数据量的场景下,数据库成为了系统的瓶颈。为了提高数据库的处理能力和性能,读写分离成为了一种常用的解决方案,本文将介绍在Spring Boot项目中实现MySQL数据库读写分离的多种具体方案,需要的朋友可以参考下2023-06-06
Java的Hibernate框架中用于操作数据库的HQL语句讲解
这篇文章主要介绍了Java的Hibernate框架中用于操作数据库的HQL语句讲解,Hibernate是Java的SSH三大web开发框架之一,需要的朋友可以参考下2016-01-01


最新评论