
Springboot事件监听与@Async注解详解
一、不求甚解
在开发中经常可以利用Spring事件监听来实现观察者模式,进行一些非事务性的操作,如记录日志之类的。
Controller
Controller中注入ApplicationEventPublisher,并利用它发布事件即可。
import org.springframework.context.ApplicationEventPublisher;
import org.springframework.web.bind.annotation.GetMapping;
import org.springframework.web.bind.annotation.RequestMapping;
import org.springframework.web.bind.annotation.RequestParam;
import org.springframework.web.bind.annotation.RestController;
import javax.annotation.Resource;
@RestController
@RequestMapping("/controller")
public class TestController {
    @Resource
    private ApplicationEventPublisher applicationEventPublisher;
    @GetMapping("/test")
    public String test(@RequestParam String name){
        System.out.println("请求进来了");
        TestEvent event = new TestEvent(this,name);
        applicationEventPublisher.publishEvent(event);
        return "success";
    }
}
Event
event继承ApplicationEvent即可。
import org.springframework.context.ApplicationEvent;
public class TestEvent extends ApplicationEvent {
    private String name;
    public TestEvent(Object source,String name) {
        super(source);
        this.name=name;
    }
    public String getName() {
        return name;
    }
    public void setName(String name) {
        this.name = name;
    }
}
Listener
Listener实现ApplicationListener接口即可。或者使用@EventListener注解
接口方式
import org.springframework.context.ApplicationListener;
import org.springframework.scheduling.annotation.Async;
import org.springframework.stereotype.Component;
@Component
@Async
public class TestListener implements ApplicationListener<TestEvent> {
    @Override
    public void onApplicationEvent(TestEvent testEvent) {
        System.out.println(testEvent.getName());
    }
}
注解方式
import org.springframework.context.event.EventListener;
import org.springframework.scheduling.annotation.Async;
import org.springframework.stereotype.Component;
@Component
@Async
public class TestListener {
    @EventListener
    public void onApplicationEvent(TestEvent testEvent) {
        System.out.println("TestListener:"+Thread.currentThread().getName());
        System.out.println("TestListener:"+testEvent.getName());
    }
}
Postman测试 //localhost:8080/controller/test?name=lisi
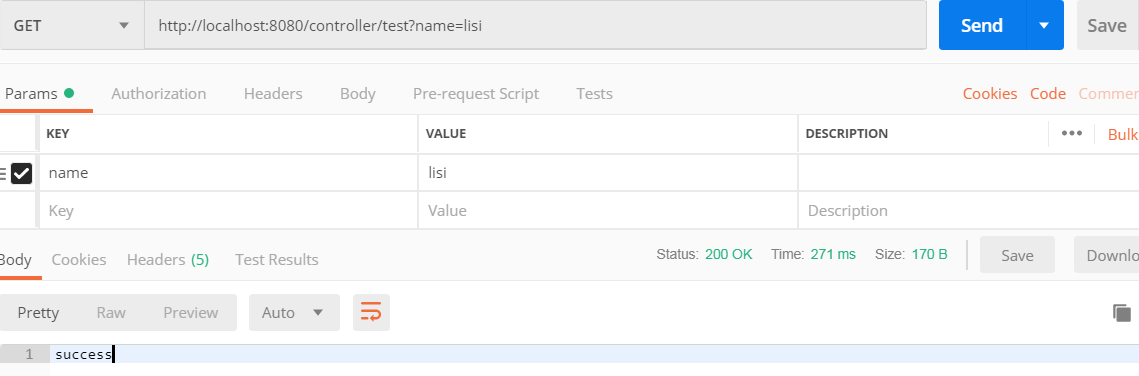
控制台打印:
请求进来了
lisi
曾经,我一直以为这样就实现了异步,因为我看公司的代码都是这样写的,现网也没什么问题。每次照着前辈们的代码CV一下就可以了,也没太多想。
二、人云亦云
@Async注解
以前一直用@Async注解,但我好像没有去深入了解过她。使用她就像使用@Resource一样自然一样随心所欲。
直到某天闲了下来,突发奇想,想要深入了解一下她。
@Async注解很容易踩坑,首先是必须在启动类上开启异步配置@EnableAsync才行,否则还是同步执行。如果不指定线程池,则使用Spring默认的线程池 SimpleAsyncTaskExecutor。
方法上一旦标记了@Async注解,当其它线程调用这个方法时,就会开启一个新的子线程去异步处理该业务逻辑。
1)在方法上使用该@Async注解,申明该方法是一个异步任务;在类上面使用该@Async注解,申明该类中的所有方法都是异步任务;
2)使用此注解的方法的类对象,必须是Spring管理下的bean对象; 所以需要在类上加上@Component注解。
3)要想使用异步任务,需要在主类上开启异步配置,即,配置上@EnableAsync注解;
4)如果不指定线程池的名称,则使用Spring默认的线程池SimpleAsyncTaskExecutor。
SimpleAsyncTaskExecutor特性:
- 1)为每个任务启动一个新线程,异步执行它。
- 2)支持通过“concurrencyLimit” bean 属性限制并发线程。默认情况下,并发线程数是无限的。
- 3)注意:此实现不重用线程!
- 4)考虑一个线程池 TaskExecutor 实现,特别是用于执行大量短期任务。
以上内容是我百度后所得,到底对不对呢?我决定亲自验证一下。
所以,使用@Async注解的时候一定要指定自己的线程池!!!
在启动类没有指定注解@EnableAsync的情况下,测试一下打印出当前的线程
 @GetMapping("/test")
    public String test(@RequestParam String name){
        System.out.println("TestController请求进来了:"+Thread.currentThread().getName());
        TestEvent event = new TestEvent(this,name);
        applicationEventPublisher.publishEvent(event);
        System.out.println("TestController请求出去了:"+Thread.currentThread().getName());
        return "success";
    }
@Override
public void onApplicationEvent(TestEvent testEvent) {
System.out.println("TestListener:"+Thread.currentThread().getName());
System.out.println("TestListener:"+testEvent.getName());
}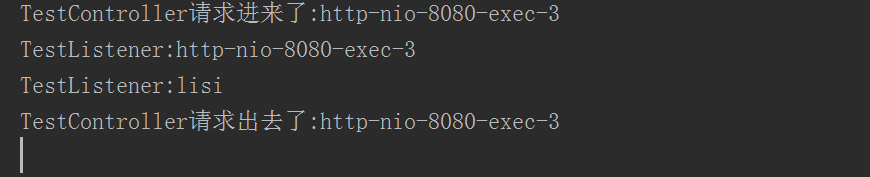
根据上述结果可证明在没有开启异步配置@EnableAsync的情况下还是同步执行!
三、刨根问底
Springboot中异步默认使用的线程池真的是SimpleAsyncTaskExecutor吗???
在不指定线程池的情况下,debug查看spring中异步默认的线程池。
开启异步 在启动类上添加该注解 @EnableAsync
import org.springframework.boot.SpringApplication;
import org.springframework.boot.autoconfigure.SpringBootApplication;
import org.springframework.scheduling.annotation.EnableAsync;
@SpringBootApplication
@EnableAsync
public class TestApplication {
    public static void main(String[] args) {
        SpringApplication.run(TestApplication.class, args);
    }
}
获取spring管理的bean实例,实现这个接口即可: ApplicationContextAware
import org.springframework.beans.BeansException;
import org.springframework.context.ApplicationContext;
import org.springframework.context.ApplicationContextAware;
import org.springframework.context.ApplicationEventPublisher;
import org.springframework.util.CustomizableThreadCreator;
import org.springframework.web.bind.annotation.GetMapping;
import org.springframework.web.bind.annotation.RequestMapping;
import org.springframework.web.bind.annotation.RequestParam;
import org.springframework.web.bind.annotation.RestController;
import javax.annotation.Resource;
@RestController
@RequestMapping("/controller")
public class TestController implements ApplicationContextAware {
    private static ApplicationContext applicationContext;
    @Resource
    private ApplicationEventPublisher applicationEventPublisher;
    @GetMapping("/test")
    public String test(@RequestParam String name){
        System.out.println("TestController请求进来了:"+Thread.currentThread().getName());
        TestEvent event = new TestEvent(this,name);
        // 获取spring管理的所有的bean的名称
        String[] beanDefinitionNames = applicationContext.getBeanDefinitionNames();
        for (int i = 0; i <beanDefinitionNames.length ; i++) {
            System.out.println(beanDefinitionNames[i]);
        }
        applicationEventPublisher.publishEvent(event);
        System.out.println("TestController请求出去了:"+Thread.currentThread().getName());
        // 根据class对象获取spring管理的bean实例
        CustomizableThreadCreator bean = applicationContext.getBean(CustomizableThreadCreator.class);
        System.out.println("CustomizableThreadCreator:"+bean.getThreadNamePrefix());
        return "success";
    }
    @Override
    public void setApplicationContext(ApplicationContext applicationContext) throws BeansException {
        TestController.applicationContext=applicationContext;
    }
}
在TestListener中打上断点。
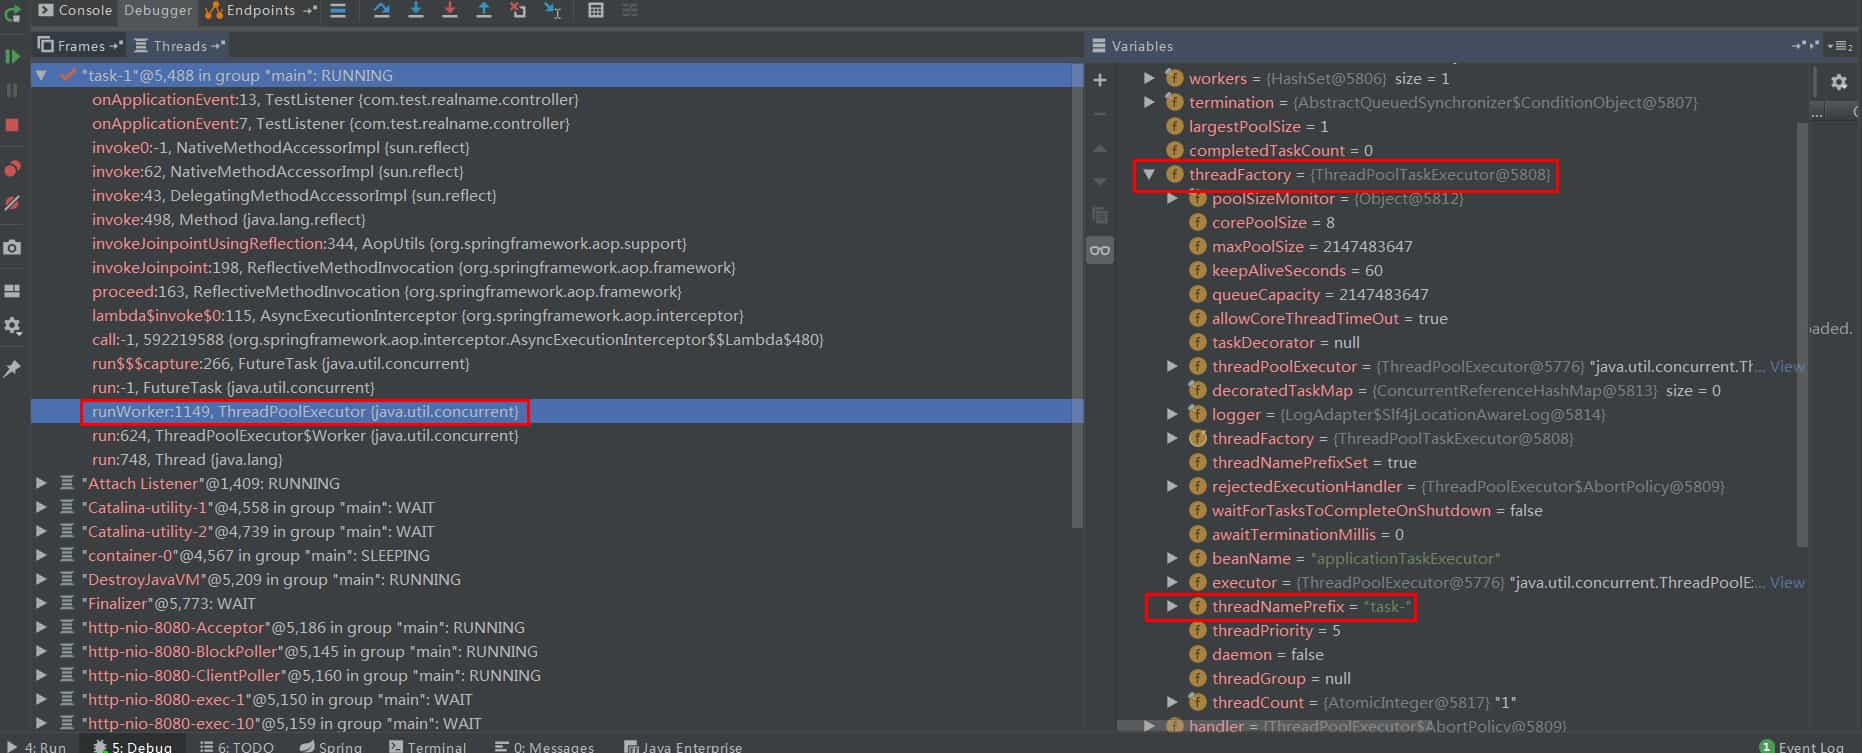
当前spring版本为5.2.12,可能与spring版本有关,当前版本的线程池默认是ThreadPoolTaskExecutor。可以看到线程池最大容量是Integer的最大值,在高并发场景下可能导致OOM。因此需要自定义线程池,并在@Async上指定为自定义线程池。
打印出了spring中所管理的bean的名称,applicationTaskExecutor果然也在。

打印出线程池的前缀,再一次验证确认线程池默认是ThreadPoolTaskExecutor。

四、曲突徙薪
最近写了一个接口,要求响应时间1s以内,并且请求量很大,明确要求一些非重要业务的操作都必须异步操作。
按着以前的套路,我还是照着上面一操作了一遍。还好今天研究了一下,否则以后的某天怕是要背一口大锅。
保持好奇,富有探索,始终对技术有敏感性!!!
自定义线程池
import org.springframework.context.annotation.Bean;
import org.springframework.context.annotation.Configuration;
import org.springframework.scheduling.concurrent.ThreadPoolTaskExecutor;
import java.util.concurrent.Executor;
import java.util.concurrent.ThreadPoolExecutor;
@Configuration
public class MyExecutorConfig {
    @Bean("MyExecutor")
    public Executor myExecutor() {
        ThreadPoolTaskExecutor executor = new ThreadPoolTaskExecutor();
        executor.setCorePoolSize(10);
        executor.setMaxPoolSize(50);
        executor.setQueueCapacity(2000);
        executor.setKeepAliveSeconds(60);
        executor.setThreadNamePrefix("myExecutor");
        executor.setRejectedExecutionHandler( new ThreadPoolExecutor.CallerRunsPolicy());
        executor.initialize();
        return executor;
    }
}
在异步注解上标明使用自定义线程池 @Async(“MyExecutor”)
Jmeter压测
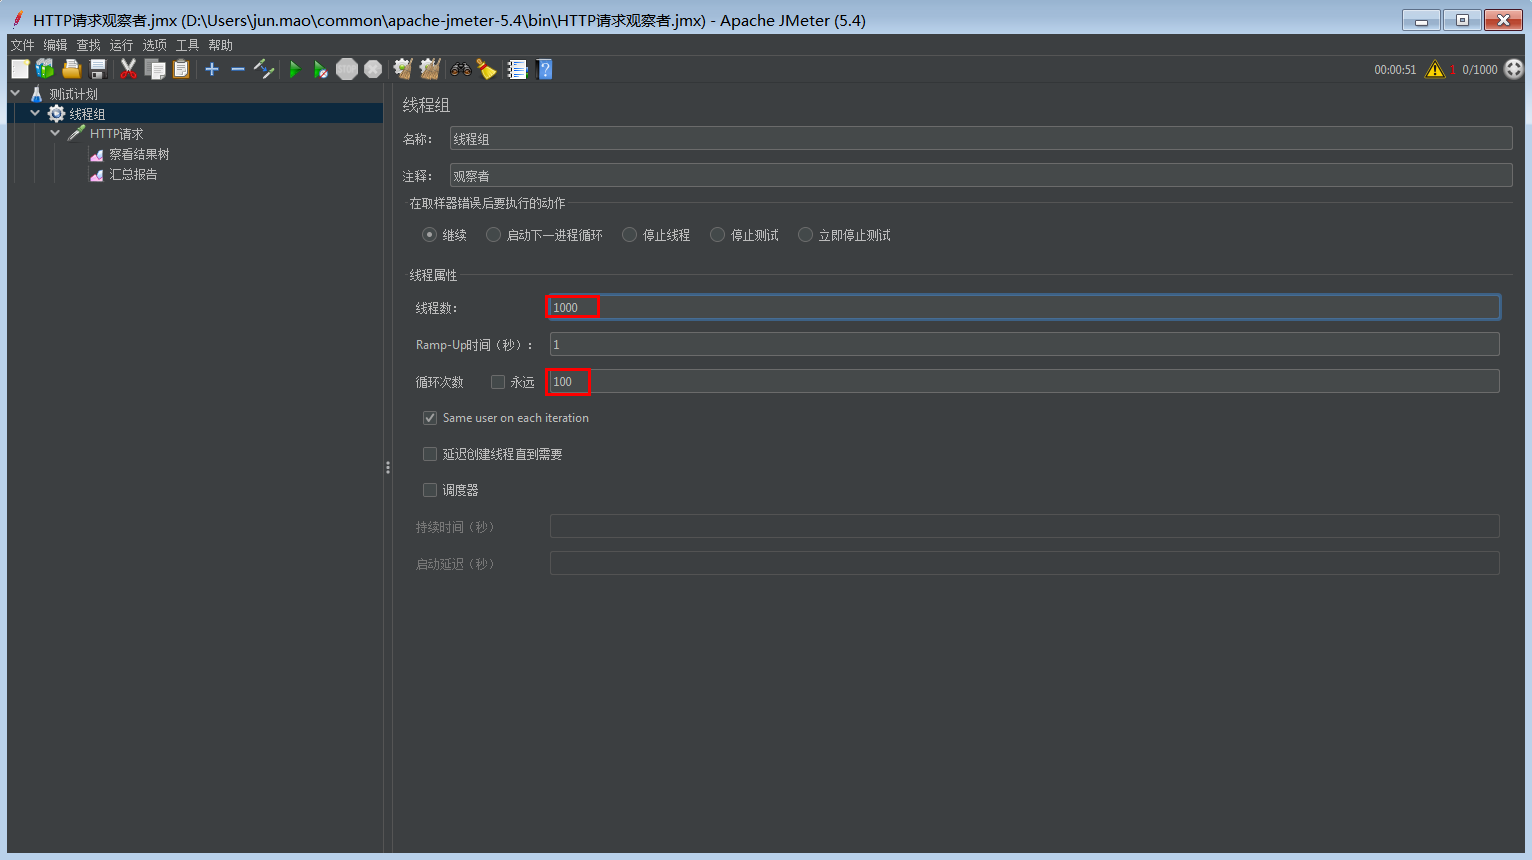
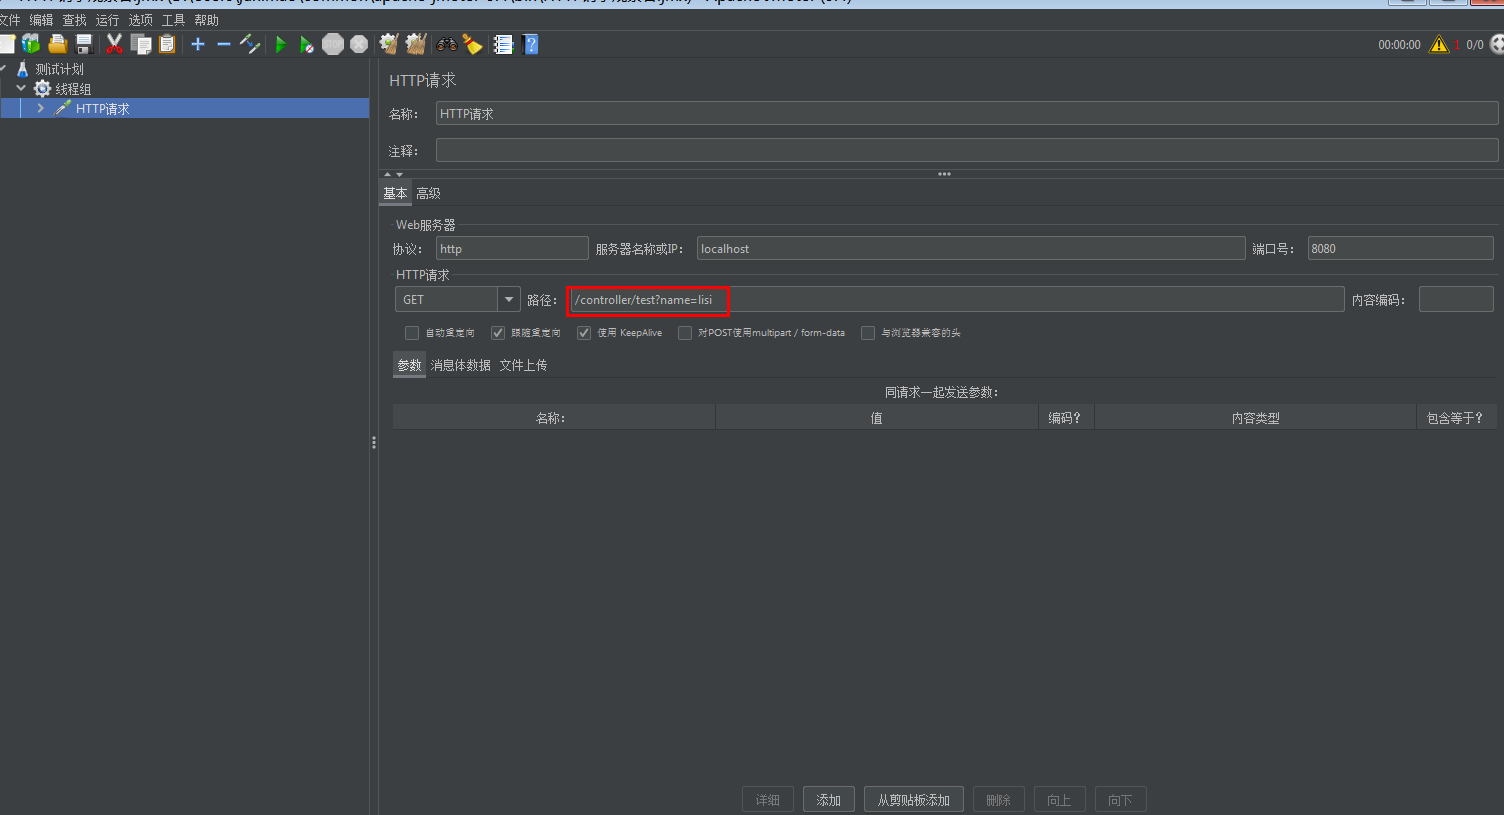
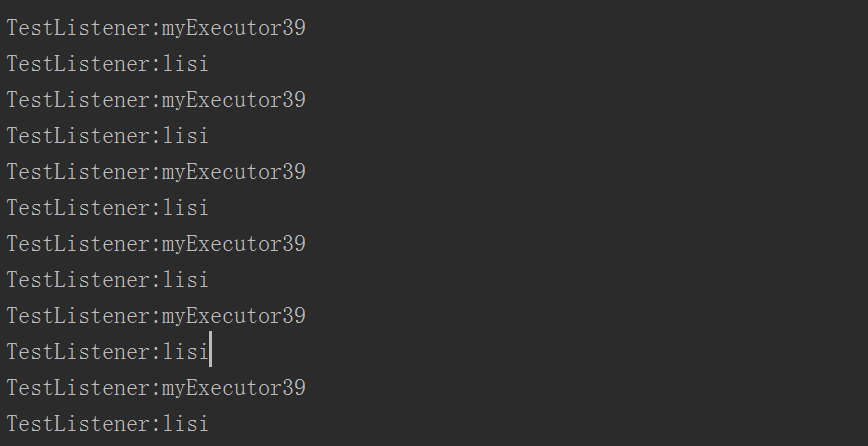
压测结果表明确实切换了线程池,使用了自定义的线程池,并且阻塞队列已满,开始朝着最大线程数迈进!
到此这篇关于Springboot事件监听与@Async注解详解的文章就介绍到这了,更多相关Springboot监听与@Async内容请搜索脚本之家以前的文章或继续浏览下面的相关文章希望大家以后多多支持脚本之家!
相关文章

SpringBoot3.x中spring.factories SPI 服务发现机制的改变问题小结
spring.factories其实是SpringBoot提供的SPI机制,底层实现是基于SpringFactoriesLoader检索ClassLoader中所有jar引入的META-INF/spring.factories文件,这篇文章主要介绍了SpringBoot3.x中spring.factories SPI 服务发现机制的改变,需要的朋友可以参考下2023-05-05 这篇文章主要介绍了浅谈使用java实现阿里云消息队列简单封装,小编觉得挺不错的,现在分享给大家,也给大家做个参考。一起跟随小编过来看看吧2018-03-03
 这篇文章主要介绍了Java多线程同步工具类CountDownLatch详解,CountDownLatch是一个多线程同步工具类,在多线程环境中它允许多个线程处于等待状态,直到前面的线程执行结束2022-06-06
 这篇文章主要介绍了spring集成redis cluster详解,分享了maven依赖,Spring配置,增加connect-redis.properties 配置文件等相关内容,具有一定参考价值,需要的朋友可以了解下。2017-11-11
 这篇文章主要给大家介绍了关于Java中字符串与日期转换常见方法的相关资料,在Java编程中经常需要将字符串表示的日期转换为日期对象进行处理,文中通过代码介绍的非常详细,需要的朋友可以参考下2023-11-11
 这篇文章主要介绍了java实现稀疏矩阵的压缩与解压 ,把该稀疏矩阵压缩以三元组形式表示并以文件形式保存,再写另一个程序读取文件中的信息把压缩后的三元组还原成原来的稀疏矩阵,需要的朋友可以参考下2022-03-03
SpringBoot使用@PathVariable进行数据校验的流程步骤
在SpringBoot项目中,我们经常需要从 URL 中获取参数并进行相关的数据校验,而@PathVariable注解就是一种非常方便的方式,可以让我们在方法参数中直接获取URL中的参数,并进行数据校验,本文将介绍如何使用@PathVariable注解进行数据校验2023-06-06 本文主要介绍java selenium XPath,这里整理了XPath的资料,并附实现方法,有需要的小伙伴可以参考下2016-08-08
 这篇文章介绍了Java下载文件的四种方式,文中通过示例代码介绍的非常详细。对大家的学习或工作具有一定的参考借鉴价值,需要的朋友可以参考下2021-12-12
 这篇文章主要为大家详细介绍了Java反射机制,文中示例代码介绍的非常详细,具有一定的参考价值,感兴趣的小伙伴们可以参考一下,希望能够给你带来帮助2022-03-03


最新评论