
Django+Vue实现文件上传下载的项目实践
更新时间:2023年06月07日 11:27:26 作者:穿越寒冬
本文主要介绍了Django+Vue实现文件上传下载的项目实践,文中通过示例代码介绍的非常详细,对大家的学习或者工作具有一定的参考学习价值,需要的朋友们下面随着小编来一起学习学习吧
前言
首先我要实现的页面效果是这样的
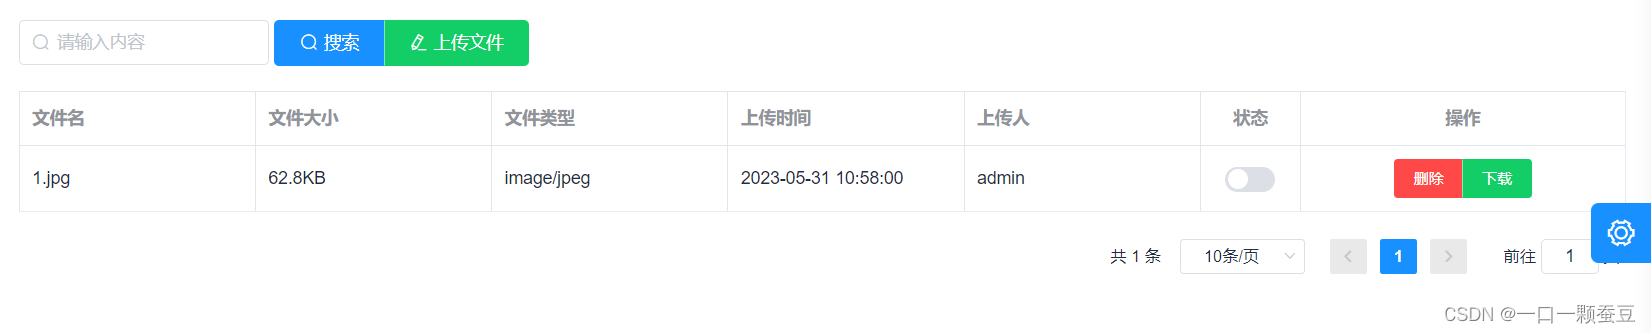
当点击上传文件按钮,弹出上传文件的弹出框,可以上传多个文件,点击确定后才正式开始上传

点击右侧下载按钮,可以直接下载文件。
上传功能
后端代码
settings.py
MEDIA_ROOT = os.path.join(BASE_DIR, '../upload')
MEDIA_URL = '/upload/'
这段代码表示你上传的文件都会放在你项目根目录的upload文件夹下。
views.py
@api_view(('POST',))
@renderer_classes((TemplateHTMLRenderer, JSONRenderer))
def upload_list(request):
    # 如果项目根目录没有upload文件夹,会自动给你创建一个
    folder_path = settings.MEDIA_ROOT
    if not os.path.exists(folder_path):
        os.makedirs(folder_path)
    files = request.FILES.getlist('file')
    for file in files:
        # 这三行代码就是上传文件的代码
        f = open(settings.MEDIA_ROOT + "/" + file.name, mode='wb')
        for chunk in file.chunks():
            f.write(chunk)
        # 这段代码是我要网数据库里存的一些文件信息,如果不存库的话不用写
        size = file.size
        suffix = file.content_type
        createUser = request.user
        filePath = settings.MEDIA_URL + file.name
        name = file.name
        # 上传完文件记得要关闭
        # 需要注意的一点,如果f.close()这句代码之前,上传文件之后有报错,那你文件是一直被占用的状态,删除也删不掉,所以一定要做好代码顺序
        f.close()
        # 往数据库里存文件信息
        Filemanage.objects.create(size=size, suffix=suffix, create_user=createUser, file_path=filePath, name=name)
    return JsonResponse(OrderedDict([
        ('results', {})
    ], code=status.HTTP_200_OK))
前端代码
<el-upload
          class="upload-demo"
          ref="upload"
          action=""
          :auto-upload="false"
          :http-request="upload"
          :before-upload="beforeAvatarUpload"
          multiple
        >
          <el-button size="small" type="primary">点击上传</el-button>
</el-upload>:ref="upload":必须要写,因为我们是手动上传方式。
:auto-upload="false":这里我设置的不自动上传,如果你没有确定按钮,点击一起上传的需求,那你就把值变为ture,你选完文件后会自动上传。
:http-request="upload":覆盖默认的上传行为,可以自定义上传的实现。
:before-upload="beforeAvatarUpload":上传文件之前的钩子,一般用于限制上传文件大小和类型。
multiple:多文件上传。
methods: {
    beforeAvatarUpload(file) {
        const isLt2M = file.size / 1024 / 1024 < 200;
        if (!isLt2M) {
            this.$message.error('上传头像图片大小不能超过2MB!');
        }
        return isLt2M;
    },
    upload(param) {
        const formData = new FormData()
        formData.append('file', param.file)
        mail.uploadFile(formData).then(response => {
            console.log('上传图片成功')
            this.$refs.upload.clearFiles()
        }).catch(response => {
            console.log(response)
            this.$refs.upload.clearFiles()
        });
    },
}
下载功能
后端代码
def download(request, nid):
    # 通过前台传来的id查出文件名
    row_object = Filemanage.objects.filter(id=nid).first()
    # 文件的相对路径
    file_path = '/upload/' + row_object.name
    # 打开文件
    with open(settings.MEDIA_ROOT + "/" + row_object.name, 'rb') as f:
        response = HttpResponse(f.read())
    # 设置Content-Disposition头以强制浏览器下载文件
    file_name = os.path.basename(file_path)
    response["Content-Type"] = "application/octet-stream"
    response['Content-Disposition'] = f'attachment; filename="{file_name}"'
    return response
前端代码
<el-button
  v-if="permissionList.del"
  size="small"
  type="success "
  @click="download(row)"
>{{ "下载" }}</el-button>
methods: {
download(row) {
this.loading = true;
// 这块是我封装的axios请求,请求时要带着responseType: 'blob',我会在下面放上我的代码
file.requestDownload(row.id).then((response) => {
const url = window.URL.createObjectURL(new Blob([response.data]));
const link = document.createElement('a');
link.href = url;
link.setAttribute('download', row.name);
document.body.appendChild(link);
link.click();
})
.catch((e) => {
console.log(e)
});
},
}requestDownload(id) {
return request({
url: '/tool/download/' + id + '/',
method: 'get',
responseType: 'blob'
})
}到此这篇关于Django+Vue实现文件上传下载的项目实践的文章就介绍到这了,更多相关Django Vue文件上传下载内容请搜索脚本之家以前的文章或继续浏览下面的相关文章希望大家以后多多支持脚本之家!
您可能感兴趣的文章:
相关文章
 今天给大家带来的文章是关于Python的,文章围绕着Python Matplotlib可视化展开,文中非常详细的介绍了如何给统计图添加注释,需要的朋友可以参考下2021-06-06
解决pyinstaller 打包exe文件太大,用pipenv 缩小exe的问题
这篇文章主要介绍了解决pyinstaller 打包exe文件太大,用pipenv 缩小exe的问题,具有很好的参考价值,希望对大家有所帮助。一起跟随小编过来看看吧2020-07-07 .ini配置文件常被用作存储程序中的一些参数,通过它程序可以变得更加灵活。下面这篇文章主要给大家介绍了关于python对配置文件.ini进行增删改查操作的方法示例,文中通过示例代码介绍的非常详细,需要的朋友可以参考借鉴,下面来一起看看吧。2017-07-07
 在Python语言中,用 != 表示不等于,本文主要介绍了python不等于运算符的具体使用,文中通过示例代码介绍的非常详细,具有一定的参考价值,感兴趣的小伙伴们可以参考一下2021-12-12
 tkinter(Tk interface)是Python的标准GUl库,支持跨平台的GUl程序开发,本文为大家整理了tkinter开发时常用的29种功能用法,希望对大家有所帮助2023-05-05
 今天小编就为大家分享一篇在Python中实现shuffle给列表洗牌,具有很好的参考价值,希望对大家有所帮助。一起跟随小编过来看看吧2018-11-11
详解python使用递归、尾递归、循环三种方式实现斐波那契数列
本篇文章主要介绍了python使用递归、尾递归、循环三种方式实现斐波那契数列,非常具有实用价值,需要的朋友可以参考下2018-01-01 提到编写命令行工具,你可能会想到用 sys.argv 或者标准库 argparse,没错,这两个很常用,不过情况复杂时没有那么方便和高效,因此今天分享两个工具,让你编写命令行工具不费吹灰之力2021-09-09
 这篇文章主要介绍了如何利用Python分别实现网页文件转为PDF文件和网页文件转PNG图片的示例代码,文中的代码简洁易懂,感兴趣的可以动手试试2022-01-01
opencv中cv2.minAreaRect函数输出角度问题详解
minAreaRect返回的数据包括了矩形的中心点,宽、高,和旋转角度,下面这篇文章主要给大家介绍了关于opencv中cv2.minAreaRect函数输出角度问题的相关资料,需要的朋友可以参考下2022-11-11


最新评论