
Python趣味挑战之pygame实现无敌好看的百叶窗动态效果
一、案例知识点概述
(一)使用到的python库
使用pygame库、random库和os、sys等系统库。
其中:
pygame库实现主体功能,提供窗口界面显示、动态效果展示等
random库实现随机数的生成,通过随机数实现动态百叶窗的上下左右选择、百叶窗的数量选择等功能。 os库实现图片资源的装载和读取。
sys库实现退出操作等。
(二) 整体实现逻辑
通过WIDTH = 600 和 HEIGHT = 600设置窗口的高度和宽度
通过runimage 和 nextimage 设置当前显示的图像和下一张要显示的图像
通过num_part = random.randint(3,8)来设置要显示的百叶窗的数量
通过num_list = []保存当前runimage拆分出来的百叶窗的surface资源,用于在百叶窗动态效果过程中显示。
通过choose来设置是上下运动还是左右运动。
二、准备工作
(一)实现pygame的主窗口
import pygame,sys

pygame.init()
screen = pygame.display.set_mode((500, 500))
pygame.display.set_caption('大小框展示')
fcclock = pygame.time.Clock()
while True:
    for event in pygame.event.get():
        if event.type == pygame.QUIT or event.type == pygame.K_F1:
            pygame.quit()
            sys.exit()
    fcclock.tick(60)
    pygame.display.flip()  # 刷新窗口
黑黑的框,不截图了。大家都懂。
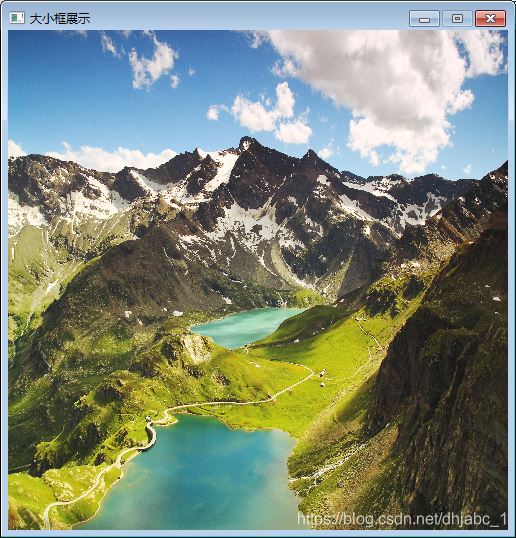
(二)贴个图显示得好看点
import pygame,sys

pygame.init()
screen = pygame.display.set_mode((500, 500))
pygame.display.set_caption('大小框展示')
fcclock = pygame.time.Clock()
img = pygame.image.load('./image/aerial-alpine-ceresole-reale-desktop-backgrounds-1562.jpg').convert_alpha()
img = pygame.transform.scale(img, (500, 500))
while True:
    for event in pygame.event.get():
        if event.type == pygame.QUIT or event.type == pygame.K_F1:
            pygame.quit()
            sys.exit()
    screen.blit(img,(0,0))
    fcclock.tick(60)
    pygame.display.flip()  # 刷新窗口
(三)图片从哪里来
这里建议直接通过网络上下载免费的、好看的图片,并保存在指定的文件夹,用于过程中展现。
我认为有三种方法:
其一:使用爬虫技术从网上下载图片,可以开一个子线程负责采集网上图片,然后加载到list列表中;
其二:可以直接对电脑中所有的盘进行自动检索,然后加载到list列表中; 其三:指定目录,然后加载到list列表中;
我这里偷个懒,选择第三种方法实现。
具体实现代码如下:
  path = './image/'
    files = []
    dirs = os.listdir(path)
    for diretion in dirs:
        files.append(path + diretion)
(四)图片装载
我为什么在初始化的时候就进行装载呢?
原因是:解决效率问题,无需每次使用时重复加载,而且在初始化的时候就适配屏幕大小进行图片缩放。
因此,我把这个过程打包成一个函数,方便后续调用,而且参数传递为:屏幕的大小。然后返回bglist对象。
for file in files:
    picture = pygame.transform.scale(pygame.image.load(file), (1440, 900))
    dSurface = picture
    # dSurface = pygame.image.load(file).convert()
    bglist.append(dSurface)
OK,图片有了,窗口有了,那么就开始实现我们的业务逻辑吧。
三、核心功能模块
(一)实现init_image函数初始化加载图片到surface对象
def init_image():
    path = './image/'
    files = []
    dirs = os.listdir(path)
    for diretion in dirs:
        files.append(path + diretion)

    for file in files:
        picture = pygame.transform.scale(pygame.image.load(file), (WIDTH, HEIGHT))
        dSurface = picture
        # dSurface = pygame.image.load(file).convert()
        bglist.append(dSurface)
(二)初始化相关变量
runimage = None
nextimage = None
flag = False   # FALSE没有切屏 TRUE 切屏
flag2 = False
choose = 6

num_part = random.randint(3,8)  # 记录分成多少块矩形框
num_list = []
num_increse = 1
inc = random.choice([-1,1])
while num_increse<=num_part:
    inc = -inc
    num_list.append(inc)
    num_increse += 1
这里,建议大家思考一下为什么要引入变量flag和flag2
(三)每次百叶窗切换完之后重置
def reset():
    global flag,runimage,nextimage,flag2,i,j,choose,num_part,num_list
    flag = False  # FALSE没有切屏 TRUE 切屏
    flag2 = False
    choose = random.randint(6,7)
    if nextimage is None:
        nextimage = random.choice(bglist)
    if runimage is None:
        runimage = random.choice(bglist)
    else:
        runimage = nextimage
        nextimage = random.choice(bglist)

    num_part = random.randint(3,8)  # 记录分成多少块矩形框
    num_list = []
    num_increse = 1
    inc = random.choice([-1,1])
    while num_increse <= num_part:
        inc = -inc
        num_list.append(inc)
        num_increse += 1
(四)实现百叶窗动态切换的run函数
def run():
    global flag,runimage,flag2,nextimage,i,j,choose,num_part,num_list
    reset()
    while True:
        for event in pygame.event.get():
            if event.type == pygame.QUIT or event.type == pygame.K_F1:
                pygame.quit()
                sys.exit()
            if event.type == pygame.KEYDOWN:
                if event.key == pygame.K_ESCAPE:
                    pygame.quit()
                    sys.exit()
                if event.key == pygame.K_SPACE:
                    if flag is False:# FALSE没有切屏 TRUE 切屏
                        flag = True
                        flag2 = False
        screen.fill((255, 255, 255))  # 设置背景为白色
        if flag:
            if choose==6:
                select_rect = []
                kk = 0
                while kk < num_part:
                    tmp_rect = pygame.Rect(kk * WIDTH/num_part,0,WIDTH/num_part,HEIGHT)
                    select_rect.append(runimage.subsurface(tmp_rect).copy())
                    kk += 1
                screen.blit(nextimage, (0, 0))
                mm = 0
                for each in zip(select_rect,num_list):
                    if each[1]==1:
                        screen.blit(each[0], (i+mm*WIDTH/num_part, -j))
                    else:
                        screen.blit(each[0], (i+mm*WIDTH/num_part, j))
                    mm += 1
                j += step
                if j >= HEIGHT:
                    flag2 = True
            elif choose==7:
                select_rect = []
                kk = 0
                while kk < num_part:
                    tmp_rect = pygame.Rect(0,kk * HEIGHT/num_part,WIDTH,HEIGHT/num_part)
                    select_rect.append(runimage.subsurface(tmp_rect).copy())
                    kk += 1
                screen.blit(nextimage, (0, 0))
                mm = 0
                for each in zip(select_rect,num_list):
                    if each[1]==1:
                        screen.blit(each[0], (-i, j+mm*HEIGHT/num_part))
                    else:
                        screen.blit(each[0], (i, j+mm*HEIGHT/num_part))
                    mm += 1
                i += step
                if i >= WIDTH:
                    flag2 = True
        else:
            screen.blit(nextimage, (0, 0))
            screen.blit(runimage, (0, 0))
        if flag2:
            reset()
        fcclock.tick(fps)
        pygame.display.flip()  # 刷新窗口
(五)主函数
if __name__ == '__main__':
    init_image()
    run()
四、完整代码
import sys, pygame
import os
import random

pygame.init()  # 初始化pygame类
WIDTH = 600
HEIGHT = 600
screen = pygame.display.set_mode((WIDTH, HEIGHT))  # 设置窗口大小
pygame.display.set_caption('美丽的屏保')  # 设置窗口标题
tick = pygame.time.Clock()
fps = 60  # 设置刷新率,数字越大刷新率越高
fcclock = pygame.time.Clock()
runimage = None
nextimage = None
flag = False   # FALSE没有切屏 TRUE 切屏
flag2 = False
choose = 6

num_part = random.randint(3,8)  # 记录分成多少块矩形框
num_list = []
num_increse = 1
inc = random.choice([-1,1])
while num_increse<=num_part:
    inc = -inc
    num_list.append(inc)
    num_increse += 1

def init_image():
    path = './image/'
    files = []
    dirs = os.listdir(path)
    for diretion in dirs:
        files.append(path + diretion)

    for file in files:
        picture = pygame.transform.scale(pygame.image.load(file), (WIDTH, HEIGHT))
        dSurface = picture
        bglist.append(dSurface)

def reset():
    global flag,runimage,nextimage,flag2,i,j,choose,num_part,num_list
    flag = False  # FALSE没有切屏 TRUE 切屏
    flag2 = False
    i = 0
    j = 0
    choose = random.randint(6,7)
    if nextimage is None:
        nextimage = random.choice(bglist)
    if runimage is None:
        runimage = random.choice(bglist)
    else:
        runimage = nextimage
        nextimage = random.choice(bglist)

    num_part = random.randint(3,8)  # 记录分成多少块矩形框
    num_list = []
    num_increse = 1
    inc = random.choice([-1,1])
    while num_increse <= num_part:
        inc = -inc
        num_list.append(inc)
        num_increse += 1


def run():
    global flag,runimage,flag2,nextimage,i,j,choose,num_part,num_list
    reset()
    while True:
        for event in pygame.event.get():
            if event.type == pygame.QUIT or event.type == pygame.K_F1:
                pygame.quit()
                sys.exit()
            if event.type == pygame.KEYDOWN:
                if event.key == pygame.K_ESCAPE:
                    pygame.quit()
                    sys.exit()
                if event.key == pygame.K_SPACE:
                    if flag is False:# FALSE没有切屏 TRUE 切屏
                        flag = True
                        flag2 = False
        screen.fill((255, 255, 255))  # 设置背景为白色
        if flag:
            if choose==6:
                select_rect = []
                kk = 0
                while kk < num_part:
                    tmp_rect = pygame.Rect(kk * WIDTH/num_part,0,WIDTH/num_part,HEIGHT)
                    select_rect.append(runimage.subsurface(tmp_rect).copy())
                    kk += 1
                screen.blit(nextimage, (0, 0))
                mm = 0
                for each in zip(select_rect,num_list):
                    if each[1]==1:
                        screen.blit(each[0], (i+mm*WIDTH/num_part, -j))
                    else:
                        screen.blit(each[0], (i+mm*WIDTH/num_part, j))
                    mm += 1
                j += step
                if j >= HEIGHT:
                    flag2 = True
            elif choose==7:
                select_rect = []
                kk = 0
                while kk < num_part:
                    tmp_rect = pygame.Rect(0,kk * HEIGHT/num_part,WIDTH,HEIGHT/num_part)
                    select_rect.append(runimage.subsurface(tmp_rect).copy())
                    kk += 1
                screen.blit(nextimage, (0, 0))
                mm = 0
                for each in zip(select_rect,num_list):
                    if each[1]==1:
                        screen.blit(each[0], (-i, j+mm*HEIGHT/num_part))
                    else:
                        screen.blit(each[0], (i, j+mm*HEIGHT/num_part))
                    mm += 1
                i += step
                if i >= WIDTH:
                    flag2 = True
        else:
            screen.blit(nextimage, (0, 0))
            screen.blit(runimage, (0, 0))
        if flag2:
            reset()
        fcclock.tick(fps)
        pygame.display.flip()  # 刷新窗口

if __name__ == '__main__':
    init_image()
    run()
五、运行效果
OK,写完,其实还是蛮有趣的,大家可以自动动手敲敲,也许比我写的更好。
到此这篇关于Python趣味挑战之pygame实现无敌好看的百叶窗动态效果的文章就介绍到这了,更多相关pygame实现百叶窗动态效果内容请搜索脚本之家以前的文章或继续浏览下面的相关文章希望大家以后多多支持脚本之家!
相关文章
 这篇文章主要为大家详细介绍了python实现邮件自动发送,具有一定的参考价值,感兴趣的小伙伴们可以参考一下2019-08-08
python之线程通过信号pyqtSignal刷新ui的方法
今天小编就为大家分享一篇python之线程通过信号pyqtSignal刷新ui的方法,具有很好的参考价值,希望对大家有所帮助。一起跟随小编过来看看吧2019-01-01 这篇文章主要介绍了Python中的lstrip()方法使用简介,是Python入门的基础知识,需要的朋友可以参考下2015-05-05
 这篇文章主要介绍了Python中LSTM回归神经网络时间序列预测详情,文章围绕主题展开详细的内容介绍,具有一定的参考价值,需要的朋友可以参考一下2022-07-07
pycharm2022.1最新永久激活码破解补丁一键安装教程免费分享(2022持续更新)
更新到Pycharm 2022.2.x版,pycharm2022.2最新可用永久激活码分享(持续更新),pycharm激活补丁一键安装简单方便,无需手动修改文件,兼容苹果MAC,linux,Windows系统2022-07-07 调试是写出良好代码的必备条件,Birdseye是一款优秀的用于python的调试工具,本文简单的介绍了Birdseye的使用方法2021-05-05
 这篇文章主要介绍了python中pass和match使用方法,pass 语句不执行任何操作。语法上需要一个语句,但程序不实际执行任何动作时,可以使用该语句2022-08-08
关于Python Tkinter 复选框 ->Checkbutton
这篇文章主要介绍了关于Python Tkinter复选框Checkbutton,文章围绕主题展开详细的内容介绍,具有一定的参考价值,需要的小伙伴可以参考一下2022-09-09 这篇文章主要介绍了Python实现简单的文件传输与MySQL备份的脚本分享,用到了socket与tarfile模块,需要的朋友可以参考下2016-01-01
 这篇文章主要介绍了分享一款地理数据可视化神器keplergl,keplergl是由Uber开源的一款地理数据可视化工具,通过keplergl我们可以在Jupyter notebook中使用,下文分享需要的小伙伴可以参考一下2022-02-02


最新评论