
为调试JavaScript添加输出窗口的代码
更新时间:2010年02月07日 11:14:51 作者:
调试JavaScript是一件很麻烦的事,尽管有很多很好用的调试工具,但有时候想要跟踪值的变化,但即不想中断脚本执行,也不想用alert显示值信息,这种情况下,一般的做法是在页面上添加一个DIV或者其它元素,然后再往里面添加调试信息。
虽然不是很复杂的实现,但每次都要这样就会很麻烦,所以我写了一小段脚本,用来自动生成这个输出窗口。
代码
window.Babu = {};
Babu.Debugging = {};
Babu.Debugging.writeLine = function(format, arg1, arg2) {
var console = Babu.Debugging._getConsole();
if (console.get_visible()) {
var msg = format;
if (typeof msg !== "undefined" && msg !== null) {
var index;
if (typeof msg === "string") {
var array = format.match(/\{(\d+)\}/g);
if (array) {
for (var i = 0; i < array.length; i++) {
index = array[i];
index = parseInt(index.substr(1, index.length - 2)) + 1;
msg = msg.replace(array[i], arguments[index]);
}
}
}
}
var span = document.createElement("SPAN");
span.appendChild(document.createTextNode(msg));
console._output.appendChild(span);
console._output.appendChild(document.createElement("BR"));
span.scrollIntoView();
return span;
}
}
Babu.Debugging._getConsole = function() {
var console = Babu.Debugging._console;
if (!console) {
var div = document.createElement("DIV");
div.style.position = "fixed";
div.style.right = "3px";
div.style.bottom = "3px";
div.style.width = "350px";
div.style.height = "180px";
div.style.backgroundColor = "white";
div.style.color = "black";
div.style.border = "solid 2px #afafaf";
div.style.fontSize = "12px";
document.body.appendChild(div);
Babu.Debugging._console = console = div;
div = document.createElement("DIV");
div.style.backgroundColor = "#e0e0e0";
div.style.position = "absolute";
div.style.left = "0px";
div.style.right = "0px";
div.style.top = "0px";
div.style.height = "16px";
div.style.padding = "2px 2px";
div.style.margin = "0px";
console.appendChild(div);
console._toolbar = div;
div = document.createElement("DIV");
div.style.overflow = "auto";
div.style.whiteSpace = "nowrap";
div.style.position = "absolute";
div.style.left = "0px";
div.style.right = "0px";
div.style.top = "20px";
div.style.bottom = "0px";
div.style.height = "auto";
console.appendChild(div);
console._output = div;
var btn;
btn = document.createElement("SPAN");
btn.innerHTML = "收缩";
btn.style.margin = "0px 3px";
btn.style.cursor = "pointer";
console._toolbar.appendChild(btn);
btn.onclick = function() { if (console.get_collapsed()) console.expand(); else console.collapse(); }
btn = document.createElement("SPAN");
btn.innerHTML = "清除";
btn.style.margin = "0px 3px";
btn.style.cursor = "pointer";
console._toolbar.appendChild(btn);
btn.onclick = Babu.Debugging.clearConsole;
btn = document.createElement("SPAN");
btn.innerHTML = "关闭";
btn.style.cursor = "pointer";
btn.style.margin = "0px 3px";
console._toolbar.appendChild(btn);
btn.onclick = function() { Babu.Debugging.hideConsole(); }
console.get_visible = function() { return this.style.display !== "none" };
console.get_collapsed = function() { return !(!this._collapseState) };
console.collapse = function() {
if (!this.get_collapsed()) {
this._output.style.display = "none";
this._toolbar.childNodes[1].style.display = "none";
this._toolbar.childNodes[2].style.display = "none";
this._toolbar.childNodes[0].innerHTML = "展开";
this._collapseState = { width: this.style.width, height: this.style.height }
this.style.width = "30px";
this.style.height = "16px";
}
}
console.expand = function() {
if (this.get_collapsed()) {
this._output.style.display = "";
this._toolbar.childNodes[1].style.display = "";
this._toolbar.childNodes[2].style.display = "";
this._toolbar.childNodes[0].innerHTML = "收缩";
this.style.width = this._collapseState.width;
this.style.height = this._collapseState.height;
this._collapseState = null;
}
}
}
return console;
}
Babu.Debugging.showConsole = function() {
Babu.Debugging._getConsole().style.display = "";
}
Babu.Debugging.hideConsole = function() {
var console = Babu.Debugging._console;
if (console) {
console.style.display = "none";
}
}
Babu.Debugging.clearConsole = function() {
var console = Babu.Debugging._console;
if (console) console._output.innerHTML = "";
}
调用方法很简单:
Babu.Debugging.writeLine("调试信息");
Babu.Debugging.writeLine("带参数的调试信息:参数1={0},参数2={1}", arg1, arg2);
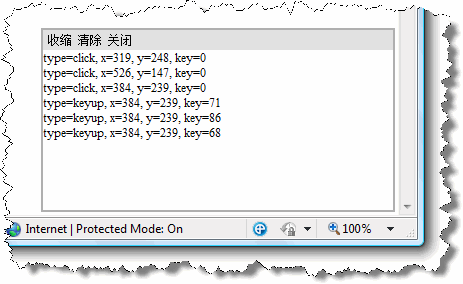
调用之后,会自动在窗口的右下角出现一个固定位置的窗口,并显示相应的内容。效果图请看下面:
代码
复制代码 代码如下:
window.Babu = {};
Babu.Debugging = {};
Babu.Debugging.writeLine = function(format, arg1, arg2) {
var console = Babu.Debugging._getConsole();
if (console.get_visible()) {
var msg = format;
if (typeof msg !== "undefined" && msg !== null) {
var index;
if (typeof msg === "string") {
var array = format.match(/\{(\d+)\}/g);
if (array) {
for (var i = 0; i < array.length; i++) {
index = array[i];
index = parseInt(index.substr(1, index.length - 2)) + 1;
msg = msg.replace(array[i], arguments[index]);
}
}
}
}
var span = document.createElement("SPAN");
span.appendChild(document.createTextNode(msg));
console._output.appendChild(span);
console._output.appendChild(document.createElement("BR"));
span.scrollIntoView();
return span;
}
}
Babu.Debugging._getConsole = function() {
var console = Babu.Debugging._console;
if (!console) {
var div = document.createElement("DIV");
div.style.position = "fixed";
div.style.right = "3px";
div.style.bottom = "3px";
div.style.width = "350px";
div.style.height = "180px";
div.style.backgroundColor = "white";
div.style.color = "black";
div.style.border = "solid 2px #afafaf";
div.style.fontSize = "12px";
document.body.appendChild(div);
Babu.Debugging._console = console = div;
div = document.createElement("DIV");
div.style.backgroundColor = "#e0e0e0";
div.style.position = "absolute";
div.style.left = "0px";
div.style.right = "0px";
div.style.top = "0px";
div.style.height = "16px";
div.style.padding = "2px 2px";
div.style.margin = "0px";
console.appendChild(div);
console._toolbar = div;
div = document.createElement("DIV");
div.style.overflow = "auto";
div.style.whiteSpace = "nowrap";
div.style.position = "absolute";
div.style.left = "0px";
div.style.right = "0px";
div.style.top = "20px";
div.style.bottom = "0px";
div.style.height = "auto";
console.appendChild(div);
console._output = div;
var btn;
btn = document.createElement("SPAN");
btn.innerHTML = "收缩";
btn.style.margin = "0px 3px";
btn.style.cursor = "pointer";
console._toolbar.appendChild(btn);
btn.onclick = function() { if (console.get_collapsed()) console.expand(); else console.collapse(); }
btn = document.createElement("SPAN");
btn.innerHTML = "清除";
btn.style.margin = "0px 3px";
btn.style.cursor = "pointer";
console._toolbar.appendChild(btn);
btn.onclick = Babu.Debugging.clearConsole;
btn = document.createElement("SPAN");
btn.innerHTML = "关闭";
btn.style.cursor = "pointer";
btn.style.margin = "0px 3px";
console._toolbar.appendChild(btn);
btn.onclick = function() { Babu.Debugging.hideConsole(); }
console.get_visible = function() { return this.style.display !== "none" };
console.get_collapsed = function() { return !(!this._collapseState) };
console.collapse = function() {
if (!this.get_collapsed()) {
this._output.style.display = "none";
this._toolbar.childNodes[1].style.display = "none";
this._toolbar.childNodes[2].style.display = "none";
this._toolbar.childNodes[0].innerHTML = "展开";
this._collapseState = { width: this.style.width, height: this.style.height }
this.style.width = "30px";
this.style.height = "16px";
}
}
console.expand = function() {
if (this.get_collapsed()) {
this._output.style.display = "";
this._toolbar.childNodes[1].style.display = "";
this._toolbar.childNodes[2].style.display = "";
this._toolbar.childNodes[0].innerHTML = "收缩";
this.style.width = this._collapseState.width;
this.style.height = this._collapseState.height;
this._collapseState = null;
}
}
}
return console;
}
Babu.Debugging.showConsole = function() {
Babu.Debugging._getConsole().style.display = "";
}
Babu.Debugging.hideConsole = function() {
var console = Babu.Debugging._console;
if (console) {
console.style.display = "none";
}
}
Babu.Debugging.clearConsole = function() {
var console = Babu.Debugging._console;
if (console) console._output.innerHTML = "";
}
调用方法很简单:
复制代码 代码如下:
Babu.Debugging.writeLine("调试信息");
Babu.Debugging.writeLine("带参数的调试信息:参数1={0},参数2={1}", arg1, arg2);
调用之后,会自动在窗口的右下角出现一个固定位置的窗口,并显示相应的内容。效果图请看下面:
相关文章
 这篇文章主要介绍了通过Javascript实现的简单富文本编辑器,需要的朋友可以参考下2014-06-06
 这篇文章主要介绍了小程序封装wx.request请求并创建接口管理文件2019-04-04
 最近在做一个简单的鼠标onmouseover时显示层(层里面有多个链接文字),onmouseout 时隐藏层的功能时,发现有诸多问题.2010-07-07
 这篇文章主要为大家详细介绍了js观察者模式的弹幕案例,文中示例代码介绍的非常详细,具有一定的参考价值,感兴趣的小伙伴们可以参考一下2020-11-11
 本文给大家分享的是javascript结合Canvas 实现简易的圆形时钟,主要是对自己前段时间学习html5的canvas的一次小检验,这里推荐给小伙伴们,有需要的可以参考下。2015-03-03
javascript设计模式 – 组合模式原理与应用实例分析
这篇文章主要介绍了javascript设计模式 – 组合模式,结合实例形式分析了javascript组合模式相关概念、原理、应用场景及相关使用注意事项,需要的朋友可以参考下2020-04-04 这篇文章主要介绍了Javascript异步执行不按顺序解决方案,文中通过示例代码介绍的非常详细,对大家的学习或者工作具有一定的参考学习价值,需要的朋友可以参考下2020-04-04
 这篇文章主要给大家介绍了关于原生微信小程序中封装一个模拟select下拉框组件的相关资料,文中介绍了如何在小程序中创建和使用自定义组件van-select,包括组件的创建步骤和在页面中的应用方法,需要的朋友可以参考下2024-11-11
JavaScript使用HTML5的window.postMessage实现跨域通信例子
这篇文章主要介绍了JavaScript使用HTML5的window.postMessage实现跨域通信例子,需要的朋友可以参考下2014-04-04 这篇文章主要介绍了ES6知识点整理之函数数组参数的默认值及其解构应用,结合实例形式分析了ES6函数数组参数解构赋值和默认值的设置相关操作技巧,需要的朋友可以参考下2019-04-04


最新评论