
Python 实现给图片加文字或logo水印
更新时间:2021年11月22日 09:26:14 作者:剑客阿良_ALiang
本文主要为大家介绍了给图片添加文字或者logo图片水印的python工具,从而打造你的专属图片。代码简洁易懂,感兴趣的小伙伴可以了解一下
前言
本文提供给图片添加文字或者logo图片水印的python工具,打造专属图片。
环境依赖
ffmpeg环境安装,ffmpy安装:
pip install ffmpy -i https://pypi.douban.com/simple
代码
上代码。
#!/user/bin/env python
# coding=utf-8
"""
@project : csdn
@author  : 剑客阿良_ALiang
@file   : image_add_watermark_tool.py
@ide    : PyCharm
@time   : 2021-11-20 14:18:13
"""
import os
import uuid
from ffmpy import FFmpeg


# 图片加文字水印
def image_add_text(
        image_path: str,
        output_dir: str,
        text: str,
        font_name: str,
        font_size=100,
        position=(0, 0),
        font_color='blue',
        box=1,
        box_color='white'):
    ext = _check_format(image_path)
    result = os.path.join(output_dir, '{}.{}'.format(uuid.uuid4(), ext))
    ff = FFmpeg(
        inputs={
            image_path: None},
        outputs={
            result: '-vf drawtext=\"fontsize={}:fontfile={}:text=\'{}\':x={}:y={}:fontcolor={}:box={}:boxcolor={}\"'.format(
                font_size,
                font_name,
                text,
                position[0],
                position[1],
                font_color,
                box,
                box_color)})
    print(ff.cmd)
    ff.run()
    return result


# 图片添加logo
def image_add_logo(
        image_path: str,
        output_dir: str,
        logo_path: str,
        position=(0, 0)):
    ext = _check_format(image_path)
    result = os.path.join(output_dir, '{}.{}'.format(uuid.uuid4(), ext))
    filter_cmd = '-vf \"movie=\'{}\' [wm];[in] [wm]overlay={}:{} [out]\"'
    ff = FFmpeg(
        inputs={
            image_path: None}, outputs={
            result: filter_cmd.format(logo_path, position[0], position[1])})
    print(ff.cmd)
    ff.run()
    return result


def _check_format(image_path: str):
    ext = os.path.basename(image_path).strip().split('.')[-1]
    if ext not in ['png', 'jpg']:
        raise Exception('format error')
    return ext
代码说明
1、image_add_text方法给图片添加文字水印方法,主要参数为:图片路径、输出目录、
水印文字、字体名称、字体大小(默认100)、文字左上角坐标(默认0:0)、文字颜色(默认蓝色)、是否需要背景(默认需要为1,不需要为0)、背景色(默认白色)。
2、image_add_logo方法给图片添加logo,主要参数为:图片路径、输出目录、logo图片地址、文字左上角坐标(默认0:0)。
3、注意logo地址如果有类似C:/这种windows盘的路径情况,需要对":"进行转义。后面验证的时候,可以看看我给的参数。
4、文件名为了避免重复,采用了uuid作为文件名。
5、图片后缀格式校验只有两种,按需添加即可。
验证一下
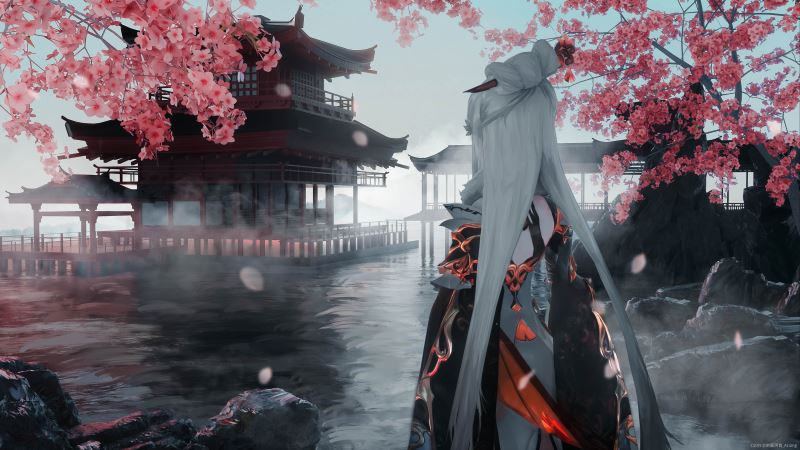
准备的素材如下,分别为图片与logo图
验证代码
if __name__ == '__main__':
    print(
        image_add_text(
            'C:/Users/huyi/Desktop/1.jpg',
            'C:/Users/huyi/Desktop/', '剑客阿良_ALiang', '微软雅黑', box=0))
    print(
        image_add_logo(
            'C:/Users/huyi/Desktop/1.jpg',
            'C:/Users/huyi/Desktop/', 'C\\:/Users/huyi/Desktop/logo.png', (30, 10)))
注意我给出的logo地址路径有什么不同。
执行结果
PyDev console: starting.
Python 3.6.13 |Anaconda, Inc.| (default, Mar 16 2021, 11:37:27) [MSC v.1916 64 bit (AMD64)] on win32
runfile('D:/spyder/csdn/image_add_watermark_tool.py', wdir='D:/spyder/csdn')
ffmpeg -i C:/Users/huyi/Desktop/1.jpg -vf drawtext=fontsize=100:fontfile=微软雅黑:text='剑客阿良_ALiang':x=0:y=0:fontcolor=blue:box=0:boxcolor=white C:/Users/huyi/Desktop/2226d7e0-5166-4ffd-ba95-9ca7d9d6f72d.jpg
ffmpeg version n4.3.1-20-g8a2acdc6da Copyright (c) 2000-2020 the FFmpeg developers
  built with gcc 9.3-win32 (GCC) 20200320
  configuration: --prefix=/ffbuild/prefix --pkg-config-flags=--static --pkg-config=pkg-config --cross-prefix=x86_64-w64-mingw32- --arch=x86_64 --target-os=mingw32 --enable-gpl --enable-version3 --disable-debug --enable-iconv --enable-zlib --enable-libxml2 --enable-libfreetype --enable-libfribidi --enable-gmp --enable-lzma --enable-fontconfig --enable-libvmaf --disable-vulkan --enable-libvorbis --enable-amf --enable-libaom --enable-avisynth --enable-libdav1d --enable-ffnvcodec --enable-cuda-llvm --disable-libglslang --enable-libass --enable-libbluray --enable-libmp3lame --enable-libopus --enable-libtheora --enable-libvpx --enable-libwebp --enable-libmfx --enable-libopencore-amrnb --enable-libopencore-amrwb --enable-libopenjpeg --enable-librav1e --enable-schannel --enable-sdl2 --enable-libsoxr --enable-libsrt --enable-libtwolame --enable-libvidstab --enable-libx264 --enable-libx265 --enable-libxvid --enable-libzimg --extra-cflags=-DLIBTWOLAME_STATIC --extra-cxxflags= --extra-ldflags=-pthread --extra-libs=-lgomp
  libavutil      56. 51.100 / 56. 51.100
  libavcodec     58. 91.100 / 58. 91.100
  libavformat    58. 45.100 / 58. 45.100
  libavdevice    58. 10.100 / 58. 10.100
  libavfilter     7. 85.100 /  7. 85.100
  libswscale      5.  7.100 /  5.  7.100
  libswresample   3.  7.100 /  3.  7.100
  libpostproc    55.  7.100 / 55.  7.100
Input #0, image2, from 'C:/Users/huyi/Desktop/1.jpg':
  Duration: 00:00:00.04, start: 0.000000, bitrate: 181106 kb/s
    Stream #0:0: Video: mjpeg (Progressive), yuvj444p(pc, bt470bg/unknown/unknown), 3840x2160, 25 tbr, 25 tbn, 25 tbc
Stream mapping:
  Stream #0:0 -> #0:0 (mjpeg (native) -> mjpeg (native))
Press [q] to stop, [?] for help
Fontconfig error: Cannot load default config file
[Parsed_drawtext_0 @ 0000014152ea5400] Using "C:/Windows/fonts/msyh.ttc"
Output #0, image2, to 'C:/Users/huyi/Desktop/2226d7e0-5166-4ffd-ba95-9ca7d9d6f72d.jpg':
  Metadata:
    encoder         : Lavf58.45.100
    Stream #0:0: Video: mjpeg, yuvj444p(pc), 3840x2160, q=2-31, 200 kb/s, 25 fps, 25 tbn, 25 tbc
    Metadata:
      encoder         : Lavc58.91.100 mjpeg
    Side data:
      cpb: bitrate max/min/avg: 0/0/200000 buffer size: 0 vbv_delay: N/A
frame=    1 fps=0.0 q=11.5 Lsize=N/A time=00:00:00.04 bitrate=N/A speed=0.158x
video:634kB audio:0kB subtitle:0kB other streams:0kB global headers:0kB muxing overhead: unknown
C:/Users/huyi/Desktop/2226d7e0-5166-4ffd-ba95-9ca7d9d6f72d.jpg
ffmpeg -i C:/Users/huyi/Desktop/1.jpg -vf "movie='C\:/Users/huyi/Desktop/logo.png' [wm];[in] [wm]overlay=30:10 [out]" C:/Users/huyi/Desktop/c626411e-531f-4dab-9a78-8103d92bbf1d.jpg
ffmpeg version n4.3.1-20-g8a2acdc6da Copyright (c) 2000-2020 the FFmpeg developers
  built with gcc 9.3-win32 (GCC) 20200320
  configuration: --prefix=/ffbuild/prefix --pkg-config-flags=--static --pkg-config=pkg-config --cross-prefix=x86_64-w64-mingw32- --arch=x86_64 --target-os=mingw32 --enable-gpl --enable-version3 --disable-debug --enable-iconv --enable-zlib --enable-libxml2 --enable-libfreetype --enable-libfribidi --enable-gmp --enable-lzma --enable-fontconfig --enable-libvmaf --disable-vulkan --enable-libvorbis --enable-amf --enable-libaom --enable-avisynth --enable-libdav1d --enable-ffnvcodec --enable-cuda-llvm --disable-libglslang --enable-libass --enable-libbluray --enable-libmp3lame --enable-libopus --enable-libtheora --enable-libvpx --enable-libwebp --enable-libmfx --enable-libopencore-amrnb --enable-libopencore-amrwb --enable-libopenjpeg --enable-librav1e --enable-schannel --enable-sdl2 --enable-libsoxr --enable-libsrt --enable-libtwolame --enable-libvidstab --enable-libx264 --enable-libx265 --enable-libxvid --enable-libzimg --extra-cflags=-DLIBTWOLAME_STATIC --extra-cxxflags= --extra-ldflags=-pthread --extra-libs=-lgomp
  libavutil      56. 51.100 / 56. 51.100
  libavcodec     58. 91.100 / 58. 91.100
  libavformat    58. 45.100 / 58. 45.100
  libavdevice    58. 10.100 / 58. 10.100
  libavfilter     7. 85.100 /  7. 85.100
  libswscale      5.  7.100 /  5.  7.100
  libswresample   3.  7.100 /  3.  7.100
  libpostproc    55.  7.100 / 55.  7.100
Input #0, image2, from 'C:/Users/huyi/Desktop/1.jpg':
  Duration: 00:00:00.04, start: 0.000000, bitrate: 181106 kb/s
    Stream #0:0: Video: mjpeg (Progressive), yuvj444p(pc, bt470bg/unknown/unknown), 3840x2160, 25 tbr, 25 tbn, 25 tbc
Stream mapping:
  Stream #0:0 -> #0:0 (mjpeg (native) -> mjpeg (native))
Press [q] to stop, [?] for help
[swscaler @ 000001d6cc29ad80] deprecated pixel format used, make sure you did set range correctly
Output #0, image2, to 'C:/Users/huyi/Desktop/c626411e-531f-4dab-9a78-8103d92bbf1d.jpg':
  Metadata:
    encoder         : Lavf58.45.100
    Stream #0:0: Video: mjpeg, yuvj420p(pc), 3840x2160, q=2-31, 200 kb/s, 25 fps, 25 tbn, 25 tbc
    Metadata:
      encoder         : Lavc58.91.100 mjpeg
    Side data:
      cpb: bitrate max/min/avg: 0/0/200000 buffer size: 0 vbv_delay: N/A
[Parsed_movie_0 @ 000001d6cc40bd80] EOF timestamp not reliable
frame=    1 fps=0.0 q=11.4 Lsize=N/A time=00:00:00.04 bitrate=N/A speed=0.176x
video:455kB audio:0kB subtitle:0kB other streams:0kB global headers:0kB muxing overhead: unknown
C:/Users/huyi/Desktop/c626411e-531f-4dab-9a78-8103d92bbf1d.jpg
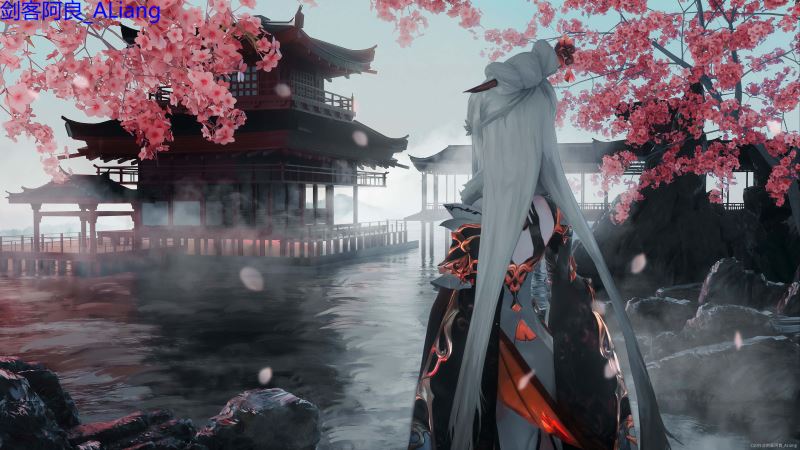
加文字水印效果
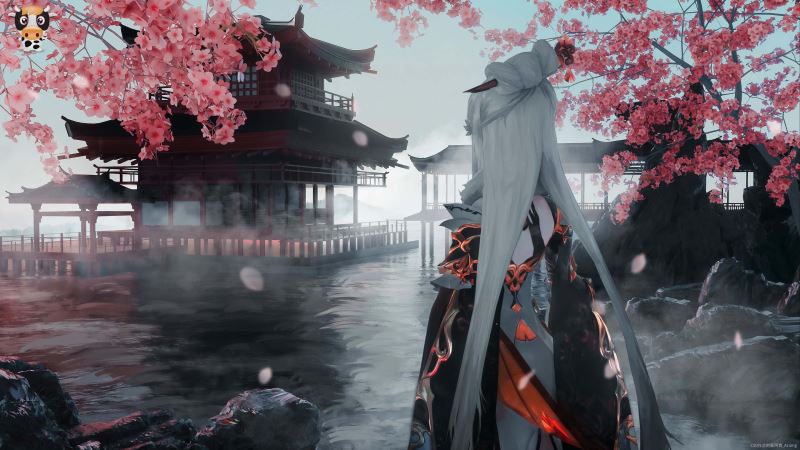
加logo效果
以上就是Python 实现给图片加文字或logo水印的详细内容,更多关于Python 图片水印的资料请关注脚本之家其它相关文章!
相关文章
 这篇文章主要为大家介绍了Python类和对象,具有一定的参考价值,感兴趣的小伙伴们可以参考一下,希望能够给你带来帮助2021-12-12
Pandas读取excel合并单元格的正确方式(openpyxl合并单元格拆分并填充内容)
Excel文件中可能包含合并单元格的数据,下面这篇文章主要给大家介绍了关于Pandas读取excel合并单元格的正确方式,主要介绍的openpyxl合并单元格拆分并填充内容,需要的朋友可以参考下2023-06-06 本文给大家分享的是 Flask 数据库迁移详情,db.create_all()不会重新创建表或是更新表,需要先使用db.drop_all()删除数据库中所有的表之后再调用db.create_all()才能重新创建表,但是这样的话,原来表中的数据就都被删除了,这肯定是不行的,这时就出现了数据库迁移的概念2021-11-11
Deepsort + Yolo 实现行人检测和轨迹追踪的方法
这篇文章主要介绍了Deepsort + Yolo 实现行人检测和轨迹追踪,本项目通过采用深度学习方法实现YOLO算法行人检测和deepsort算法对人员定位的和轨迹跟踪,需要的朋友可以参考下2021-09-09 在使用Excel进行数据分析或报告制作时,页面设置是确保最终输出效果专业、美观的关键步骤,合理的页面设置不仅能够优化打印效果,还能提升数据的可读性,本文将详细介绍如何使用Python操作Excel中的各项页面设置功能,需要的朋友可以参考下2024-08-08
 这篇文章主要介绍了python中gevent库的用法详情,Greenlet全部运行在主程序操作系统的过程中,但是它们是协作调度的,文章围绕主题展开详细的内容介绍,具有一定的参考价值2022-07-07
 大家好,本篇文章主要讲的是用python的seaborn画数值箱型图,感兴趣的同学赶快来看一看吧,对你有帮助的话记得收藏一下2022-01-01
 这篇文章主要介绍了python base64库给用户名或密码加密,需要的朋友可以参考下2020-01-01
 这篇文章主要为大家详细介绍了python实现126邮箱发送邮件,文中示例代码介绍的非常详细,具有一定的参考价值,感兴趣的小伙伴们可以参考一下2020-05-05
 这篇文章主要介绍了举例详解Python中的split()函数的使用方法,split()函数的使用是Python学习当中的基础知识,通常用于将字符串切片并转换为列表,需要的朋友可以参考下2015-04-04


最新评论