centos 系统下安装配置FastDFS步骤分享
发布时间:2012-09-16 12:05:47 作者:佚名  我要评论
我要评论
FastDFS是一个开源的轻量级分布式文件系统,它对文件进行管理,功能包括:文件存储、文件同步、文件访问(文件上传、文件下载)等,解决了大容量存储和负载均衡的问题。特别适合以文件为载体的在线服务,如相册网站、视频网站等等
centos 系统下安装配置FastDFS步骤:
1:安装libevent(libevent-2.0.16-stable)
##卸载系统自带libevent
rpm -qa|grep libevent rpm -e libevent*
##为Trackerd和Storaged节点节点安装libevent
cd /home/ylh
wget http://unclelu-server.googlecode.com/files/libevent-2.0.16-stable.tar.gz
tar -zxvf libevent-2.0.16-stable.tar.gz
cd libevent-2.0.16-stable
make clean
./configure
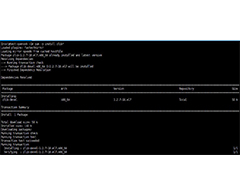
make && make install
##为libevent创建软链接到/lib库下,64位系统对应/lib64
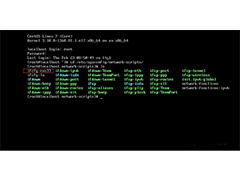
ln -s /usr/local/lib/libevent* /lib/
ln -s /usr/local/lib/libevent* /lib64/
2:为Trackerd节点安装FastDFS,并修改配置文件/etc/fdfs/tracker.conf( 如果Trackerd需要使用内置的web server,需要修改make文件,启用WITH_HTTPD=1再编译)
cd /home/ylh
wget http://fastdfs.googlecode.com/files/FastDFS_v3.06.tar.gz
tar -zxvf FastDFS_v3.06.tar.gz
cd FastDFS_v3.06
./make.sh
./make.sh install
##创建存储目录
mkdir /home/ylh/fastdfs
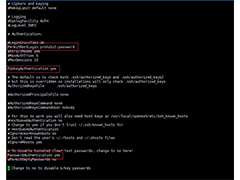
##修改配置文件. vim /etc/fdfs/tracker.conf 修改后保存退出
##启动Trackerd
/usr/local/bin/fdfs_trackerd /etc/fdfs/tracker.conf
3:为Storaged节点安装FastDFS, Storaged节点也需要libevent,安装步骤参见第一步
cd /home/ylh
wget http://fastdfs.googlecode.com/files/FastDFS_v3.06.tar.gz
tar -zxvf FastDFS_v3.06.tar.gz
cd FastDFS_v3.06
./make.sh
./make.sh install
4:为Storaged节点安装web服务器,Storaged节点可以使用nginx或者apache提供http下载服务。这里我们选用nginx。
cd /home/ylh
wget http://nginx.org/download/nginx-0.8.55.tar.gz
tar zxvf nginx-0.8.55.tar.gz
cd nginx-0.8.55
./configure –prefix=/opt/nginx –with-http_stub_status_module
make && make install
5:为Storaged节点安装fastdfs-nginx-module
cd /home/ylh
wget http://fastdfs.googlecode.com/files/fastdfs-nginx-module_v1.10.tar.gz
tar xzf fastdfs_nginx_module_v1.05.tar.gz
cd /home/ylh/nginx-0.8.55 ./configure –add-module=/home/ylh/fastdfs-nginx-module/src
make; make install
6:修改nginx配置文件并保存退出 (vim /usr/local/nginx/conf/nginx.conf)
location /M00 {
root /home/ylh/fastdfs/data;
ngx_fastdfs_module;
}
7:拷贝并修改nginx模块配置文件
cp /home/ylh/fastdfs-nginx-module/src/mod_fastdfs.conf /etc/fdfs
vim 修改/etc/fdfs/mod_fastdfs.conf 保存退出
##启动nginx
/usr/local/nginx/sbin/nginx
8:修改Storaged节点的配置文件/etc/fdfs/storage.conf,启动Storaged
##创建存储目录 mkdir /home/ylh/fastdfs
##修改配置 vim /etc/fdfs/storage.conf 修改后保存退出
##启动 Storaged
/usr/local/bin/fdfs_storaged /etc/fdfs/storage.conf
9:测试
## 修改客户端配置文件/etc/conf/client.conf文件并保存退出
##测试上传
/usr/local/bin/ fs_test /etc/conf/client.conf upload /home/a.jpg
如果上传成功回显信息中有文件的url,在浏览器中,输入url地址, tracker server会自动重定向到存储文件的storage server,文件下载成功。
至此,已经成功搭建了FastDFS
相关文章
 虚拟机安装CentOS后没有网络了不能上网,该怎么设置网络呢?下面我们就来看看这个问题的解决办法,详细请看下文图文介绍2024-01-18
虚拟机怎么安装CentOS? 安装CentOS操作系统的保姆级图文教程
虚拟机想要安装CentOS操作系统,但是CentOS操作系统已经停止维护了,该怎么安装呢?详细请看下文图文教程2024-01-18
Centos7.8怎么更新openssh? Centos升级openssh的技巧
Centos7.8怎么更新openssh?Centos7.8系统想要安装openssh,该怎么安装呢?下面我们就来看看Centos升级openssh的技巧2023-09-02
Centos7.8怎么更新openssl? CentOS升级OpenSSL的技巧
Centos7.8怎么更新openssl?Centos7.8系统想要升级OpenSSL,该怎么升级呢?详细请看下文介绍2023-09-02- centos7没有图形化操作可能对很多人来说都不太习惯,下面我们来为centos7安装图形化界面,本文以安装 GNOME 图形化为例,需要的朋友可以参考下2023-06-29
- 今天小编在安装RHEL7的时候,一步留神没有安装图形化桌面,下面分享一下安装图形化桌面的过程,需要的朋友可以参考下2023-06-29
CentOS7各个版本镜像下载地址及版本说明(包括Everything版)
下载CentOS-7.0-1406的时候,有很多可选则的版本,对于普通用户来说,不知道选择哪个好,下面做一下简单介绍,需要的朋友可以参考下2023-06-01
Centos 7怎么手动配置ip地址? Centos7配置IP地址的技巧
Centos 7怎么手动配置ip地址?Centos 7系统想要自己配置ip地址,该怎么操作呢?下面我们就来看看Centos7配置IP地址的技巧2023-05-17- 这篇文章主要介绍了Centos 7 压缩与解压缩命令小结,需要的朋友可以参考下2023-03-28
 由于centos8 在2022年停止服务,后继版本为8-steam。在使用阿里云的 centos8 的 yum 时报错,这篇文章主要介绍了CentOS8使用阿里云yum源异常的解决方法,需要的朋友可以参考2022-04-19


最新评论