
Python实现检索指定网段内所有的数据库服务器
更新时间:2025年02月06日 09:35:02 作者:mosquito_lover1
这篇文章主要为大家详细介绍了如何使用Python实现检索指定网段内所有的数据库服务器,文中的示例代码讲解详细,感兴趣的小伙伴可以了解下
功能介绍
图形化界面,使用tkinter实现
可以输入单个IP地址或CIDR格式的网段
支持扫描Oracle、SQL Server、MySQL、PostgreSQL和SQLite五种数据库
实时显示扫描结果,并按数据库类型分类显示
显示每种数据库类型的发现数量
可以随时停止扫描
多线程实现,不会卡住界面
不会弹出命令行窗口
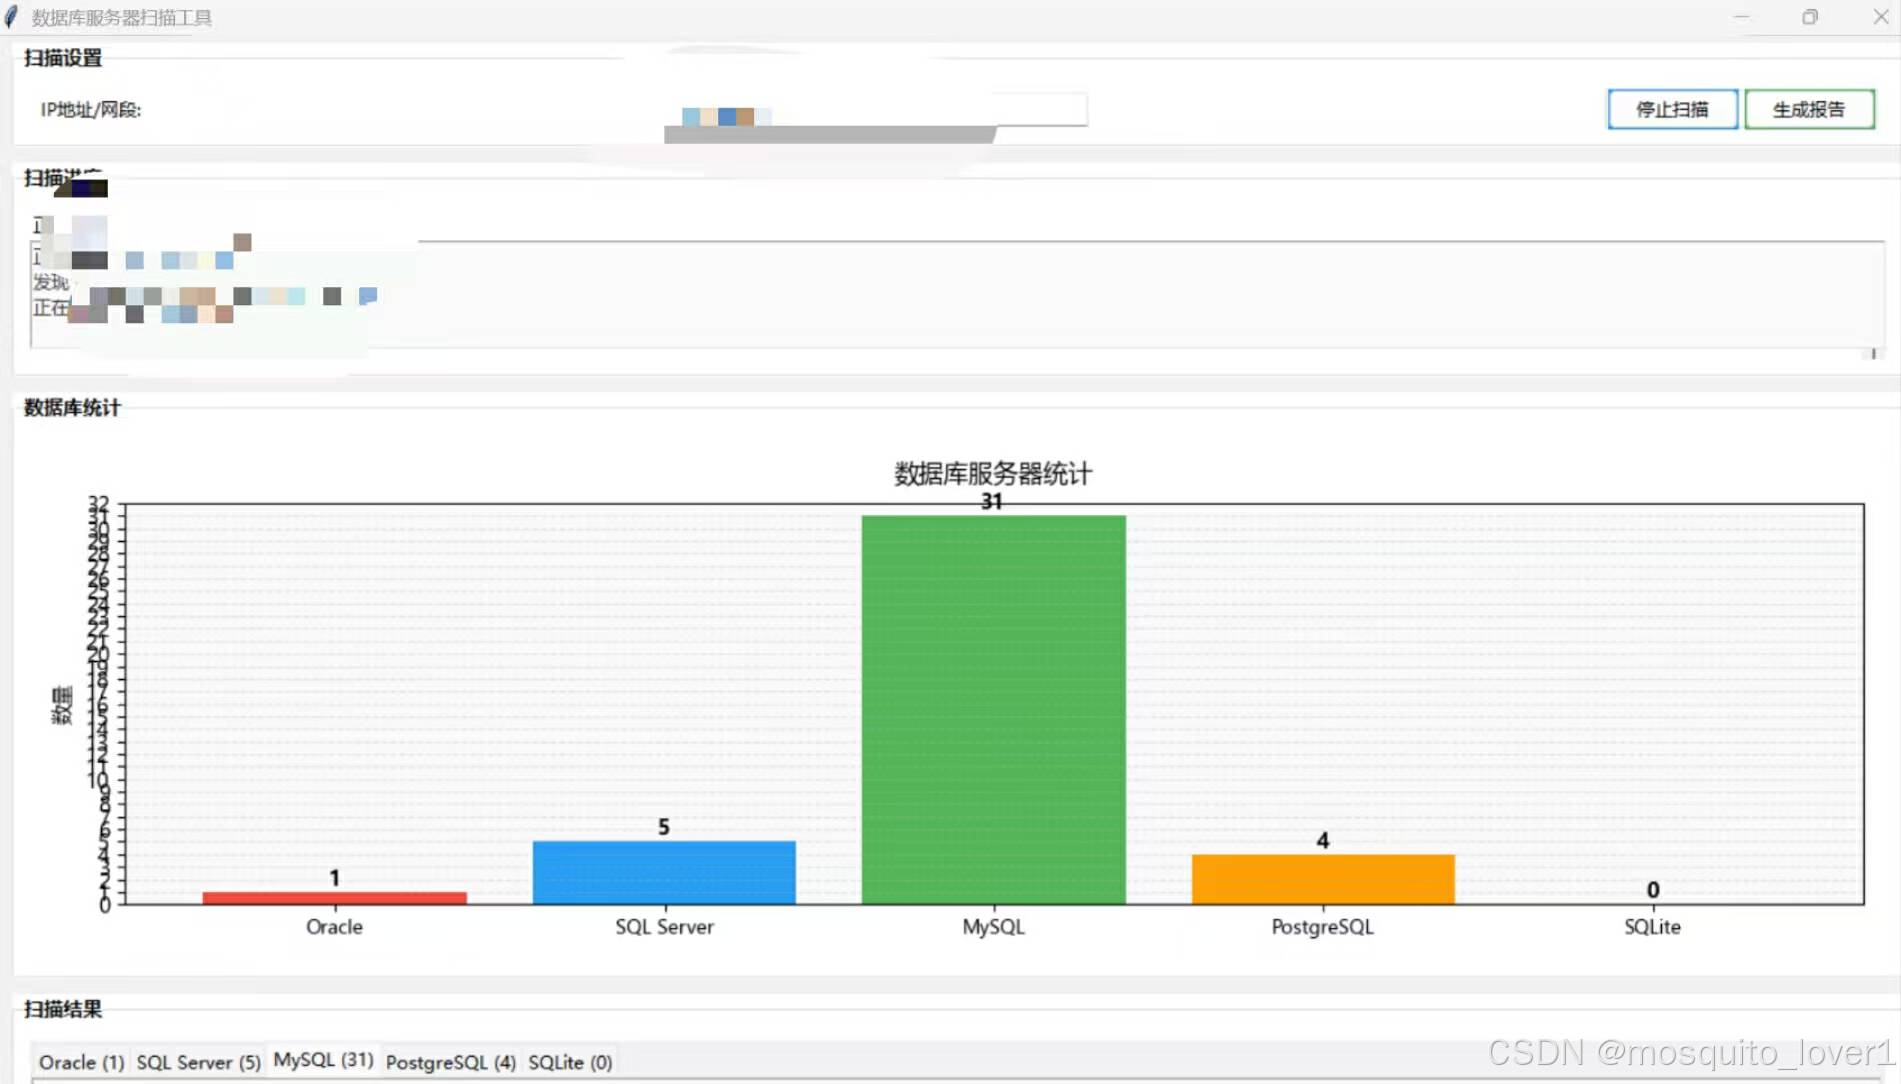
界面截图
核心源码
import tkinter as tk
from tkinter import ttk, messagebox, filedialog
import threading
import ipaddress
import socket
import queue
import time
import xml.etree.ElementTree as ET
from datetime import datetime
import os
import matplotlib.pyplot as plt
from matplotlib.figure import Figure
from matplotlib.backends.backend_tkagg import FigureCanvasTkAgg
import matplotlib
matplotlib.use('TkAgg')

class DatabaseScanner:
    def __init__(self):
        self.root = tk.Tk()
        self.root.title("数据库服务器扫描工具")

        # 获取屏幕尺寸
        screen_width = self.root.winfo_screenwidth()
        screen_height = self.root.winfo_screenheight()

        # 设置窗口初始大小为屏幕的80%宽度和90%高度
        window_width = int(screen_width * 0.8)
        window_height = int(screen_height * 0.9)  # 增加高度比例

        # 计算窗口位置使其居中
        x = (screen_width - window_width) // 2
        y = (screen_height - window_height) // 2

        # 设置窗口大小和位置
        self.root.geometry(f"{window_width}x{window_height}+{x}+{y}")

        # 设置窗口最小尺寸
        self.root.minsize(800, 800)  # 增加最小高度

        # 设置主题色
        self.colors = {
            'bg': '#f0f0f0',
            'frame_bg': '#ffffff',
            'button': '#2196f3',
            'button_hover': '#1976d2',
            'success': '#4caf50',
            'warning': '#ff9800',
            'error': '#f44336'
        }

        # 设置样式
        self.style = ttk.Style()
        self.style.configure('Main.TLabelframe', background=self.colors['frame_bg'])
        self.style.configure('Main.TLabelframe.Label', background=self.colors['frame_bg'],
                           font=('微软雅黑', 10, 'bold'))
        self.style.configure('Scan.TButton', background=self.colors['button'],
                           font=('微软雅黑', 9))
        self.style.configure('Report.TButton', background=self.colors['success'],
                           font=('微软雅黑', 9))

        # 创建数据存储变量
        self.scan_running = False
        self.result_queue = queue.Queue()
        self.db_results = {
            'Oracle': [],
            'SQL Server': [],
            'MySQL': [],
            'PostgreSQL': [],
            'SQLite': []
        }

        self.root.configure(bg=self.colors['bg'])
        self.setup_ui()

    def setup_ui(self):
        # 创建主框架,使用grid布局
        main_frame = ttk.Frame(self.root)
        main_frame.grid(row=0, column=0, sticky="nsew")

        # 配置root和main_frame的grid权重
        self.root.grid_rowconfigure(0, weight=1)
        self.root.grid_columnconfigure(0, weight=1)

        # 调整各区域的相对大小比例
        main_frame.grid_rowconfigure(0, weight=0)  # 扫描设置固定高度
        main_frame.grid_rowconfigure(1, weight=1)  # 进度日志区域
        main_frame.grid_rowconfigure(2, weight=3)  # 增加图表区域的比例
        main_frame.grid_rowconfigure(3, weight=4)  # 增加结果区域的比例
        main_frame.grid_columnconfigure(0, weight=1)

        # 输入框框架
        input_frame = ttk.LabelFrame(main_frame, text="扫描设置", padding=10, style='Main.TLabelframe')
        input_frame.grid(row=0, column=0, sticky="ew", padx=10, pady=5)

        ttk.Label(input_frame, text="IP地址/网段:", background=self.colors['frame_bg'],
                 font=('微软雅黑', 9)).grid(row=0, column=0, padx=5)
        self.ip_entry = ttk.Entry(input_frame, width=40, font=('微软雅黑', 9))
        self.ip_entry.grid(row=0, column=1, padx=5)
        self.ip_entry.insert(0, "192.168.1.0/24")

        button_frame = ttk.Frame(input_frame, style='Main.TLabelframe')
        button_frame.grid(row=0, column=2, padx=5)

        self.scan_button = ttk.Button(button_frame, text="开始扫描",
                                    command=self.start_scan, style='Scan.TButton')
        self.scan_button.pack(side=tk.LEFT, padx=2)

        self.report_button = ttk.Button(button_frame, text="生成报告",
                                      command=self.generate_report, style='Report.TButton')
        self.report_button.pack(side=tk.LEFT, padx=2)

        # 配置input_frame的列权重
        input_frame.columnconfigure(1, weight=1)

        # 进度日志框架
        log_frame = ttk.LabelFrame(main_frame, text="扫描进度", padding=10, style='Main.TLabelframe')
        log_frame.grid(row=1, column=0, sticky="ew", padx=10, pady=5)

        self.progress_var = tk.StringVar(value="等待开始扫描...")
        self.progress_label = ttk.Label(log_frame, textvariable=self.progress_var,
                                      background=self.colors['frame_bg'],
                                      font=('微软雅黑', 9))
        self.progress_label.pack(fill=tk.X)

        self.log_text = tk.Text(log_frame, height=4, font=('微软雅黑', 9))
        self.log_text.pack(fill=tk.BOTH, expand=True)
        self.log_text.configure(bg='#fafafa', fg='#333333')
        log_scrollbar = ttk.Scrollbar(log_frame, command=self.log_text.yview)
        log_scrollbar.pack(side=tk.RIGHT, fill=tk.Y)
        self.log_text.config(yscrollcommand=log_scrollbar.set)

        # 添加统计图表框架
        chart_frame = ttk.LabelFrame(main_frame, text="数据库统计", padding=10, style='Main.TLabelframe')
        chart_frame.grid(row=2, column=0, sticky="nsew", padx=10, pady=5)

        # 创建图表
        self.figure = Figure(dpi=100)  # 移除固定figsize
        self.figure.patch.set_facecolor(self.colors['frame_bg'])
        self.chart_ax = self.figure.add_subplot(111)
        self.canvas = FigureCanvasTkAgg(self.figure, master=chart_frame)
        self.canvas.get_tk_widget().pack(fill=tk.BOTH, expand=True)

        # 初始化图表
        self.update_chart()

        # 结果显示框架
        result_frame = ttk.LabelFrame(main_frame, text="扫描结果", padding=10, style='Main.TLabelframe')
        result_frame.grid(row=3, column=0, sticky="nsew", padx=10, pady=5)

        # 创建数据库类型标签页
        self.notebook = ttk.Notebook(result_frame)
        self.notebook.pack(fill=tk.BOTH, expand=True)

        # 为不同数据库类型设置不同的颜色
        db_colors = {
            'Oracle': '#f44336',
            'SQL Server': '#2196f3',
            'MySQL': '#4caf50',
            'PostgreSQL': '#ff9800',
            'SQLite': '#9c27b0'
        }

        self.db_text_widgets = {}
        for db_type in self.db_results.keys():
            frame = ttk.Frame(self.notebook, style='Main.TLabelframe')
            self.notebook.add(frame, text=f"{db_type} (0)")

            text_widget = tk.Text(frame, height=8, font=('微软雅黑', 9))
            text_widget.pack(fill=tk.BOTH, expand=True)
            text_widget.configure(bg='#fafafa', fg=db_colors[db_type])
            scrollbar = ttk.Scrollbar(frame, command=text_widget.yview)
            scrollbar.pack(side=tk.RIGHT, fill=tk.Y)
            text_widget.config(yscrollcommand=scrollbar.set)

            self.db_text_widgets[db_type] = text_widget

        # 绑定窗口大小改变事件
        self.root.bind('<Configure>', self.on_window_resize)

    def on_window_resize(self, event):
        """当窗口大小改变时调整图表大小"""
        if hasattr(self, 'canvas'):
            # 延迟更新以避免频繁刷新
            self.root.after_cancel(self._resize_job) if hasattr(self, '_resize_job') else None
            self._resize_job = self.root.after(100, self.update_chart)

    def validate_ip_input(self, ip_input):
        try:
            if '/' in ip_input:  # CIDR格式
                ipaddress.ip_network(ip_input, strict=False)
            else:  # 单个IP地址
                ipaddress.ip_address(ip_input)
            return True
        except ValueError:
            return False

    def start_scan(self):
        if self.scan_running:
            self.scan_running = False
            self.scan_button.config(text="开始扫描")
            return

        ip_input = self.ip_entry.get().strip()
        if not self.validate_ip_input(ip_input):
            messagebox.showerror("错误", "请输入有效的IP地址或网段")
            return

        # 清空之前的结果
        for db_type in self.db_results:
            self.db_results[db_type] = []
            self.db_text_widgets[db_type].delete(1.0, tk.END)
            self.notebook.tab(list(self.db_results.keys()).index(db_type), text=f"{db_type} (0)")

        # 重置图表
        self.update_chart()

        self.scan_running = True
        self.scan_button.config(text="停止扫描")

        # 启动扫描线程
        scan_thread = threading.Thread(target=self.scan_network, args=(ip_input,))
        scan_thread.daemon = True
        scan_thread.start()

        # 启动更新UI的线程
        self.root.after(100, self.update_results)

    def scan_network(self, ip_input):
        try:
            if '/' in ip_input:  # 网段
                network = ipaddress.ip_network(ip_input, strict=False)
                ip_list = list(network.hosts())
            else:  # 单个IP
                ip_list = [ipaddress.ip_address(ip_input)]

            total_ips = len(ip_list)
            for index, ip in enumerate(ip_list, 1):
                if not self.scan_running:
                    break

                ip_str = str(ip)
                progress = f"正在扫描: {ip_str} ({index}/{total_ips})"
                self.result_queue.put(("progress", progress))
                self.result_queue.put(("log", f"正在扫描 {ip_str}...\n"))

                # 检查各种数据库端口
                self.check_database_ports(ip_str)

        except Exception as e:
            self.result_queue.put(("error", f"扫描出错: {str(e)}"))

        finally:
            self.scan_running = False
            self.result_queue.put(("progress", "扫描完成"))
            self.result_queue.put(("log", "扫描已完成\n"))
            self.root.after(0, lambda: self.scan_button.config(text="开始扫描"))

    def check_database_ports(self, ip):
        # 定义数据库默认端口
        db_ports = {
            'Oracle': [1521],
            'SQL Server': [1433],
            'MySQL': [3306],
            'PostgreSQL': [5432],
            'SQLite': []  # SQLite是文件型数据库,没有网络端口
        }

        for db_type, ports in db_ports.items():
            for port in ports:
                try:
                    sock = socket.socket(socket.AF_INET, socket.SOCK_STREAM)
                    sock.settimeout(1)
                    result = sock.connect_ex((ip, port))
                    if result == 0:
                        self.result_queue.put(("found", db_type, ip, port))
                    sock.close()
                except:
                    continue

    def update_chart(self):
        """更新统计图表"""
        self.chart_ax.clear()

        # 获取图表区域的大小
        chart_width = self.canvas.get_tk_widget().winfo_width()
        chart_height = self.canvas.get_tk_widget().winfo_height()

        # 调整图表的纵横比
        aspect_ratio = chart_height / chart_width

        # 根据窗口大小调整图表尺寸,保持合适的纵横比
        self.figure.set_size_inches(chart_width/100, (chart_width * aspect_ratio)/100)

        # 准备数据
        db_types = list(self.db_results.keys())
        counts = [len(ips) for ips in self.db_results.values()]
        colors = ['#f44336', '#2196f3', '#4caf50', '#ff9800', '#9c27b0']

        # 创建柱状图
        bars = self.chart_ax.bar(db_types, counts, color=colors)

        # 设置图表样式
        plt.rcParams['font.sans-serif'] = ['Microsoft YaHei']  # 使用微软雅黑字体
        plt.rcParams['axes.unicode_minus'] = False

        self.chart_ax.set_ylabel('数量', fontsize=10)
        self.chart_ax.set_title('数据库服务器统计', fontsize=12, pad=10)

        # 设置Y轴范围和刻度
        max_count = max(counts) if counts else 0
        self.chart_ax.set_ylim(0, max_count + 1 if max_count > 0 else 1)
        self.chart_ax.yaxis.set_ticks(range(0, int(max_count + 2)))

        # 设置背景颜色和网格
        self.figure.patch.set_facecolor(self.colors['frame_bg'])
        self.chart_ax.set_facecolor('#f8f9fa')
        self.chart_ax.grid(True, axis='y', linestyle='--', alpha=0.3)

        # 美化X轴标签
        self.chart_ax.set_xticklabels(db_types, rotation=0, fontsize=9)

        # 在柱子上显示具体数值
        for bar in bars:
            height = bar.get_height()
            self.chart_ax.text(bar.get_x() + bar.get_width()/2., height,
                             f'{int(height)}',
                             ha='center', va='bottom',
                             fontsize=10,
                             fontweight='bold')

        # 调整布局,确保所有元素都能显示
        self.figure.tight_layout()

        # 刷新画布
        self.canvas.draw()

    def update_results(self):
        while not self.result_queue.empty():
            message = self.result_queue.get()
            if message[0] == "found":
                _, db_type, ip, port = message
                if ip not in self.db_results[db_type]:
                    self.db_results[db_type].append(ip)
                    self.db_text_widgets[db_type].insert(tk.END, f"{ip}:{port}\n")
                    self.notebook.tab(list(self.db_results.keys()).index(db_type),
                                   text=f"{db_type} ({len(self.db_results[db_type])})")
                    self.result_queue.put(("log", f"发现 {db_type} 服务器: {ip}:{port}\n"))
                    # 更新统计图表
                    self.update_chart()
            elif message[0] == "error":
                messagebox.showerror("错误", message[1])
            elif message[0] == "progress":
                self.progress_var.set(message[1])
            elif message[0] == "log":
                self.log_text.insert(tk.END, message[1])
                self.log_text.see(tk.END)

        if self.scan_running:
            self.root.after(100, self.update_results)

    def generate_report(self):
        if not any(self.db_results.values()):
            messagebox.showwarning("警告", "没有扫描结果可供生成报告!")
            return

        try:
            # 创建XML报告
            root = ET.Element("ScanReport")
            ET.SubElement(root, "ScanTime").text = datetime.now().strftime("%Y-%m-%d %H:%M:%S")
            ET.SubElement(root, "ScanTarget").text = self.ip_entry.get()

            databases = ET.SubElement(root, "Databases")
            for db_type, ips in self.db_results.items():
                db_elem = ET.SubElement(databases, "Database")
                ET.SubElement(db_elem, "Type").text = db_type
                ET.SubElement(db_elem, "Count").text = str(len(ips))
                servers = ET.SubElement(db_elem, "Servers")
                for ip in ips:
                    server = ET.SubElement(servers, "Server")
                    server.text = ip

            # 保存文件对话框
            file_path = filedialog.asksaveasfilename(
                defaultextension=".xml",
                filetypes=[("XML files", "*.xml")],
                initialfile=f"scan_report_{datetime.now().strftime('%Y%m%d_%H%M%S')}.xml"
            )

            if file_path:
                tree = ET.ElementTree(root)
                tree.write(file_path, encoding="utf-8", xml_declaration=True)
                self.result_queue.put(("log", f"扫描报告已保存至: {file_path}\n"))
                messagebox.showinfo("成功", "扫描报告已生成!")

        except Exception as e:
            messagebox.showerror("错误", f"生成报告时出错: {str(e)}")

    def run(self):
        self.root.mainloop()

if __name__ == "__main__":
    scanner = DatabaseScanner()
    scanner.run()
到此这篇关于Python实现检索指定网段内所有的数据库服务器的文章就介绍到这了,更多相关Python检索网段内数据库服务器内容请搜索脚本之家以前的文章或继续浏览下面的相关文章希望大家以后多多支持脚本之家!
相关文章
 你会用python获取各种DOS命令显示的内容核心吗?说的可不是返回值,是用system()函数调用windows操作系统的DOS命令来做点事情,需要的朋友可以参考下2021-10-10
 这篇文章主要介绍了Python自动化操作实现图例绘制,文中通过示例代码介绍的非常详细,对大家的学习或者工作具有一定的参考学习价值,需要的朋友可以参考下2020-07-07
python使用正则表达式(Regular Expression)方法超详细
这篇文章主要介绍了python使用正则表达式(Regular Expression)方法超详细,文中通过示例代码介绍的非常详细,对大家的学习或者工作具有一定的参考学习价值,需要的朋友们下面随着小编来一起学习学习吧2019-12-12 本文介绍了如何使用 pytest-html 插件生成测试报告,并提供了详细的操作步骤、配置项和示例代码,具有一定的参考价值,感兴趣的可以了解一下2023-11-11
使用Python第三方库xlrd读取Excel中的数据的流程步骤
这篇文章主要给大家介绍了使用Python第三方库xlrd读取Excel中的数据的流程步骤,文中通过代码示例给大家介绍的非常详细,对大家的学习或工作有一定的帮助,需要的朋友可以参考下2023-12-12 本文介绍了多种在Python中判断变量是否为空的方法,包括if语句、len()函数、not关键字、bool()函数和try...except语句等,具有一档的参考价值,感兴趣的可以了解一下2024-12-12
 这篇文章主要介绍了Python控制键盘鼠标pynput的详细用法,小编觉得挺不错的,现在分享给大家,也给大家做个参考。一起跟随小编过来看看吧2019-01-01
 这篇文章主要介绍了python中的脚本性能分析,具有很好的参考价值,希望对大家有所帮助。如有错误或未考虑完全的地方,望不吝赐教2022-11-11
Python爬虫+tkinter界面实现历史天气查询的思路详解
这篇文章主要介绍了Python爬虫+tkinter界面实现历史天气查询的思路详解,本文给大家介绍的非常详细,对大家的学习或工作具有一定的参考借鉴价值,需要的朋友可以参考下2021-02-02
PyCharm 2020.1版安装破解注册码永久激活(激活到2089年)
这篇文章主要介绍了PyCharm 2020.1版安装破解注册码永久激活(激活到2089年),需要的朋友可以参考下2020-09-09


最新评论