
基于Python开发PPTX压缩工具
更新时间:2025年02月08日 15:08:14 作者:winfredzhang
在日常办公中,PPT文件往往因为图片过大而导致文件体积过大,不便于传输和存储,所以本文将使用Python开发一个PPTX压缩工具,需要的可以了解下
引言
在日常办公中,PPT文件往往因为图片过大而导致文件体积过大,不便于传输和存储。为了应对这一问题,我们可以使用Python的wxPython图形界面库结合python-pptx和Pillow,开发一个简单的PPTX压缩工具。本文将详细介绍如何实现这一功能。
全部代码
import wx
import os
from pptx import Presentation
from PIL import Image
import io

class CompressorFrame(wx.Frame):
    def __init__(self):
        super().__init__(parent=None, title='PPTX压缩工具')
        self.panel = wx.Panel(self)
        self.create_ui()

    def create_ui(self):
        vbox = wx.BoxSizer(wx.VERTICAL)

        # 文件选择部分
        hbox1 = wx.BoxSizer(wx.HORIZONTAL)
        self.file_path = wx.TextCtrl(self.panel, size=(300, -1))
        browse_btn = wx.Button(self.panel, label='选择文件')
        browse_btn.Bind(wx.EVT_BUTTON, self.on_browse)
        hbox1.Add(self.file_path, proportion=1, flag=wx.EXPAND|wx.ALL, border=5)
        hbox1.Add(browse_btn, flag=wx.ALL, border=5)

        # 压缩按钮
        compress_btn = wx.Button(self.panel, label='开始压缩')
        compress_btn.Bind(wx.EVT_BUTTON, self.on_compress)

        # 进度条
        self.progress = wx.Gauge(self.panel, range=100, size=(400, 25))

        # 状态文本
        self.status_text = wx.StaticText(self.panel, label="")

        vbox.Add(hbox1, flag=wx.EXPAND|wx.ALL, border=5)
        vbox.Add(compress_btn, flag=wx.ALIGN_CENTER|wx.ALL, border=5)
        vbox.Add(self.progress, flag=wx.EXPAND|wx.ALL, border=5)
        vbox.Add(self.status_text, flag=wx.EXPAND|wx.ALL, border=5)

        self.panel.SetSizer(vbox)
        self.Fit()

    def on_browse(self, event):
        with wx.FileDialog(self, "选择PPTX文件", wildcard="PowerPoint files (*.pptx)|*.pptx",
                         style=wx.FD_OPEN | wx.FD_FILE_MUST_EXIST) as fileDialog:
            if fileDialog.ShowModal() == wx.ID_CANCEL:
                return
            path = fileDialog.GetPath()
            path = os.path.normpath(path.strip('"'))
            self.file_path.SetValue(path)

    def update_status(self, text):
        wx.CallAfter(self.status_text.SetLabel, text)

    def on_compress(self, event):
        if not self.file_path.GetValue():
            wx.MessageBox('请先选择文件', '提示', wx.OK | wx.ICON_INFORMATION)
            return

        input_path = self.file_path.GetValue().strip('"')
        input_path = os.path.normpath(input_path)

        if not os.path.exists(input_path):
            wx.MessageBox('文件不存在,请检查路径', '错误', wx.OK | wx.ICON_ERROR)
            return

        output_path = self._get_output_path(input_path)

        try:
            self._compress_pptx(input_path, output_path)
            wx.MessageBox('压缩完成!\n保存路径:' + output_path,
                         '成功', wx.OK | wx.ICON_INFORMATION)
        except Exception as e:
            wx.MessageBox(f'压缩过程中出错:{str(e)}',
                         '错误', wx.OK | wx.ICON_ERROR)
        finally:
            self.progress.SetValue(0)
            self.update_status("")

    def _get_output_path(self, input_path):
        directory = os.path.dirname(input_path)
        filename = os.path.basename(input_path)
        name, ext = os.path.splitext(filename)
        return os.path.join(directory, f"{name}_compressed{ext}")

    def _compress_pptx(self, input_path, output_path):
        try:
            prs = Presentation(input_path)
        except Exception as e:
            raise Exception(f"无法打开PPTX文件: {str(e)}")

        total_slides = len(prs.slides)
        processed_images = 0
        skipped_images = 0

        for i, slide in enumerate(prs.slides):
            self.update_status(f"正在处理第 {i+1}/{total_slides} 张幻灯片")

            shapes_with_images = []
            for shape in slide.shapes:
                if hasattr(shape, "image"):
                    shapes_with_images.append(shape)

            for shape in shapes_with_images:
                try:
                    # 获取图片数据
                    image_bytes = shape.image.blob

                    # 使用PIL压缩图片
                    with Image.open(io.BytesIO(image_bytes)) as img:
                        # 转换RGBA为RGB
                        if img.mode == 'RGBA':
                            img = img.convert('RGB')

                        # 压缩图片
                        # 如果图片较大,调整尺寸
                        max_size = 800  # 最大尺寸为1024像素
                        if img.width > max_size or img.height > max_size:
                            ratio = min(max_size/img.width, max_size/img.height)
                            new_size = (int(img.width * ratio), int(img.height * ratio))
                            img = img.resize(new_size, Image.LANCZOS)

                        output_buffer = io.BytesIO()
                        img.save(output_buffer, format='JPEG', quality=10, optimize=True)

                        # 替换原图片
                        shape._element.blip.embed.rId = shape._element.blip.embed.rId
                        new_image = output_buffer.getvalue()

                        # 更新图片数据
                        image_part = shape.image
                        image_part._blob = new_image

                    processed_images += 1
                except Exception as e:
                    print(f"处理图片时出错: {str(e)}")
                    skipped_images += 1
                    continue

            # 更新进度条
            progress = int((i + 1) / total_slides * 100)
            wx.CallAfter(self.progress.SetValue, progress)

        self.update_status(f"完成!成功处理 {processed_images} 张图片,跳过 {skipped_images} 张图片")

        try:
            prs.save(output_path)
        except Exception as e:
            raise Exception(f"保存文件时出错: {str(e)}")

def main():
    app = wx.App()
    frame = CompressorFrame()
    frame.Show()
    app.MainLoop()

if __name__ == '__main__':
    main()
环境准备
在开始之前,我们需要安装以下Python库:
- wxPython:用于创建图形用户界面
- python-pptx:用于处理PPTX文件
- Pillow:用于图片压缩
安装命令:
pip install wxPython python-pptx Pillow
代码结构
代码主要包括以下几个部分:
- 图形界面设计
- 文件选择与压缩功能
- 图片压缩逻辑
代码实现
导入必要模块
import wx
import os
from pptx import Presentation
from PIL import Image
import io
创建主窗口
主窗口CompressorFrame继承自wx.Frame,用于展示UI组件。
class CompressorFrame(wx.Frame):
    def __init__(self):
        super().__init__(parent=None, title='PPTX压缩工具')
        self.panel = wx.Panel(self)
        self.create_ui()

    def create_ui(self):
        vbox = wx.BoxSizer(wx.VERTICAL)

        # 文件选择部分
        hbox1 = wx.BoxSizer(wx.HORIZONTAL)
        self.file_path = wx.TextCtrl(self.panel, size=(300, -1))
        browse_btn = wx.Button(self.panel, label='选择文件')
        browse_btn.Bind(wx.EVT_BUTTON, self.on_browse)
        hbox1.Add(self.file_path, proportion=1, flag=wx.EXPAND|wx.ALL, border=5)
        hbox1.Add(browse_btn, flag=wx.ALL, border=5)

        # 压缩按钮
        compress_btn = wx.Button(self.panel, label='开始压缩')
        compress_btn.Bind(wx.EVT_BUTTON, self.on_compress)

        # 进度条
        self.progress = wx.Gauge(self.panel, range=100, size=(400, 25))

        # 状态文本
        self.status_text = wx.StaticText(self.panel, label="")

        vbox.Add(hbox1, flag=wx.EXPAND|wx.ALL, border=5)
        vbox.Add(compress_btn, flag=wx.ALIGN_CENTER|wx.ALL, border=5)
        vbox.Add(self.progress, flag=wx.EXPAND|wx.ALL, border=5)
        vbox.Add(self.status_text, flag=wx.EXPAND|wx.ALL, border=5)

        self.panel.SetSizer(vbox)
        self.Fit()
文件选择功能
通过文件对话框让用户选择PPTX文件。
def on_browse(self, event):
    with wx.FileDialog(self, "选择PPTX文件", wildcard="PowerPoint files (*.pptx)|*.pptx",
                     style=wx.FD_OPEN | wx.FD_FILE_MUST_EXIST) as fileDialog:
        if fileDialog.ShowModal() == wx.ID_CANCEL:
            return
        path = fileDialog.GetPath()
        self.file_path.SetValue(os.path.normpath(path.strip('"')))
压缩功能实现
压缩图片逻辑:
- 使用Pillow库压缩PPT中的图片,将其转换为JPEG格式,并降低质量以减少文件大小。
- 限制图片的最大尺寸,保持图片的可视质量。
更新进度条与状态:
使用wx.Gauge展示处理进度。
实时更新处理状态。
def _compress_pptx(self, input_path, output_path):
    prs = Presentation(input_path)
    total_slides = len(prs.slides)
    processed_images = 0
    skipped_images = 0

    for i, slide in enumerate(prs.slides):
        self.update_status(f"正在处理第 {i+1}/{total_slides} 张幻灯片")

        shapes_with_images = [shape for shape in slide.shapes if hasattr(shape, "image")]

        for shape in shapes_with_images:
            try:
                image_bytes = shape.image.blob
                with Image.open(io.BytesIO(image_bytes)) as img:
                    if img.mode == 'RGBA':
                        img = img.convert('RGB')
                    max_size = 800
                    if img.width > max_size or img.height > max_size:
                        ratio = min(max_size/img.width, max_size/img.height)
                        new_size = (int(img.width * ratio), int(img.height * ratio))
                        img = img.resize(new_size, Image.LANCZOS)
                    output_buffer = io.BytesIO()
                    img.save(output_buffer, format='JPEG', quality=10, optimize=True)
                    new_image = output_buffer.getvalue()
                    shape.image._blob = new_image
                processed_images += 1
            except Exception as e:
                print(f"处理图片时出错: {str(e)}")
                skipped_images += 1
        wx.CallAfter(self.progress.SetValue, int((i + 1) / total_slides * 100))

    self.update_status(f"完成!成功处理 {processed_images} 张图片,跳过 {skipped_images} 张图片")
    prs.save(output_path)
主函数
启动wxPython应用程序。
def main():
app = wx.App()
frame = CompressorFrame()
frame.Show()
app.MainLoop()
if __name__ == '__main__':
main()
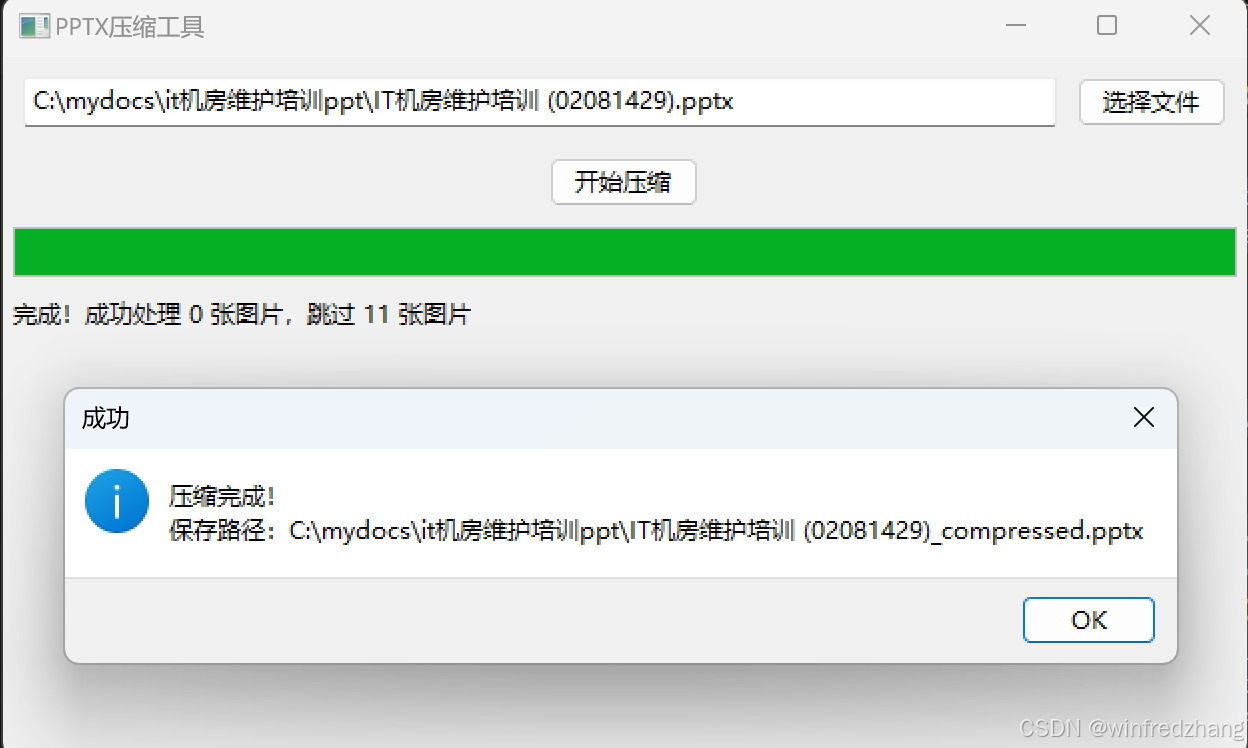
运行结果
到此这篇关于基于Python开发PPTX压缩工具的文章就介绍到这了,更多相关Python PPTX压缩内容请搜索脚本之家以前的文章或继续浏览下面的相关文章希望大家以后多多支持脚本之家!
相关文章
 选择学习 python 时,最令我震惊的是它的简单性和可读性。但是你知道还可以用更少的代码行可以让 Python 代码变得更简单吗?本文为大家总结了18个帮你简化代码的Python技巧,感兴趣的可以了解一下2022-07-07
 使用消息队列在数据的通信中拥有很多优点,SnakeMQ是一个开源的用Python实现的跨平台MQ库,well,Python的消息队列包SnakeMQ使用初探,here we go:2016-06-06
 下面小编就为大家带来一篇利用python生成一个导出数据库的bat脚本文件的方法。小编觉得挺不错的,现在就分享给大家,也给大家做个参考。一起跟随小编过来看看吧2016-12-12
基于Python的网页自动化工具DrissionPage的使用详解
DrissionPage 是一个基于 python 的网页自动化工具,它既能控制浏览器,也能收发数据包,还能把两者合而为一,下面就跟随小编一起来学习一下它的具体使用吧2024-01-01 这篇文章主要介绍了解决Python串口接收无标识不定长数据问题,具有很好的参考价值,希望对大家有所帮助,如有错误或未考虑完全的地方,望不吝赐教2023-09-09
 这篇文章主要介绍了Python代码列表求并集,交集,差集,下面文章讲详细的介绍如何利用python代码实现并集,交集,差集的相关资料展开内容,需要的朋友可以参考一下2021-11-11
 Python 作为一门强大的编程语言,提供了多个优秀的库来操作 Excel 文件,本文将对 xlrd、xlwt、xlutils、xlwings、XlsxWriter、openpyxl、pandas 这七大模块进行全面对比,帮助你选择最合适的工具2025-09-09
 Python 中的变量不需要声明。每个变量在使用前都必须赋值,变量赋值以后该变量才会被创建。在 Python 中,变量就是变量,它没有类型,我们所说的"类型"是变量所指的内存中对象的类型。2017-02-02
Python如何生成exe文件?用Pycharm一步步带你学(超详细、超贴心)
这篇文章主要给大家介绍了关于Python如何生成exe文件的相关资料,本文利用Pycharm一步步带你学,文中通过图文以及实例代码介绍的超详细、超贴心,需要的朋友可以参考下2022-02-02 这篇文章主要介绍了Pyhton面向对象原理与基础语法,结合实例形式分析了Python面向对象程序设计中的基本原理、概念、语法与相关使用技巧,需要的朋友可以参考下2020-01-01


最新评论