

Python结合PyQt6实现屏幕截图工具(附源码)
更新时间:2026年08月07日 08:48:37 作者:小灰灰搞电子
本文分享了一个基于PyQt6的屏幕截图工具实现源码,核心功能包括全屏截图和区域拖拽截图两种模式,文中的示例代码讲解详细,感兴趣的小伙伴可以了解下
一、源码分享
1、源码分享
import sys
import os
from PyQt6.QtWidgets import (QApplication, QMainWindow, QPushButton, QWidget,
                             QVBoxLayout, QLabel, QMessageBox, QDialog)
from PyQt6.QtGui import QScreen, QPixmap, QPainter, QColor, QPen
from PyQt6.QtCore import Qt, QRect, QPoint, QDateTime


class ScreenshotMask(QDialog):
    def __init__(self, full_screen_pix):
        super().__init__()
        self.full_pix = full_screen_pix
        # 全屏无边框置顶
        self.setWindowFlags(
            Qt.WindowType.FramelessWindowHint
            | Qt.WindowType.WindowStaysOnTopHint
        )
        self.setGeometry(0, 0, self.full_pix.width(), self.full_pix.height())
        self.setAttribute(Qt.WidgetAttribute.WA_TranslucentBackground)
        self.setMouseTracking(True)

        self.start_pos = QPoint()
        self.end_pos = QPoint()
        self.is_drawing = False
        self.select_rect = QRect()
        self.result_pix = None

    def paintEvent(self, event):
        painter = QPainter(self)
        # 底层原图
        painter.drawPixmap(self.rect(), self.full_pix)
        # 半透明遮罩
        painter.fillRect(self.rect(), QColor(0, 0, 0, 130))

        if self.is_drawing:
            rect = QRect(self.start_pos, self.end_pos).normalized()
            # 选区清空遮罩
            painter.setCompositionMode(QPainter.CompositionMode.CompositionMode_Clear)
            painter.fillRect(rect, Qt.GlobalColor.transparent)
            painter.setCompositionMode(QPainter.CompositionMode.CompositionMode_SourceOver)
            # 绘制边框
            pen = QPen(QColor(0, 160, 255), 2)
            painter.setPen(pen)
            painter.drawRect(rect)
            self.select_rect = rect

    def mousePressEvent(self, event):
        if event.button() == Qt.MouseButton.LeftButton:
            self.is_drawing = True
            self.start_pos = event.pos()
            self.end_pos = event.pos()
            self.update()

    def mouseMoveEvent(self, event):
        if self.is_drawing:
            self.end_pos = event.pos()
            self.update()

    def mouseReleaseEvent(self, event):
        if event.button() == Qt.MouseButton.LeftButton and self.is_drawing:
            self.is_drawing = False
            if not self.select_rect.isEmpty():
                self.result_pix = self.full_pix.copy(self.select_rect)
            self.accept()  # 关闭对话框

    def keyPressEvent(self, event):
        if event.key() == Qt.Key.Key_Escape:
            self.reject()  # 取消截图


class MainWindow(QMainWindow):
    def __init__(self):
        super().__init__()
        self.init_ui()

    def init_ui(self):
        self.setWindowTitle("PyQt6 截图工具")
        self.resize(300, 150)
        center = QWidget()
        self.setCentralWidget(center)
        layout = QVBoxLayout(center)
        layout.setSpacing(12)
        layout.setContentsMargins(30, 30, 30, 30)

        btn_full = QPushButton("全屏截图")
        btn_area = QPushButton("区域拖拽截图")
        tip = QLabel("按住鼠标拖拽选区 | ESC取消")
        tip.setAlignment(Qt.AlignmentFlag.AlignCenter)
        tip.setStyleSheet("color:#666")

        layout.addWidget(btn_full)
        layout.addWidget(btn_area)
        layout.addWidget(tip)

        btn_full.clicked.connect(self.capture_full)
        btn_area.clicked.connect(self.start_area_capture)

    def capture_full(self):
        screen = QApplication.primaryScreen()
        full_img = screen.grabWindow(0)
        time_str = QDateTime.currentDateTime().toString("yyyyMMdd_HHmmss")
        save_path = f"full_{time_str}.png"
        full_img.save(save_path, "PNG")
        QMessageBox.information(self, "保存成功", f"路径:\n{os.path.abspath(save_path)}")

    def start_area_capture(self):
        # 先隐藏主窗口,避免截图包含自身
        self.hide()
        QApplication.processEvents()

        screen = QApplication.primaryScreen()
        full_img = screen.grabWindow(0)

        mask = ScreenshotMask(full_img)
        # 正确使用QDialog的exec(),不会卡死
        ret = mask.exec()

        # 截图完成后恢复窗口
        self.show()

        if ret == 1 and mask.result_pix is not None:
            time_str = QDateTime.currentDateTime().toString("yyyyMMdd_HHmmss")
            save_path = f"region_{time_str}.png"
            mask.result_pix.save(save_path, "PNG")
            QMessageBox.information(self, "区域截图完成", f"已保存:\n{os.path.abspath(save_path)}")


if __name__ == "__main__":
    app = QApplication(sys.argv)
    win = MainWindow()
    win.show()
    sys.exit(app.exec())
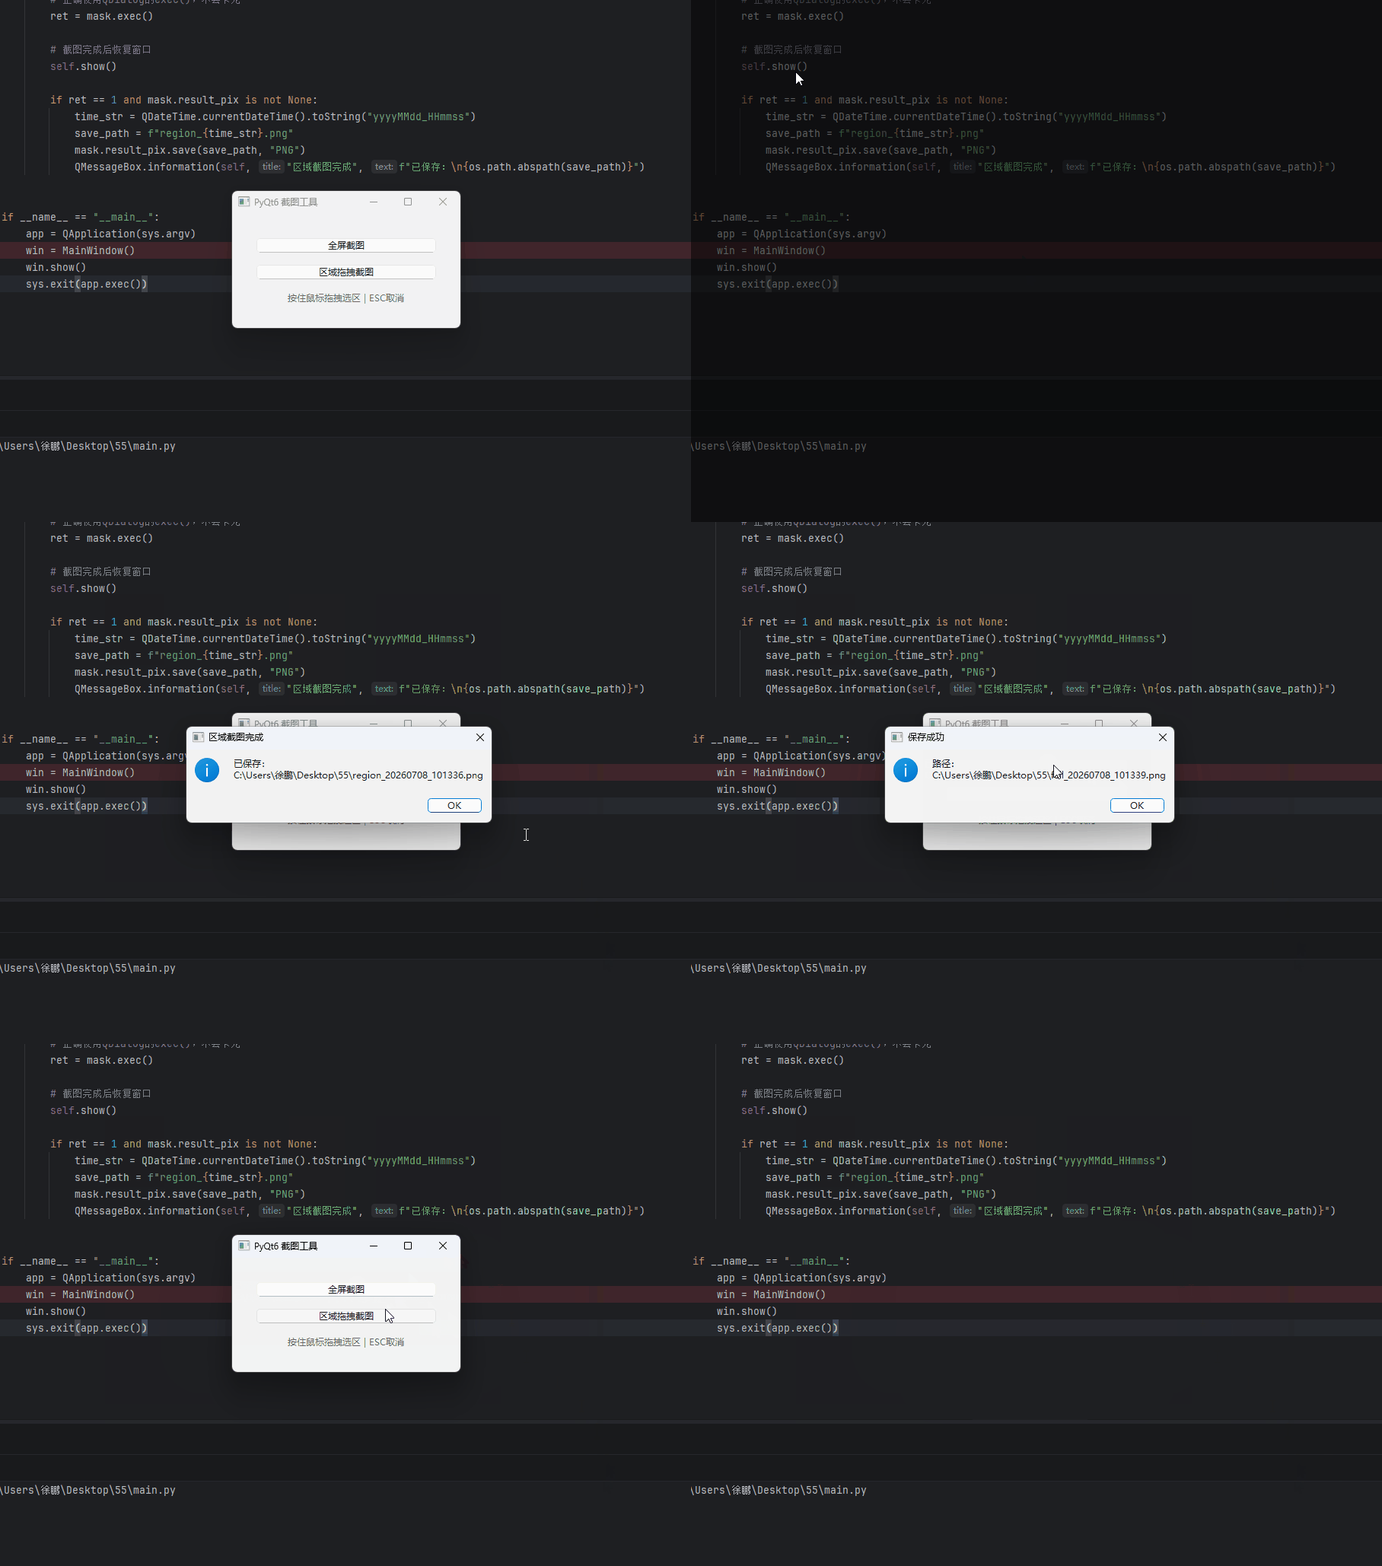
2、效果展示
二、详解
1、核心代码解析
导入模块
import sys
from PyQt6.QtWidgets import QApplication, QMainWindow, QPushButton, QWidget, QVBoxLayout
from PyQt6.QtGui import QScreen
from PyQt6.QtCore import Qt
- QApplication: PyQt6应用程序的核心类,管理GUI程序的控制流和主要设置
- QMainWindow: 主窗口类,提供标准的应用程序主窗口框架
- QScreen: 屏幕类,用于获取屏幕信息和进行屏幕截图操作
- Qt.AlignmentFlag: 对齐标志枚举,用于控制界面元素的布局对齐方式
ScreenshotWindow类结构
class ScreenshotWindow(QMainWindow):
    def __init__(self):
        super().__init__()
        self.init_ui()
- 继承自
QMainWindow,获得标准主窗口的所有功能 - 在构造函数中调用
init_ui()方法初始化用户界面
界面初始化
def init_ui(self):
    self.setWindowTitle("屏幕截图工具")
    self.resize(300, 120)

    # 中心部件与布局
    central_widget = QWidget()
    self.setCentralWidget(central_widget)
    layout = QVBoxLayout(central_widget)
    layout.setContentsMargins(50, 30, 50, 30)

    # 截图按钮
    self.btn_capture = QPushButton("点击截取全屏并保存PNG")
    self.btn_capture.clicked.connect(self.capture_screen)
    layout.addWidget(self.btn_capture, alignment=Qt.AlignmentFlag.AlignCenter)
- setWindowTitle(): 设置窗口标题
- resize(): 设置窗口初始大小(300×120像素)
- QVBoxLayout: 垂直布局管理器,自动排列子部件
- setContentsMargins(): 设置布局边距(左、上、右、下)
- clicked.connect(): 连接按钮点击信号到槽函数
2、截图功能详解
capture_screen方法
def capture_screen(self):
    # 获取主屏幕对象
    screen: QScreen = QApplication.primaryScreen()
    # 截取整个屏幕
    pixmap = screen.grabWindow(0)
    # 保存为png文件,保存在程序同级目录
    save_path = "screenshot.png"
    pixmap.save(save_path, "PNG")
    print(f"截图已保存至: {save_path}")
QApplication.primaryScreen()
- 返回应用程序的主屏幕对象(
QScreen实例) - 在多显示器系统中,返回操作系统定义的主显示器
- 可以通过
QApplication.screens()获取所有可用屏幕列表
screen.grabWindow(0)
- 参数0: 表示截取整个屏幕(桌面窗口)
- 返回一个
QPixmap对象,包含屏幕的像素数据 - 可以指定特定窗口的ID来截取特定窗口
pixmap.save()
- 将
QPixmap保存为图像文件 - 支持多种格式:PNG、JPG、BMP等
- 第二个参数指定格式(“PNG”、"JPEG"等)
3、关键API说明
QScreen类的重要方法
| 方法 | 说明 | 返回值 |
|---|---|---|
grabWindow(WId window, x=0, y=0, width=-1, height=-1) | 截取指定窗口区域 | QPixmap |
geometry() | 获取屏幕的几何信息(位置和大小) | QRect |
availableGeometry() | 获取可用区域(排除任务栏等) | QRect |
name() | 获取屏幕名称 | str |
devicePixelRatio() | 获取设备像素比 | float |
QPixmap类的重要方法
| 方法 | 说明 |
|---|---|
save(fileName, format) | 保存图像到文件 |
toImage() | 转换为QImage对象 |
scaled(width, height) | 缩放图像 |
copy(rect) | 复制指定区域 |
4、功能扩展建议
多显示器支持
def capture_all_screens(self):
    """截取所有屏幕"""
    screens = QApplication.screens()
    for i, screen in enumerate(screens):
        pixmap = screen.grabWindow(0)
        pixmap.save(f"screenshot_screen_{i}.png", "PNG")
选择保存路径
from PyQt6.QtWidgets import QFileDialog

def capture_with_dialog(self):
    screen = QApplication.primaryScreen()
    pixmap = screen.grabWindow(0)

    # 弹出文件保存对话框
    file_path, _ = QFileDialog.getSaveFileName(
        self,
        "保存截图",
        "screenshot.png",
        "PNG Files (*.png);;JPEG Files (*.jpg);;All Files (*)"
    )

    if file_path:
        pixmap.save(file_path, "PNG")
        print(f"截图已保存至: {file_path}")
截取指定区域
def capture_region(self, x, y, width, height):
    """截取屏幕指定区域"""
    screen = QApplication.primaryScreen()
    pixmap = screen.grabWindow(0, x, y, width, height)
    return pixmap
添加时间戳
from datetime import datetime

def capture_with_timestamp(self):
    screen = QApplication.primaryScreen()
    pixmap = screen.grabWindow(0)

    # 生成带时间戳的文件名
    timestamp = datetime.now().strftime("%Y%m%d_%H%M%S")
    save_path = f"screenshot_{timestamp}.png"

    pixmap.save(save_path, "PNG")
    print(f"截图已保存至: {save_path}")
5、常见问题与解决方案
权限问题
- macOS: 需要屏幕录制权限
- 系统偏好设置 → 安全性与隐私 → 隐私 → 屏幕录制
- 勾选终端或IDE应用
- Linux: 可能需要X11或Wayland相关权限
- Windows: 通常无需特殊配置
多显示器坐标系统
- 每个显示器有独立的坐标系统
- 主显示器的原点为(0, 0)
- 副显示器可能有负坐标或大于主显示器分辨率的坐标
高DPI屏幕适配
# 启用高DPI支持
if hasattr(Qt, 'AA_EnableHighDpiScaling'):
    QApplication.setAttribute(Qt.AA_EnableHighDpiScaling, True)
if hasattr(Qt, 'AA_UseHighDpiPixmaps'):
    QApplication.setAttribute(Qt.AA_UseHighDpiPixmaps, True)
6、总结
本文详细介绍了使用PyQt6实现屏幕截图的核心技术:
- 基础实现: 使用
QScreen.grabWindow()方法截取全屏 - 界面设计: 使用
QMainWindow和QVBoxLayout创建简洁界面 - 文件保存: 使用
QPixmap.save()方法保存为PNG格式 - 扩展功能: 提供了多显示器、区域截图、自定义保存路径等扩展方案
PyQt6的屏幕截图功能简单高效,适合需要集成截图功能的桌面应用程序开发。通过本文的示例代码和详细解析,读者可以快速掌握这一实用技术。
以上就是Python结合PyQt6实现屏幕截图工具(附源码)的详细内容,更多关于PyQt屏幕截图的资料请关注脚本之家其它相关文章!
相关文章

配置python连接oracle读取excel数据写入数据库的操作流程
这篇文章主要介绍了配置python连接oracle,读取excel数据写入数据库,本文通过实例代码给大家介绍的非常详细,对大家的学习或工作具有一定的参考借鉴价值,需要的朋友可以参考下2021-03-03 ImageAI是一个面向计算机视觉编程的Python库,支持最先进的机器学习算法。本文将利用ImageAI实现图像识别功能,感兴趣的小伙伴可以跟随小编一起学习一下2023-02-02
 下面小编就为大家分享一篇numpy.delete删除一列或多列的方法,具有很好的参考价值,希望对大家有所帮助。一起跟随小编过来看看吧2018-04-04
 这篇文章主要介绍了一个基于Python+Tkinter开发的全功能本地化文本处理工具,它不仅具备基础的格式转换功能,更集成了中文特色处理等实用功能,有需要的可以了解下2025-04-04
 这篇文章主要介绍了JAVA及PYTHON质数计算代码对比,文中通过示例代码介绍的非常详细,对大家的学习或者工作具有一定的参考学习价值,需要的朋友可以参考下2020-06-06
 这篇文章主要介绍了Py之pycocotools库的简介、安装、使用方法及说明,具有很好的参考价值,希望对大家有所帮助。如有错误或未考虑完全的地方,望不吝赐教2023-02-02
 今天小编就为大家分享一篇python scp 批量同步文件的实现方法,具有很好的参考价值,希望对大家有所帮助。一起跟随小编过来看看吧2019-01-01
 这篇文章主要介绍了python UIAutomator2使用超详细教程,本文给大家介绍的非常详细,对大家的学习或工作具有一定的参考借鉴价值,需要的朋友可以参考下2021-02-02
解决pycharm无法识别本地site-packages的问题
今天小编就为大家分享一篇解决pycharm无法识别本地site-packages的问题,具有很好的参考价值,希望对大家有所帮助。一起跟随小编过来看看吧2018-10-10
Python利用Beautiful Soup模块修改内容方法示例
Beautiful Soup是一个可以从HTML或XML文件中提取数据的Python 库。它能够通过你喜欢的转换器实现惯用的文档导航、查找、修改文档的方式。他还能够修改HTML/XML文档的内容。这篇文章主要介绍了Python利用Beautiful Soup模块修改内容的方法,需要的朋友可以参考下。2017-03-03
最新评论