

Python+PyQt6实现将PDF文件转高清图片
更新时间:2026年08月07日 09:01:58 作者:小灰灰搞电子
PyQt6中的PDF 模块提供了强大的 PDF 文档处理能力,这篇文章主要为大家想介绍了Python如何结合PyQt6实现将PDF文件转高清图片并提供了完整源码,感兴趣的小伙伴可以了解下
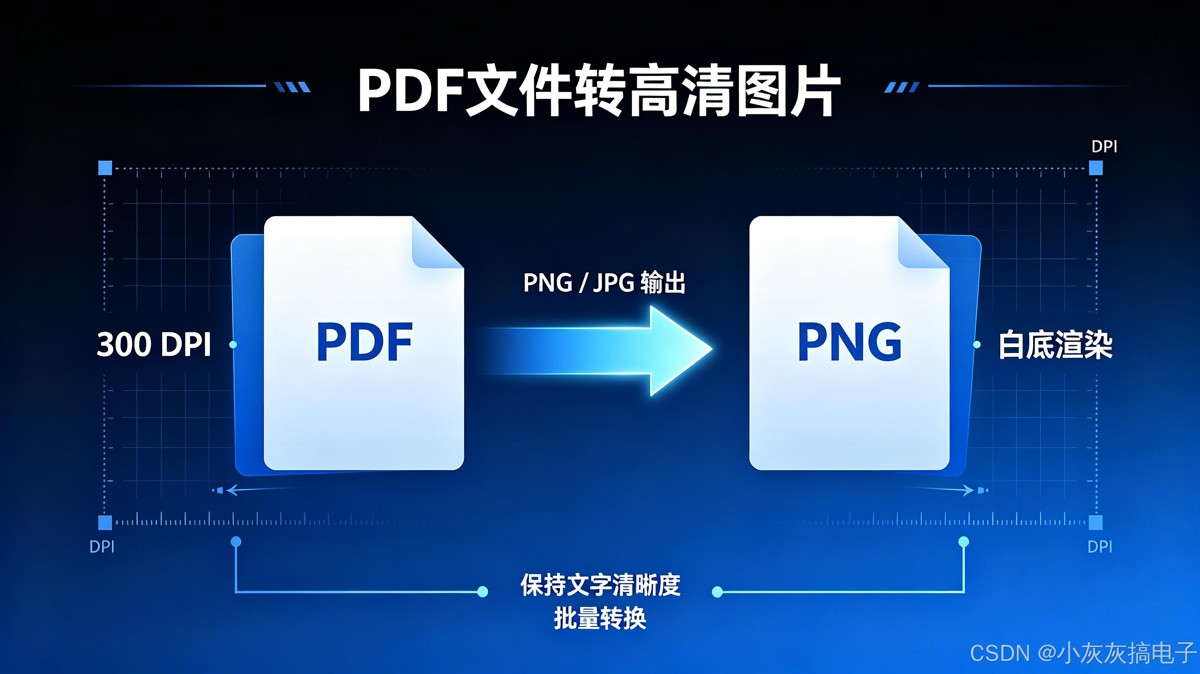
一、源码分享
1、源码分享
import sys
from PyQt6.QtCore import Qt, QSize, QFileInfo
from PyQt6.QtGui import QImage, QPainter
# 低版本仅能导入这三个,去掉 QPdfDocumentLoader
from PyQt6.QtPdf import QPdfDocument, QPdfDocumentRenderOptions
from PyQt6.QtWidgets import QApplication, QMainWindow, QPushButton, QWidget, QVBoxLayout


class MainWindow(QMainWindow):
    def __init__(self, parent=None):
        super().__init__(parent)
        self.setWindowTitle("PDF转高清图片 PyQt6")
        self.resize(400, 120)

        central_widget = QWidget()
        self.setCentralWidget(central_widget)
        layout = QVBoxLayout(central_widget)
        self.btn_convert = QPushButton("执行PDF转图片")
        layout.addWidget(self.btn_convert)
        self.btn_convert.clicked.connect(self.on_pushButton_clicked)

    def pdfToHighResImage(self, pdfPath: str, imgPath: str, size: QSize, dpi: int) -> bool:
        # 关键修复:传入self作为父对象,解决构造参数不足报错
        doc = QPdfDocument(self)

        err = doc.load(pdfPath)
        if err != QPdfDocument.Error.None_:
            print(f"load pdf error code: {err}")
            return False

        # 校验自定义尺寸
        if not size.isValid() or size.width() <= 0 or size.height() <= 0:
            print("input size width or height less zero!")
            return False

        # 拆分路径,自动创建目录
        imageFileInfo = QFileInfo(imgPath)
        suffix = imageFileInfo.suffix().lower()
        imgFormat = ""
        quality = -1
        if suffix == "png":
            imgFormat = "PNG"
        elif suffix in ("jpg", "jpeg"):
            imgFormat = "JPG"
            quality = 100
        else:
            print("unsupported image extensions, only png / jpg / jpeg are supported!")
            return False

        pageIdx = 0
        print(f"Page point size: {doc.pagePointSize(pageIdx)}")

        opts = QPdfDocumentRenderOptions()
        opts.setRenderFlags(QPdfDocumentRenderOptions.RenderFlag.None_)
        img = doc.render(pageIdx, size, opts)

        if img.isNull():
            print(f"page {pageIdx + 1} rendering failed!")
            return False

        # 白底画布
        whiteBgImg = QImage(size, QImage.Format.Format_RGB32)
        whiteBgImg.fill(Qt.GlobalColor.white)

        painter = QPainter(whiteBgImg)
        painter.setRenderHints(QPainter.RenderHint.Antialiasing | QPainter.RenderHint.TextAntialiasing)
        painter.drawImage(0, 0, img)
        painter.end()

        img = whiteBgImg

        # DPI 设置
        dotsPerMeter = round(dpi / 25.4 * 1000)
        img.setDotsPerMeterX(dotsPerMeter)
        img.setDotsPerMeterY(dotsPerMeter)

        if imgFormat == "PNG":
            img.setText("DPI", str(dpi))

        saveOk = False
        if quality > 0:
            saveOk = img.save(imgPath, imgFormat, quality)
        else:
            saveOk = img.save(imgPath, imgFormat)

        if not saveOk:
            print(f"failed to save the image: {imgPath}")
        else:
            print(f"success to save the image: {imgPath}")

        return saveOk

    def on_pushButton_clicked(self):
        self.pdfToHighResImage("L000137362.pdf", "L000137362.jpg", QSize(896, 1534), 300)
        self.pdfToHighResImage("L000137362.pdf", "L000137362.png", QSize(896, 1534), 300)


if __name__ == "__main__":
    app = QApplication(sys.argv)
    win = MainWindow()
    win.show()
    sys.exit(app.exec())
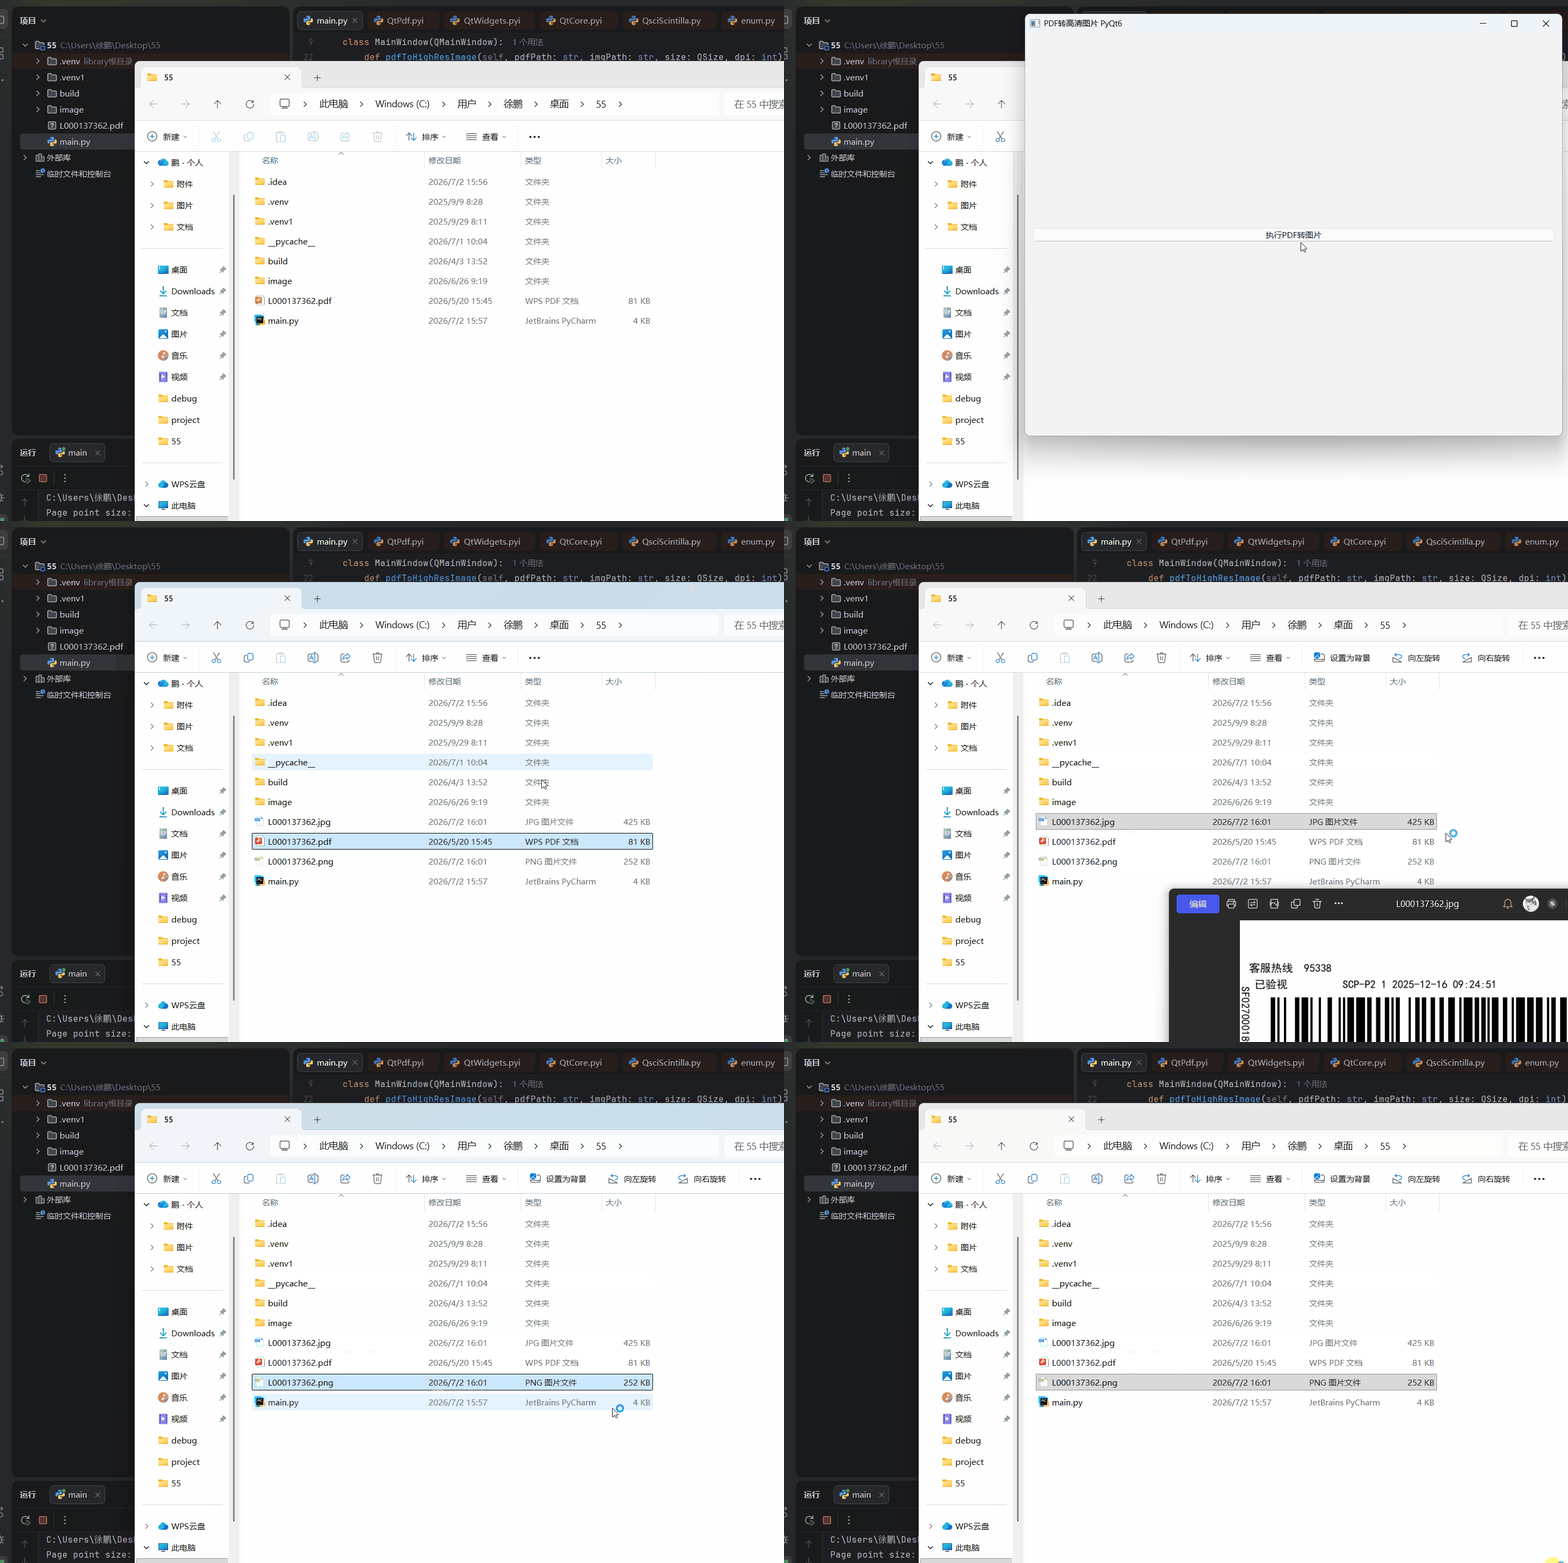
2、效果展示
二、PyQt pdf模块详解
PyQt6 的 PDF 模块提供了强大的 PDF 文档处理能力,主要包含在 QtPdf 模块中。该模块允许开发者加载、渲染、查看和操作 PDF 文档,是构建 PDF 阅读器、转换工具或文档处理应用的理想选择。
1、核心类介绍
QPdfDocument
QPdfDocument 是 PDF 模块的核心类,负责加载和管理 PDF 文档。它提供了以下关键功能:
- 文档加载:通过
load()方法从文件路径或QByteArray加载 PDF 文档 - 页面信息:获取页面数量、页面尺寸(
pagePointSize())、页面标签等 - 文档元数据:访问文档标题、作者、创建日期等元信息
- 页面渲染:将 PDF 页面渲染为
QImage对象 - 文本提取:从 PDF 页面提取文本内容(需要
QPdfSelection配合) - 文档搜索:在文档中搜索特定文本
QPdfDocumentRenderOptions
QPdfDocumentRenderOptions 控制 PDF 页面的渲染行为,可以设置:
- 渲染标志:通过
setRenderFlags()设置渲染选项 - 裁剪矩形:指定要渲染的页面区域
- 缩放因子:控制渲染图像的缩放比例
QPdfPageNavigator
QPdfPageNavigator 提供页面导航功能,支持:
- 跳转到特定页面
- 前进/后退导航
- 历史记录管理
QPdfSelection
QPdfSelection 表示 PDF 页面上的文本选择,可以:
- 获取选中的文本内容
- 获取选择区域的边界矩形
- 高亮显示选中的文本
2、基本使用流程
加载 PDF 文档
from PyQt6.QtPdf import QPdfDocument

# 创建文档对象(需要传入父对象)
doc = QPdfDocument(parent=self)

# 加载 PDF 文件
error = doc.load("example.pdf")

# 检查加载结果
if error != QPdfDocument.Error.None_:
    print(f"加载失败,错误代码: {error}")
else:
    print(f"PDF 加载成功,共 {doc.pageCount()} 页")
获取页面信息
# 获取页面数量
page_count = doc.pageCount()

# 获取第一页的尺寸(以点为单位,1点=1/72英寸)
page_size = doc.pagePointSize(0)  # QSizeF 对象
print(f"页面尺寸: {page_size.width()} x {page_size.height()} 点")

# 转换为像素(假设 DPI=72)
dpi = 72
width_px = page_size.width() * dpi / 72
height_px = page_size.height() * dpi / 72
渲染页面为图像
from PyQt6.QtPdf import QPdfDocumentRenderOptions
from PyQt6.QtGui import QImage

# 创建渲染选项
opts = QPdfDocumentRenderOptions()
opts.setRenderFlags(QPdfDocumentRenderOptions.RenderFlag.None_)

# 设置目标尺寸(以像素为单位)
target_size = QSize(800, 600)

# 渲染第一页
image = doc.render(0, target_size, opts)

if not image.isNull():
    print(f"渲染成功,图像尺寸: {image.width()} x {image.height()}")
    # 保存图像
    image.save("page_0.png", "PNG")
else:
    print("渲染失败")
提取页面文本
# 创建页面对象(需要 QPdfPageModel 配合)
# 注意:文本提取功能相对有限,复杂布局可能无法正确提取
from PyQt6.QtPdf import QPdfPageModel

page_model = QPdfPageModel(doc)
if page_model.pageCount() > 0:
    # 获取页面文本(简化示例,实际使用更复杂)
    text = page_model.text(0)
    print(f"页面文本: {text[:100]}...")  # 显示前100个字符
3、高级功能
自定义渲染选项
opts = QPdfDocumentRenderOptions()

# 设置裁剪区域(渲染页面的一部分)
from PyQt6.QtCore import QRectF
crop_rect = QRectF(50, 50, 200, 300)  # 左上角(50,50),宽200,高300
opts.setCropRect(crop_rect)

# 设置缩放
opts.setScaleFactor(2.0)  # 放大2倍

# 设置渲染标志
from PyQt6.QtPdf import QPdfDocumentRenderOptions
flags = (QPdfDocumentRenderOptions.RenderFlag.Antialiasing |
         QPdfDocumentRenderOptions.RenderFlag.TextAntialiasing)
opts.setRenderFlags(flags)
处理多页文档
def render_all_pages(doc, output_dir="output"):
    import os
    os.makedirs(output_dir, exist_ok=True)

    for page_index in range(doc.pageCount()):
        # 获取原始页面尺寸
        page_size = doc.pagePointSize(page_index)

        # 转换为像素(300 DPI)
        dpi = 300
        width = int(page_size.width() * dpi / 72)
        height = int(page_size.height() * dpi / 72)
        target_size = QSize(width, height)

        # 渲染
        opts = QPdfDocumentRenderOptions()
        image = doc.render(page_index, target_size, opts)

        if not image.isNull():
            # 保存为PNG
            filename = os.path.join(output_dir, f"page_{page_index:03d}.png")
            image.save(filename, "PNG")
            print(f"已保存: {filename}")
        else:
            print(f"页面 {page_index} 渲染失败")
错误处理
from PyQt6.QtPdf import QPdfDocument

class PdfProcessor:
    def __init__(self):
        self.document = QPdfDocument()

    def load_pdf(self, filepath):
        error = self.document.load(filepath)

        error_messages = {
            QPdfDocument.Error.None_: "成功",
            QPdfDocument.Error.FileNotFoundError: "文件未找到",
            QPdfDocument.Error.InvalidFileFormatError: "无效的文件格式",
            QPdfDocument.Error.IncorrectPasswordError: "密码错误",
            QPdfDocument.Error.UnsupportedSecuritySchemeError: "不支持的加密方案",
            QPdfDocument.Error.DocumentLockedError: "文档被锁定",
            QPdfDocument.Error.UnknownError: "未知错误"
        }

        if error in error_messages:
            return error_messages[error]
        else:
            return f"未知错误代码: {error}"
4、性能优化建议
异步渲染
对于大型PDF文档,建议在后台线程中进行渲染操作:
from PyQt6.QtCore import QThread, pyqtSignal

class RenderThread(QThread):
    finished = pyqtSignal(QImage, int)  # 图像和页码

    def __init__(self, doc, page_index, size):
        super().__init__()
        self.doc = doc
        self.page_index = page_index
        self.size = size

    def run(self):
        opts = QPdfDocumentRenderOptions()
        image = self.doc.render(self.page_index, self.size, opts)
        self.finished.emit(image, self.page_index)
缓存已渲染页面
对于PDF查看器应用,实现页面缓存可以显著提升性能:
class PdfViewerCache:
    def __init__(self, max_cache_size=10):
        self.cache = {}  # page_index -> QImage
        self.max_size = max_cache_size
        self.access_order = []  # 最近访问顺序

    def get_page(self, page_index, doc, size):
        if page_index in self.cache:
            # 更新访问顺序
            self.access_order.remove(page_index)
            self.access_order.append(page_index)
            return self.cache[page_index]

        # 渲染新页面
        opts = QPdfDocumentRenderOptions()
        image = doc.render(page_index, size, opts)

        # 添加到缓存
        self.cache[page_index] = image
        self.access_order.append(page_index)

        # 清理旧缓存
        if len(self.cache) > self.max_size:
            oldest = self.access_order.pop(0)
            del self.cache[oldest]

        return image
渐进式渲染
对于高分辨率渲染,可以考虑渐进式加载:
def progressive_render(doc, page_index, final_size, steps=3):
    """渐进式渲染:从低分辨率开始,逐步提高"""
    images = []

    for step in range(1, steps + 1):
        # 逐步增加尺寸
        scale = step / steps
        current_size = QSize(
            int(final_size.width() * scale),
            int(final_size.height() * scale)
        )

        opts = QPdfDocumentRenderOptions()
        image = doc.render(page_index, current_size, opts)
        images.append(image)

    return images  # 返回不同分辨率的图像序列
5、常见问题与解决方案
内存泄漏问题
QPdfDocument 需要正确管理生命周期:
# 正确做法:设置父对象,自动管理内存
class PdfWidget(QWidget):
    def __init__(self):
        super().__init__()
        self.doc = QPdfDocument(self)  # 设置父对象

    def load_pdf(self, path):
        self.doc.load(path)

    # 析构时自动释放
中文显示问题
确保系统字体包含中文字符集,或指定字体:
from PyQt6.QtGui import QFont, QFontDatabase

# 加载中文字体
font_id = QFontDatabase.addApplicationFont("path/to/chinese_font.ttf")
if font_id != -1:
    font_families = QFontDatabase.applicationFontFamilies(font_id)
    if font_families:
        chinese_font = QFont(font_families[0])
        # 应用到渲染上下文
加密PDF处理
处理加密PDF需要密码:
def load_encrypted_pdf(filepath, password):
    doc = QPdfDocument()

    # 先尝试无密码加载
    error = doc.load(filepath)

    if error == QPdfDocument.Error.IncorrectPasswordError:
        # 使用密码重试
        # 注意:PyQt6的QPdfDocument目前没有直接的密码接口
        # 可能需要通过其他方式处理加密PDF
        print("需要密码解密")
        return None

    return doc
6、实际应用示例
简单的PDF查看器
from PyQt6.QtWidgets import (QApplication, QMainWindow, QWidget,
                             QVBoxLayout, QLabel, QScrollArea)
from PyQt6.QtPdf import QPdfDocument
from PyQt6.QtGui import QPixmap

class SimplePdfViewer(QMainWindow):
    def __init__(self):
        super().__init__()
        self.setWindowTitle("PDF查看器")
        self.resize(800, 600)

        self.doc = QPdfDocument(self)
        self.current_page = 0

        # 创建界面
        central = QWidget()
        self.setCentralWidget(central)
        layout = QVBoxLayout(central)

        self.image_label = QLabel()
        self.image_label.setAlignment(Qt.AlignmentFlag.AlignCenter)

        scroll = QScrollArea()
        scroll.setWidget(self.image_label)
        scroll.setWidgetResizable(True)
        layout.addWidget(scroll)

        # 加载PDF
        self.load_pdf("document.pdf")

    def load_pdf(self, filepath):
        error = self.doc.load(filepath)
        if error == QPdfDocument.Error.None_:
            self.show_page(0)

    def show_page(self, page_index):
        if 0 <= page_index < self.doc.pageCount():
            self.current_page = page_index

            # 渲染页面
            page_size = self.doc.pagePointSize(page_index)
            target_size = QSize(
                int(page_size.width() * 2),  # 放大显示
                int(page_size.height() * 2)
            )

            opts = QPdfDocumentRenderOptions()
            image = self.doc.render(page_index, target_size, opts)

            if not image.isNull():
                pixmap = QPixmap.fromImage(image)
                self.image_label.setPixmap(pixmap)
                self.setWindowTitle(f"PDF查看器 - 第 {page_index + 1} 页")
PDF转图片工具
class PdfToImageConverter:
    def __init__(self, dpi=300, output_format="PNG"):
        self.dpi = dpi
        self.output_format = output_format.upper()

    def convert(self, pdf_path, output_dir):
        import os
        from PyQt6.QtPdf import QPdfDocument

        doc = QPdfDocument()
        if doc.load(pdf_path) != QPdfDocument.Error.None_:
            return False

        os.makedirs(output_dir, exist_ok=True)

        for i in range(doc.pageCount()):
            page_size = doc.pagePointSize(i)

            # 计算像素尺寸
            width = int(page_size.width() * self.dpi / 72)
            height = int(page_size.height() * self.dpi / 72)

            # 渲染
            opts = QPdfDocumentRenderOptions()
            image = doc.render(i, QSize(width, height), opts)

            if not image.isNull():
                # 保存
                filename = os.path.join(
                    output_dir,
                    f"page_{i:03d}.{self.output_format.lower()}"
                )

                if self.output_format == "JPG":
                    image.save(filename, "JPEG", 95)  # 95%质量
                else:
                    image.save(filename, self.output_format)

        return True
三、总结
PyQt6 的 PDF 模块提供了完整的 PDF 处理能力,从简单的文档加载和渲染到高级的文本提取和页面导航。关键点总结:
- 核心类:
QPdfDocument是基础,QPdfDocumentRenderOptions控制渲染 - 基本流程:加载 → 获取信息 → 渲染 → 保存/显示
- 性能考虑:使用缓存、异步渲染和渐进式加载优化体验
- 错误处理:正确处理各种加载和渲染错误
- 实际应用:可以构建查看器、转换工具、文档处理应用等
以上就是Python+PyQt6实现将PDF文件转高清图片的详细内容,更多关于PyQt PDF转图片的资料请关注脚本之家其它相关文章!
相关文章
 这篇文章主要介绍了django使用graphql的实例,具有很好的参考价值,希望对大家有所帮助。一起跟随小编过来看看吧2020-09-09
Django REST framework 如何实现内置访问频率控制
这篇文章主要介绍了Django REST framework 内置访问频率控制,文中通过示例代码介绍的非常详细,对大家的学习或者工作具有一定的参考学习价值,需要的朋友可以参考下2019-07-07 在数字化内容管理和网页发布领域,将 PDF 文档转换为 HTML 格式是一项非常有价值的技能,本文将详细介绍如何使用 Spire.PDF for Python 库将 PDF 文档转换为 HTML 格式,涵盖基本转换、分页输出、流式处理等多种转换方式,希望对大家有所帮助2026-06-06
 这篇文章主要介绍了亲测解决tensorflow和keras版本不匹配问题,完美解决:ImportError: No module named 'tensorflow.python.eager'问题,具有很好的参考价值,希望对大家有所帮助,如有错误或未考虑完全的地方,望不吝赐教2024-03-03
 本篇文章给大家分享了Python3实现在线转换Image图片格式的功能以及相关实例代码,有兴趣的朋友参考下。2018-06-06
 在本篇内容里我们给大家整理了关于Python3中ceil()函数用法以及相关知识点,需要的学习一下吧。2019-02-02
 在本篇文章里小编给各位分享了一篇关于vue.js刷新当前页面的实例讲解,有兴趣的朋友们可以学习参考下。2020-12-12
基于python + django + whoosh + jieba 分词器实现站内检索功能
这篇文章主要介绍了基于python + django + whoosh + jieba 分词器实现站内检索功能,本文通过实例代码给大家介绍的非常详细,对大家的学习或工作具有一定的参考借鉴价值,需要的朋友可以参考下2021-08-08 这篇文章主要介绍了python中使用pyhook实现键盘监控的例子,包含pyhook的下载地址和手册地址及一个Windows下的监控实例,需要的朋友可以参考下2014-07-07
 这篇文章主要介绍了python列表的逆序遍历实现,文中通过示例代码介绍的非常详细,对大家的学习或者工作具有一定的参考学习价值,需要的朋友们下面随着小编来一起学习学习吧2020-04-04
最新评论