
C#实现简单学生信息管理系统
更新时间:2022年02月27日 08:11:41 作者:_shuai_
这篇文章主要为大家详细介绍了C#实现简单学生信息管理系统,具有一定的参考价值,感兴趣的小伙伴们可以参考一下
本文实例为大家分享了C#实现简单学生信息管理系统的具体代码,供大家参考,具体内容如下
一、运行环境windows,使用vs编译软件

二、主要功能
登录、添加学生信息、修改学生信息、删除学生信息、查询学生信息
三、实现步骤
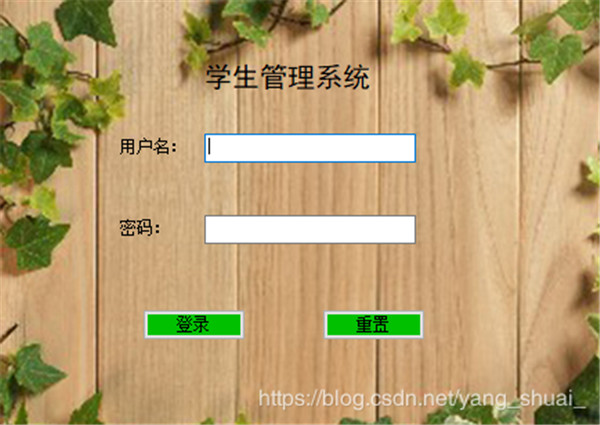
1、登陆界面功能实现
老规矩,先贴下主要代码:
 //构造方法
 public Login()
 {
 InitializeComponent();
 this.label3.Parent = this;
 this.label1.BackColor = Color.Transparent;
 this.label2.BackColor = Color.Transparent;
 this.label3.BackColor = Color.Transparent;
 this.FormBorderStyle = System.Windows.Forms.FormBorderStyle.None;
 }
 //对登录按钮的事件实现代码
 private void button1_Click(object sender, EventArgs e)
 {
 string ss = ConfigurationManager.ConnectionStrings["Stu"].ToString();
 SqlConnection conn = new SqlConnection(ss);
 try
 {
 //开启连接
 conn.Open();
 // MessageBox.Show("数据库连接成功!");
 }
 catch (Exception)
 {
 //MessageBox.Show("数据库连接失败!");
 }
 String uname = txtName.Text.Trim();
 string pword = txtPass.Text.Trim();
 if(uname == ""|| pword == "")
 {
 MessageBox.Show("请输入用户名或密码!");
 return;
 }
 else
 {
 SqlCommand cmd = conn.CreateCommand();
 SqlDataAdapter adp = new SqlDataAdapter();
 string sql2 = "select * from account where name='"+ uname + " 'and pass='" + pword + " ' ";
 cmd.CommandText = sql2;
 adp.SelectCommand = cmd;
 DataSet dat = new DataSet();
 adp.Fill(dat, "account");
 if(dat.Tables["account"].Rows.Count == 0)
 {
 MessageBox.Show("用户名或密码错误!");
 return;
 }
 else
 {
 Form1.isLogin = true;
 Form1.username = this.txtName.Text;
 this.Close();
 }
 cmd.Clone();
 }
 conn.Close();

 }
 //实现按ESC键关闭该窗口
 protected override bool ProcessCmdKey(ref System.Windows.Forms.Message msg, System.Windows.Forms.Keys keyData)
 {
 switch (keyData)
 {
 case Keys.Escape:
 this.Close();//esc关闭窗体
 break;
 }
 return false;
 }
 //重置按钮清空文本框
 private void button2_Click(object sender, EventArgs e)
 {
 txtName.Text = "";
 txtPass.Text = "";
 }
 //密码输入完成后实现敲击enter键触发登录按钮
 private void txtPass_KeyDown(object sender, KeyEventArgs e)
 {
 if(e.KeyCode == Keys.Enter)
 {
 this.button1_Click(sender, e);
 }
 }
 //实现按enter键使焦点转移到下一文本框,与tab键通用
 private void txtName_KeyPress(object sender, KeyPressEventArgs e)
 {
 if (e.KeyChar == (char)Keys.Enter)
 {
 SendKeys.Send("{tab}");
 }
 }
效果如下图:
2、主界面功能实现
主要代码如下:
public static bool isLogin = false;
 int id;
 SqlConnection conn;
 SqlCommand cmd;
 SqlDataAdapter adp;
 DataSet dat;
 public static string username
 {
 get;
 set;
 }
 public Form1()
 {
 InitializeComponent();
 this.label1.BackColor = Color.Transparent;
 this.groupBox1.BackColor = Color.Transparent;
 this.groupBox2.BackColor = Color.Transparent;
 this.dataGridView1.BorderStyle = BorderStyle.None;
 this.dataGridView1.CellBorderStyle = DataGridViewCellBorderStyle.None;

 this.FormBorderStyle = System.Windows.Forms.FormBorderStyle.None;
 this.Text += "| 管理员:" + username;
 string ss = ConfigurationManager.ConnectionStrings["Stu"].ToString();
 //建立数据库连接
 conn = new SqlConnection(ss);
 try
 {
 //开启连接
 conn.Open();
 // MessageBox.Show("数据库连接成功!");
 }
 catch (Exception)
 {
 MessageBox.Show("数据库连接失败!");
 }

 }

 private void Form1_Load(object sender, EventArgs e)
 {
 DataGridViewDataLoad();

 //this.stu_dentTableAdapter.Fill(this.students.Stu_dent);

 }

 private void DataGridViewDataLoad()
 {
 String sql1 = "select * from Stu_dent";
 adp = new SqlDataAdapter(sql1,conn);
 dat = new DataSet();
 adp.Fill(dat);
 dataGridView1.DataSource = dat.Tables[0];
 }

 private void button5_Click(object sender, EventArgs e)
 {
 string num = textBox1.Text.Trim();
 string name = textBox2.Text.Trim();
 String sql4 = "Select * from Stu_dent where 1=1";
 if(!String.IsNullOrEmpty(num))
 {
 sql4 += " and StuNum=" + num;
 }
 if(!String.IsNullOrEmpty(name))
 {
 sql4 += " and StuName like '%" + name + "%'";
 }
 adp = new SqlDataAdapter(sql4, conn);
 dat = new DataSet();
 adp.Fill(dat);
 dataGridView1.DataSource = dat.Tables[0];

 }
 protected override bool ProcessCmdKey(ref System.Windows.Forms.Message msg, System.Windows.Forms.Keys keyData)
 {
 switch (keyData)
 {
 case Keys.Escape:
 this.Close();//esc关闭窗体
 break;
 }
 return false;
 }
 private void button1_Click(object sender, EventArgs e)
 {
 AddStudent addStudent = new AddStudent();
 addStudent.StartPosition = FormStartPosition.CenterScreen;
 //addStudent.Show();
 addStudent.ShowDialog();
 DataGridViewDataLoad();
 }

 private void button4_Click(object sender, EventArgs e)
 {
 this.Close();
 }

 private void button2_Click(object sender, EventArgs e)
 {
 MessageBox.Show("请在学生信息显示框中双击所要删除学生所在的那一行即可!!!","提示");
 }
 private void button3_Click(object sender, EventArgs e)
 {
 MessageBox.Show("请在学生信息显示框中单击所要删修改学生所在的那一行的任意文字区域即可!", "提示");
 }
 private void dataGridView1_CellDoubleClick(object sender, DataGridViewCellEventArgs e)
 {
 DialogResult result = MessageBox.Show("确定删除该学生信息?", "删除", MessageBoxButtons.OKCancel);
 if(result == DialogResult.OK)
 {
 id = Convert.ToInt32(dataGridView1.Rows[e.RowIndex].Cells[0].Value);
 Console.WriteLine(id);
 string sql2 = "delete from Stu_dent where ID=" + id;
 cmd = new SqlCommand(sql2, conn);
 cmd.ExecuteNonQuery();

 }
 DataGridViewDataLoad();
 }

 private void dataGridView1_CellContentClick(object sender, DataGridViewCellEventArgs e)
 {
 id = Convert.ToInt32(this.dataGridView1.Rows[e.RowIndex].Cells[0].Value);
 UpdateStudent updatestudent = new UpdateStudent(id);
 updatestudent.StartPosition = FormStartPosition.CenterScreen;
 updatestudent.ShowDialog();
 DataGridViewDataLoad();
 }
效果如下:

3、添加学生信息功能实现
主要代码如下:
public AddStudent()
 {
 InitializeComponent();
 this.FormBorderStyle = System.Windows.Forms.FormBorderStyle.None;
 string ss = ConfigurationManager.ConnectionStrings["Stu"].ToString();
 //建立数据库连接
 conn = new SqlConnection(ss);
 try
 {
 //开启连接
 conn.Open();
 // MessageBox.Show("数据库连接成功!");
 }
 catch (Exception)
 {
 MessageBox.Show("数据库连接失败!");
 }

 }

 private void AddStudent_Load(object sender, EventArgs e)
 {

 }

 private void label1_Click(object sender, EventArgs e)
 {

 }
 protected override bool ProcessCmdKey(ref System.Windows.Forms.Message msg, System.Windows.Forms.Keys keyData)
 {
 switch (keyData)
 {
 case Keys.Escape:
 this.Close();//esc关闭窗体
 break;
 }
 return false;
 }
 private void button1_Click(object sender, EventArgs e)
 {
 string StuNum = textBox1.Text.Trim();
 string StuName = textBox2.Text.Trim();
 int StuAge;
 Int32.TryParse(textBox3.Text.Trim(), out StuAge);
 string StuClass = textBox5.Text.Trim();
 string StuPhone = textBox6.Text.Trim();
 string StuSex = radioButton1.Checked ? "男" : "女";
 if (String.IsNullOrEmpty(StuNum))
 {
 MessageBox.Show("学号不能为空!");
 }
 if (String.IsNullOrEmpty(StuName))
 {
 MessageBox.Show("姓名不能为空!");
 }

 if (String.IsNullOrEmpty(StuClass))
 {
 MessageBox.Show("班级不能为空!");
 }
 if (String.IsNullOrEmpty(StuPhone))
 {
 MessageBox.Show("联系方式不能为空!");
 }
 string sql = string.Format("insert into Stu_dent values ('{0}','{1}','{2}','{3}','{4}','{5}')", StuNum, StuName,StuAge,StuSex, StuClass, StuPhone );
 cmd = new SqlCommand(sql, conn);
 int count = cmd.ExecuteNonQuery();
 if (count > 0)
 {
 MessageBox.Show("添加成功!");
 }
 else
 {
 MessageBox.Show("添加失败!");
 }
 this.Close();
 }
4、删除学生信息功能实现
在这里采用双击所要删除学生所在的那一行的任意位置即可
主要代码如下:
private void dataGridView1_CellDoubleClick(object sender, DataGridViewCellEventArgs e)
 {
 DialogResult result = MessageBox.Show("确定删除该学生信息?", "删除", MessageBoxButtons.OKCancel);
 if(result == DialogResult.OK)
 {
 id = Convert.ToInt32(dataGridView1.Rows[e.RowIndex].Cells[0].Value);
 Console.WriteLine(id);
 string sql2 = "delete from Stu_dent where ID=" + id;
 cmd = new SqlCommand(sql2, conn);
 cmd.ExecuteNonQuery();

 }
 DataGridViewDataLoad();
 }
效果如下图(双击第一行进行删除):
删除前:

删除后:

5、修改学生信息功能实现
在这里采用单击所要修改学生所在行任意文字处即可
主要代码如下:
public UpdateStudent(int id)
 {
 this.id = id;
 string ss = ConfigurationManager.ConnectionStrings["Stu"].ToString();
 conn = new SqlConnection(ss);
 try
 {
 //开启连接
 conn.Open();
 // MessageBox.Show("数据库连接成功!");
 }
 catch (Exception)
 {
 MessageBox.Show("数据库连接失败!");
 }
 InitializeComponent();
 this.FormBorderStyle = System.Windows.Forms.FormBorderStyle.None;
 }
 protected override bool ProcessCmdKey(ref System.Windows.Forms.Message msg, System.Windows.Forms.Keys keyData)
 {
 switch (keyData)
 {
 case Keys.Escape:
 this.Close();//esc关闭窗体
 break;
 }
 return false;
 }
 private void UpdateStudent_Load(object sender, EventArgs e)
 {
 cmd = conn.CreateCommand();
 string sql1 = "select * from Stu_dent where ID=" + id;
 cmd.CommandText = sql1;
 reader = cmd.ExecuteReader();
 if(reader.HasRows)
 {
 reader.Read();
 textBox1.Text = reader.GetString(1);
 textBox2.Text = reader.GetString(2);
 textBox3.Text = reader.GetInt32(3).ToString();
 if(reader.GetString(4) == "男")
 {
 this.radioButton2.Checked = true;
 }
 else
 {
 this.radioButton1.Checked = true;
 }
 textBox5.Text = reader.GetString(5);
 textBox6.Text = reader.GetString(6);
 }

 reader.Close();

 }

 private void button1_Click(object sender, EventArgs e)
 {
 string StuNum = textBox1.Text.Trim();
 string StuName = textBox2.Text.Trim();
 int StuAge;
 Int32.TryParse(textBox3.Text.Trim(), out StuAge);
 string StuClass = textBox5.Text.Trim();
 string StuPhone = textBox6.Text.Trim();
 string StuSex = radioButton1.Checked ? "男" : "女";
 if (String.IsNullOrEmpty(StuName))
 {
 MessageBox.Show("姓名不能为空!");
 }

 if (String.IsNullOrEmpty(StuClass))
 {
 MessageBox.Show("班级不能为空!");
 }
 if (String.IsNullOrEmpty(StuPhone))
 {
 MessageBox.Show("联系方式不能为空!");
 }
 string sql = string.Format("update Stu_dent set StuName='{0}',StuAge={1},StuSex='{2}',StuClass='{3}',StuPhone='{4}' where StuNum='{5}'", StuName, StuAge, StuSex, StuClass, StuPhone, StuNum);
 cmd = new SqlCommand(sql, conn);
 int count = cmd.ExecuteNonQuery();
 if (count > 0)
 {
 MessageBox.Show("修改成功!");
 }
 else
 {
 MessageBox.Show("修改失败!");
 }
 this.Close();
 }

 private void button2_Click(object sender, EventArgs e)
 {
 cmd = conn.CreateCommand();
 string sql1 = "select * from Stu_dent where ID=" + id;
 cmd.CommandText = sql1;
 reader = cmd.ExecuteReader();
 if (reader.HasRows)
 {
 reader.Read();
 textBox1.Text = reader.GetString(1);
 textBox2.Text = reader.GetString(2);
 textBox3.Text = reader.GetInt32(3).ToString();
 if (reader.GetString(4) == "男")
 {
 this.radioButton2.Checked = true;
 }
 else
 {
 this.radioButton1.Checked = true;
 }
 textBox5.Text = reader.GetString(5);
 textBox6.Text = reader.GetString(6);
 }

 reader.Close();
 }
(在这里将郭某某的专业班级为例)
修改前:

修改后:

6、查询学生信息功能实现
查询功能就写了两种查询方式
主要代码如下:
private void button5_Click(object sender, EventArgs e)
 {
 string num = textBox1.Text.Trim();
 string name = textBox2.Text.Trim();
 String sql4 = "Select * from Stu_dent where 1=1";
 if(!String.IsNullOrEmpty(num))
 {
 sql4 += " and StuNum=" + num;
 }
 if(!String.IsNullOrEmpty(name))
 {
 sql4 += " and StuName like '%" + name + "%'";
 }
 adp = new SqlDataAdapter(sql4, conn);
 dat = new DataSet();
 adp.Fill(dat);
 dataGridView1.DataSource = dat.Tables[0];

 }
效果如下:
按学号查询:

按姓名查询:

总结:这是上完c#课后,自己无聊整着玩的,功能实现简单易懂,比较容易,希望能对你的学习有所帮助。对了,每个窗体的背景图片是我再网上随便找的,你可以选择你喜欢的背景。
更多学习资料请关注专题《管理系统开发》。
以上就是本文的全部内容,希望对大家的学习有所帮助,也希望大家多多支持脚本之家。
相关文章
 本文详细讲解了C#网络编程的Socket编程,文中通过示例代码介绍的非常详细。对大家的学习或工作具有一定的参考借鉴价值,需要的朋友可以参考下2022-02-02
 这篇文章主要介绍了C# 实现把double 存成两位精度小数,具有很好的参考价值,希望对大家有所帮助。一起跟随小编过来看看吧2020-12-12
 这篇文章主要为大家详细介绍了C#自定义画刷原理,文中示例代码介绍的非常详细,具有一定的参考价值,感兴趣的小伙伴们可以参考一下2022-08-08
 在现代应用程序中,数据可视化是一个重要的功能,它可以帮助用户更直观地理解数据,在C# WPF中,有多种方式可以生成图表,以下是五种常见的方法,每种方法都有其独特的优势和局限,感兴趣的小伙伴跟着小编一起来看看吧2024-09-09
 这篇文章主要介绍了c# 利用易福门振动模块VSE002采集振动数据的方法,本文通过图文实例相结合给大家介绍的非常详细,对大家的学习或工作具有一定的参考借鉴价值,需要的朋友可以参考下2020-04-04
C#中string和StingBuilder内存中的区别实例分析
这篇文章主要介绍了C#中string和StingBuilder内存中的区别,以实例形式演示了二者在内存中的不同之处,需要的朋友可以参考下2014-09-09
Unity UGUI的RectMask2D遮罩组件的介绍使用
这篇文章主要为大家介绍了Unity UGUI的RectMask2D遮罩组件的介绍使用详解,有需要的朋友可以借鉴参考下,希望能够有所帮助,祝大家多多进步,早日升职加薪2023-07-07 本文主要介绍了c# 应用NPOI获取Excel中的图片,保存至本地的算法。具有很好的参考价值,下面跟着小编一起来看下吧2017-02-02
c#不使用windows api函数打开我的电脑和获取电脑驱动器信息
这篇文章主要介绍了c#不使用windows api函数打开我的电脑和电脑驱动器信息的方法,大家参考使用2013-12-12 C#操作Excel的方法有很多种,本文介绍了C#通过NPOI操作Excel,具有一定的参考价值,有兴趣的可以了解一下。2017-01-01


最新评论