
Flutter banner_view 轮播图的使用及实现代码
更新时间:2019年07月25日 10:42:41 作者:niceyoo
这篇文章主要介绍了Flutter banner_view 轮播图的使用及实现代码,本文给大家介绍的非常详细,具有一定的参考借鉴价值 ,需要的朋友可以参考下
1、前言
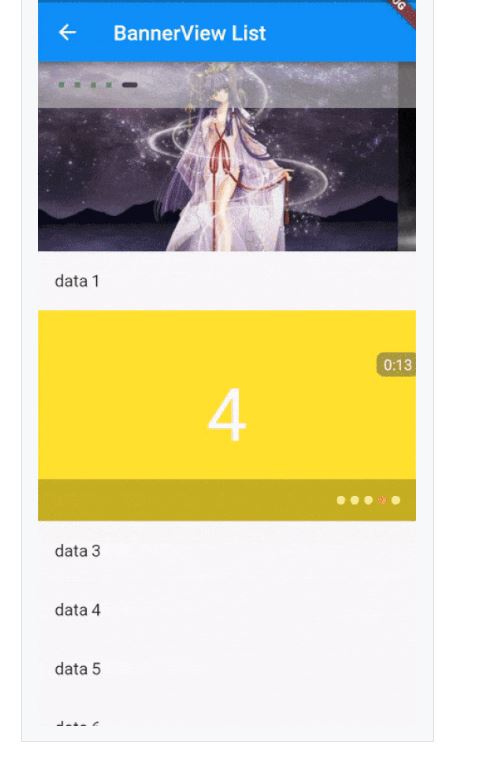
实现轮播图,效果如下:

2、实现
将采用 banner_view 实现:资源库地址

2.1、yaml 引入依赖
在 pubspec.yaml 声明需要引用的库,执行命令 flutter packages get 进行拉取即可使用。
banner_view: "^1.1.2"
2.2、代码中引入依赖
在资源库地址下方,作者提供了 banner_view 的几种展示方式。
import 'package:flutter/material.dart';
import 'package:banner_view/banner_view.dart';
import 'Pair.dart';
import 'factory/BannerItemFactory.dart';
class BannerViewPage extends StatefulWidget {
 @override
 _BannerViewPageState createState() => new _BannerViewPageState();
}
class _BannerViewPageState extends State<BannerViewPage> {
 @override
 Widget build(BuildContext context) {
 return new Scaffold(
  body:
   new Container(
   child: new Column(
    children: <Widget>[
    new Container(
     alignment: Alignment.center,
     height: 200.0,
     child: this._bannerView0(),
     padding: EdgeInsets.only(bottom: 10.0),
    )
    ],
   ),
   ),
  );
 }
 /**
 * 第一种方式
 */
 BannerView _bannerView0() {
 // 盛放图片的 List
 List<Pair<String, Color>> param = [
  Pair.create('https://p5.ssl.qhimg.com/dm/456_209_/t01f43c5849ef5f521a.jpg', Colors.red[500]),
  Pair.create('https://p.ssl.qhimg.com/t0171bb61911ebe8899.jpg', Colors.green[500]),
  Pair.create('https://p.ssl.qhimg.com/t01ee77978d3a95a3ae.jpg', Colors.blue[500]),
 ];
 return new BannerView(
  BannerItemFactory.banners(param),
 );
// return new BannerView(
//  BannerItemFactory.banners(param),
//  indicatorMargin: 10.0,
//  indicatorNormal: new Container(
//  width: 5.0,
//  height: 5.0,
//  decoration: new BoxDecoration(
//   color: Colors.green,
//   shape: BoxShape.rectangle,
//  ),
//  ),
//  indicatorSelected: new Container(
//  width: 15.0,
//  height: 5.0,
//  decoration: new BoxDecoration(
//   color: Colors.black,
//   shape: BoxShape.rectangle,
//   borderRadius: new BorderRadius.all(
//   new Radius.circular(5.0),
//   ),
//  ),
//  ),
//  indicatorBuilder: (context, indicator) {
//  Widget cc = new Container(
//   padding: new EdgeInsets.symmetric(horizontal: 20.0,),
//   height: 44.0,
//   width: double.infinity,
//   color: Colors.grey[300],
//   child: indicator,
//  );
//  return new Opacity(
//   opacity: 0.5,
//   child: cc,
//  );
//  },
// );
 }
 /**
 * 第二种方式
 */
 BannerView _bannerView() {
 var pre = 'https://raw.githubusercontent.com/yangxiaoweihn/Assets/master';
 List<Pair<String, Color>> param = [
  Pair.create('https://raw.githubusercontent.com/yangxiaoweihn/Assets/master/cars/car_0.jpg', Colors.red[100]),
  Pair.create('https://raw.githubusercontent.com/yangxiaoweihn/Assets/master/cartoons/ct_0.jpg', Colors.green[100]),
  Pair.create('https://raw.githubusercontent.com/yangxiaoweihn/Assets/master/pets/cat_1.jpg', Colors.blue[100]),
  Pair.create('https://raw.githubusercontent.com/yangxiaoweihn/Assets/master/scenery/s_1.jpg', Colors.yellow[100]),
  Pair.create('https://raw.githubusercontent.com/yangxiaoweihn/Assets/master/cartoons/ct_1.jpg', Colors.red[100]),
//  Pair.create('$pre/cartoons/ct_1.jpg', Colors.red[100]),
 ];
 return new BannerView(
  BannerItemFactory.banners(param),
  indicatorMargin: 10.0,
  indicatorNormal: new Container(
  width: 5.0,
  height: 5.0,
  decoration: new BoxDecoration(
   color: Colors.green,
   shape: BoxShape.rectangle,
  ),
  ),
  indicatorSelected: new Container(
  width: 15.0,
  height: 5.0,
  decoration: new BoxDecoration(
   color: Colors.black,
   shape: BoxShape.rectangle,
   borderRadius: new BorderRadius.all(
   new Radius.circular(5.0),
   ),
  ),
  ),
  indicatorBuilder: (context, indicator) {
  Widget cc = new Container(
   padding: new EdgeInsets.symmetric(horizontal: 20.0,),
   height: 44.0,
   width: double.infinity,
   color: Colors.grey[300],
   child: indicator,
  );
  return new Opacity(
   opacity: 0.5,
   child: cc,
  );
  },
 );
 }
}
总结
以上所述是小编给大家介绍的Flutter banner_view 轮播图的使用及实现代码,希望对大家有所帮助,如果大家有任何疑问请给我留言,小编会及时回复大家的。在此也非常感谢大家对脚本之家网站的支持!
如果你觉得本文对你有帮助,欢迎转载,烦请注明出处,谢谢!
相关文章

Android App中ViewPager所带来的滑动冲突问题解决方法
Android中我们经常使用ViewPager配合Fragment实现视图滑动,但在实际操作中又会经常发生方向上的冲突问题,这里我们就来总结一下Android App中ViewPager所带来的滑动冲突问题解决方法:2016-06-06 本文完成输入2个数相乘,并显示其结果。共涉及到4个控件的使用学习,输入数字采用EditText,显示结果用TextView,运算按钮button以及菜单中的退出键2013-11-11
 这篇文章主要为大家详细介绍了Android自定义EditText实现登录界面,具有一定的参考价值,感兴趣的小伙伴们可以参考一下2017-12-12
 本篇文章主要介绍了Android获取监听SD卡状态,小编觉得挺不错的,现在分享给大家,也给大家做个参考。一起跟随小编过来看看吧2017-03-03
 今天小编就为大家分享一篇关于Android整理好的图片压缩工具类,小编觉得内容挺不错的,现在分享给大家,具有很好的参考价值,需要的朋友一起跟随小编来看看吧2018-12-12
Android Studio 3.0中mipmap-anydpi-v26是什么东东
在Android Studio 3.0中一旦我们创建了一个项目,一个名为mipmap-anydpi-v26自动创建的文件夹在res文件夹下。它究竟能干什么?为什么我们需要这个?我们在开发时该如何利用它,下面通过本文给大家介绍下2017-12-12
Android ActionBarActivity设置全屏无标题的方法总结
这篇文章主要介绍了Android ActionBarActivity设置全屏无标题的相关资料,需要的朋友可以参考下2017-07-07 这篇文章主要介绍了Android EditText常用属性功能,较为详细的汇总分析了Android开发中EditText控件的常用属性的功能与具体用法,需要的朋友可以参考下2016-06-06
Android编程使用AlarmManager设置闹钟的方法
这篇文章主要介绍了Android编程使用AlarmManager设置闹钟的方法,结合具体实例分析了Android基于AlarmManager实现闹钟功能的设置、取消、显示等相关操作技巧,需要的朋友可以参考下2017-03-03 这篇文章主要介绍了android按行读取文件内容的几个方法,java逐行读取文件内容的几个方法,需要的朋友可以参考下2014-06-06


最新评论