
如何使用win10内置的linux系统启动spring-boot项目
1.安装win10内置linux子系统
1.1.安装linux子系统
1.1.1.升级或者重装linux系统
1.系统要求
需要升级win10到一周年纪念版,或者 重装系统
2.重装系统
笔者结果测试发现下面的系统重装后可以启用linux子系统
cn_windows_10_enterprise_version_1607_updated_jul_2016_x64_dvd_9057083.iso
cn_windows_10_multi-edition_vl_version_1709_updated_sept_2017_x64_dvd_100090774.iso
1.1.2.启用linux子系统
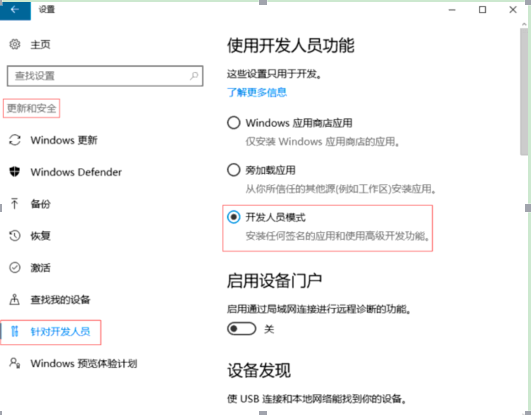
step1.启用开发人员模式
(16215版之后不再需要开发人员模式)
设置-->更新和安全-->针对开发人员
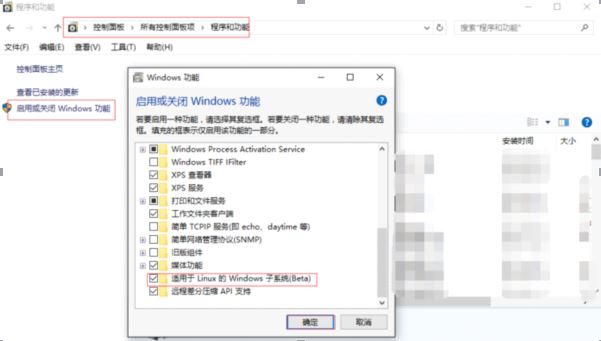
step2.启用linux子系统
控制面板-->程序和功能-->启用或关闭windows功能
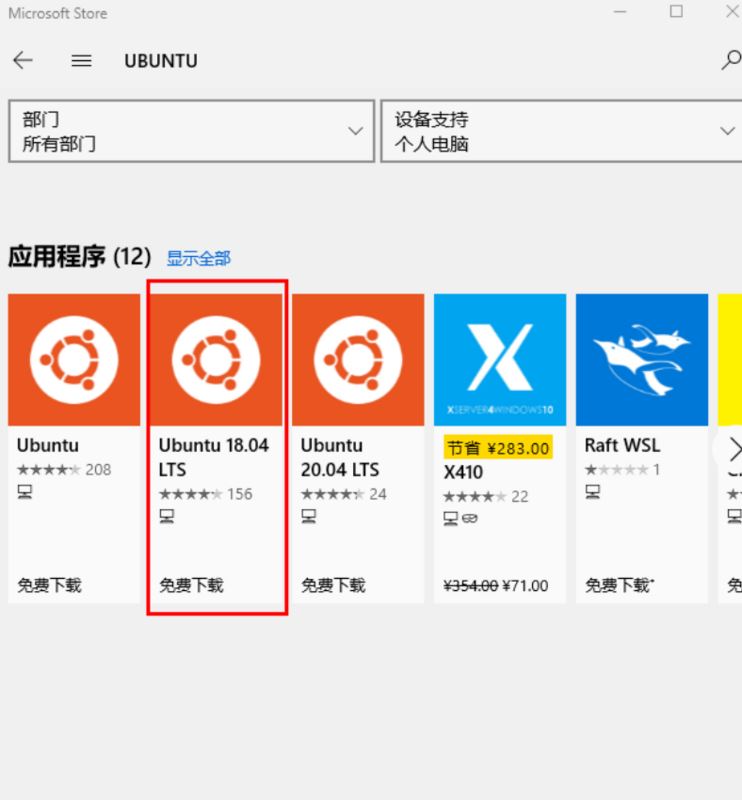
1.1.3.在线安装ubuntu系统
打开Microsoft Store安装ubuntu系统
1.1.4.离线安装ubuntu系统
下载安装包,下载自己想要安装的Linux系统。
参考链接:https://docs.microsoft.com/en...
下载Ubuntu 16.04.
Invoke-WebRequest -Uri https://aka.ms/wsl-ubuntu-1604 -OutFile Ubuntu.appx -UseBasicParsing
也可以使用curl下载,但是需要先安装curl
curl.exe -L -o ubuntu-1604.appx https://aka.ms/wsl-ubuntu-1604
安装
Add-AppxPackage .\app_name.appx
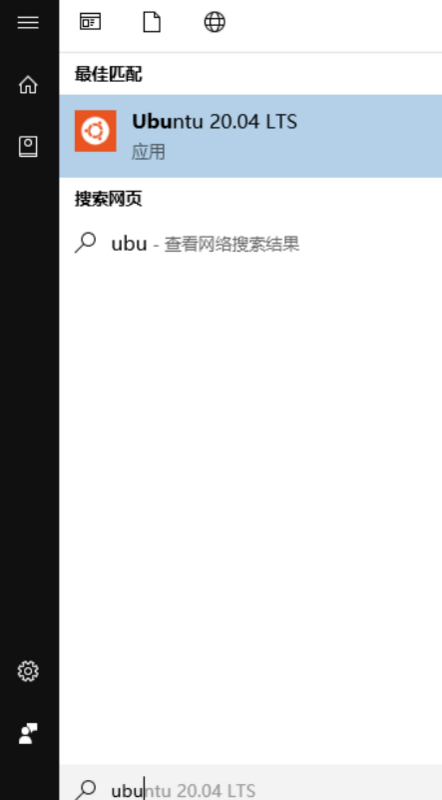
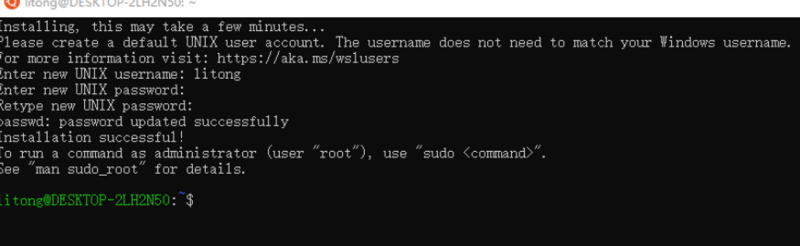
1.1.5.启动ubuntu系统
启动ubuntu系统
安装完成后打开搜索菜单,输入系统名字搜索启动
输出需要设置的用户和密码
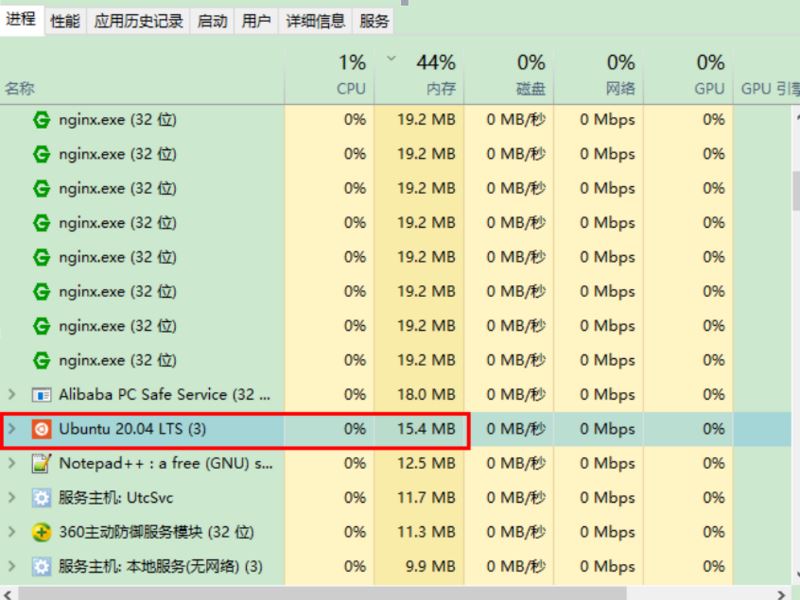
你相信吗,仅仅只有15.4MB
安装目录
C:\Users\Administrator\AppData\Local\Packages\CanonicalGroupLimited.Ubuntu20.04onWindows_79rhkp1fndgsc
home目录
C:\Users\Administrator\AppData\Local\Packages\CanonicalGroupLimited.Ubuntu20.04onWindows_79rhkp1fndgsc\LocalState\rootfs\home
1.2.开启ssh-server
1.2.1.相互复制文件
ubuntu的bash窗口窗与在xshell不同,通过shift+v无法黏贴,并且在输入界面鼠标右键无法使用。粘贴文件的方法如下
右击标题栏==> Edit(编辑) ==> Mark/Paste(标记并复制/粘贴)操作
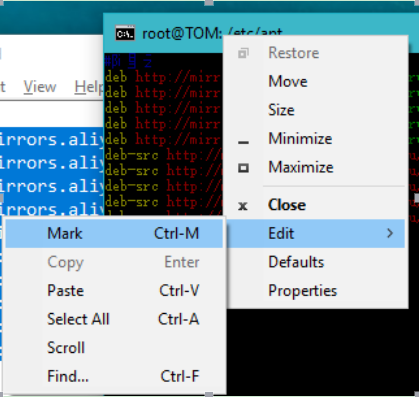
这样还是很麻烦,可以调整对话框,在弹出的菜单中有一个Properties对话框属性菜单,点击进入下图
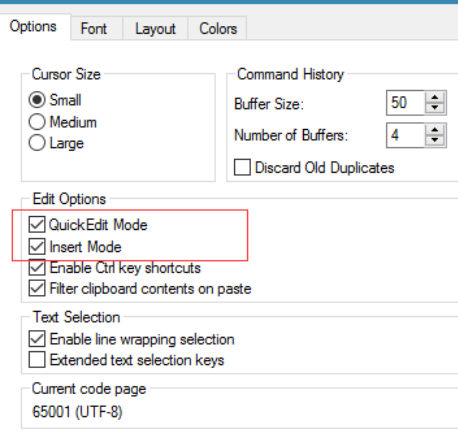
勾选快速编辑、快速插入模式,这两种模式支持鼠标右键选中,左键黏贴操作。
最后,最好的方式是,在ubuntu上启动ssh服务,通过xshell连接上操作会更好。
1.2.2.修改apt源
参考链接
https://developer.aliyun.com/...
用你熟悉的编辑器打开:
/etc/apt/sources.list
替换默认的archive.ubuntu.com为mirrors.aliyun.com
修改后的内容
ubuntu18.04
deb http://mirrors.aliyun.com/ubuntu/ bionic main restricted universe multiverse
deb-src http://mirrors.aliyun.com/ubuntu/ bionic main restricted universe multiversedeb http://mirrors.aliyun.com/ubuntu/ bionic-security main restricted universe multiverse
deb-src http://mirrors.aliyun.com/ubuntu/ bionic-security main restricted universe multiversedeb http://mirrors.aliyun.com/ubuntu/ bionic-updates main restricted universe multiverse
deb-src http://mirrors.aliyun.com/ubuntu/ bionic-updates main restricted universe multiversedeb http://mirrors.aliyun.com/ubuntu/ bionic-proposed main restricted universe multiverse
deb-src http://mirrors.aliyun.com/ubuntu/ bionic-proposed main restricted universe multiversedeb http://mirrors.aliyun.com/ubuntu/ bionic-backports main restricted universe multiverse
deb-src http://mirrors.aliyun.com/ubuntu/ bionic-backports main restricted universe multiverse
ubuntu 20.04(focal)
deb http://mirrors.aliyun.com/ubuntu/ focal main restricted universe multiverse
deb-src http://mirrors.aliyun.com/ubuntu/ focal main restricted universe multiversedeb http://mirrors.aliyun.com/ubuntu/ focal-security main restricted universe multiverse
deb-src http://mirrors.aliyun.com/ubuntu/ focal-security main restricted universe multiversedeb http://mirrors.aliyun.com/ubuntu/ focal-updates main restricted universe multiverse
deb-src http://mirrors.aliyun.com/ubuntu/ focal-updates main restricted universe multiversedeb http://mirrors.aliyun.com/ubuntu/ focal-proposed main restricted universe multiverse
deb-src http://mirrors.aliyun.com/ubuntu/ focal-proposed main restricted universe multiversedeb http://mirrors.aliyun.com/ubuntu/ focal-backports main restricted universe multiverse
deb-src http://mirrors.aliyun.com/ubuntu/ focal-backports main restricted universe multiverse
更新
apt-get update
1.2.3.启用ssh
1.安装ssh
apt-get -y install openssh-server
2.修改配置文件,一般不需要修改
cp /etc/ssh/sshd_config /etc/ssh/sshd_config.bak
vi /etc/ssh/sshd_config
# 修改端口号,避免和 Windows ssh 服务端口冲突
Port 2222
#StrictModes yes # 注释
# 使用密码登录
PasswordAuthentication yes
# 允许使用 root 用户登录
PermitRootLogin yes
3.设置root账号密码
sudo -s
passwd root
4.启动ssh
service ssh start
5.如果提示“sshd error: could not load host key”,则用下面的命令重新生成
rm /etc/ssh/ssh*key
dpkg-reconfigure openssh-server
使用xshell连接127.0.0.1输入账号和密码即可
1.2.4.配置PS1变量
自行百度什么事linux的PS1变量
export PS1="\[\e[1;32;40m\][\u@\h \W]\\$ \[\e[m\]"
2.搭建开发环境
2.1.搭建java开发环境
2.1.1.安装java和maven
mkdir /usr/java
tar -xf jdk-8u211-linux-x64.tar.gz -C /usr/java/
mdkir /usr/maven
tar -xf litongjava-apache-maven-3.3.9.tar.gz -C /usr/maven/
配置环境变量
export JAVA_HOME=/usr/java/jdk1.8.0_211
export M2_HOME=/usr/maven/apache-maven-3.3.9
export PATH=$JAVA_HOME/bin:$M2_HOME/bin:$PATH
配置maven使用windows的maven本地库目录,maven本地库在linux中对应的目录是/mnt/d/dev_mavenRepository/
settings.xml的内容如下
cat /usr/maven/apache-maven-3.3.9/conf/settings.xml
<?xml version="1.0" encoding="UTF-8"?>
<settings xmlns="http://maven.apache.org/SETTINGS/1.0.0"
   xmlns:xsi="http://www.w3.org/2001/XMLSchema-instance"
  xsi:schemaLocation="http://maven.apache.org/SETTINGS/1.0.0 http://maven.apache.org/xsd/settings-1.0.0.xsd">
  <localRepository>/mnt/d/dev_mavenRepository/</localRepository>
 <pluginGroups>
 </pluginGroups>
 <proxies>
 </proxies>
 <servers>
 </servers>
 <mirrors>
 <mirror>
  <id>aliyun</id>
  <name>aliyun</name>
  <mirrorOf>*</mirrorOf>
  <url>https://maven.aliyun.com/repository/public</url>
 </mirror>
 </mirrors>
 <profiles>
 </profiles>
</settings>
2.1.2.打包和启动spring-boot项目
进行项目目录执行下面的命令打包项目
mvn clean package -DskipTests
进入target目录启动项目
cd target/
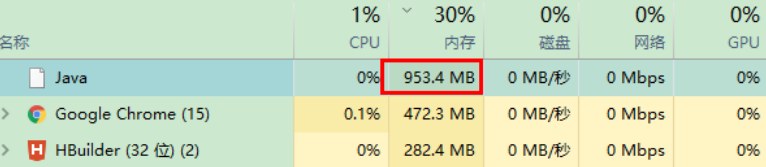
java -jar *.jar
可以明显的看出,java程序使用了近1G的内存
总结
到此这篇关于如何使用win10内置的linux系统启动spring-boot项目的文章就介绍到这了,更多相关win10 linux启动spring-boot项目内容请搜索脚本之家以前的文章或继续浏览下面的相关文章希望大家以后多多支持脚本之家!
相关文章

Linux(Ubuntu 18.04)上安装Anaconda步骤详解
Anaconda是最受欢迎的python数据科学和机器学习平台,用于大规模数据处理,预测分析和科学计算。这篇文章主要介绍了Linux(Ubuntu 18.04)上安装Anaconda的方法,需要的朋友可以参考下2018-11-11 文章描述了使用jps命令查看进程无法显示的问题,并提供了解决方案,解决方法包括切换到tmp目录,使用ll命令查看子目录,找到并修改权限为755的"hsperfdata_[用户名]"和"hsperfdata_root"目录2025-01-01
 这篇文章主要介绍了在阿里云购买云服务器并安装宝塔面板的步骤,文中通过示例代码介绍的非常详细,对大家的学习或者工作具有一定的参考学习价值,需要的朋友们下面随着小编来一起学习学习吧2020-07-07
CentOS 5.4 服务器配置 yum安装Apache+php+Mysql
Centos 里的 yum 在线安装很慢.以下是替换为中国CentOS镜像服务器!2010-03-03 apache无法启动,查询了一些方法,说是更改端口,如果你还是无法启动。那就备份一下数据库,重装apache吧2014-09-09
 这篇文章主要为大家详细介绍了CentOS 7.2如何部署邮件服务器Postfix,具有一定的参考价值,感兴趣的小伙伴们可以参考一下2016-11-11
 在本篇文章里小编给各位整理的是关于linux编译内核的方法,有需要的朋友们可以跟着学习参考下。2020-03-03
 在Linux中设置别名永久生效的步骤包括:在/root/.bashrc文件中配置别名,保存并退出,然后使用source命令(或点命令)使配置立即生效,这样,别名设置就不会在通过SSH重新登录时丢失2025-01-01
 本篇文章主要介绍了在Centos部署nodejs的步骤,小编觉得挺不错的,现在分享给大家,也给大家做个参考。一起跟随小编过来看看吧2017-05-05
 在本篇文章里小编给大家整理的是关于linux线程间的同步与互斥的相关知识点,有兴趣的朋友们学习下。2019-11-11


最新评论