
Vue3配置axios跨域实现过程解析
更新时间:2020年11月25日 11:48:34 作者:-零
这篇文章主要介绍了Vue3配置axios跨域实现过程解析,文中通过示例代码介绍的非常详细,对大家的学习或者工作具有一定的参考学习价值,需要的朋友可以参考下
实现跨域共3个步骤:
1,vue3.0根目录下创建vue.config.js文件;
module.exports = {
  devServer: {
    proxy: {
      '/api': {
        target: 'https://you.163.com/', //接口域名
        changeOrigin: true,       //是否跨域
        ws: true,            //是否代理 websockets
        secure: true,          //是否https接口
        pathRewrite: {         //路径重置
          '^/api': ''
        }
      }
    }
  }
};
2,将上述代码块写入其中;
如图:

3,将api接口放入请求的url中;
使用页面的代码块:
<template>
  <div>
    <H1>TEST</H1>
    <p>{{data}}</p>
  </div>
</template>

<script>
  import axis from 'axios';
  export default {
    name: 'Test',
    data() {
      return {
        data: {},
      };
    },
    methods: {
      getData() {
        axis.get('/api/xhr/search/queryHotKeyWord.json')//axis后面的.get可以省略;
          .then(
            (response) => {
              console.log(response);
              this.data = response;
            })
          .catch(
            (error) => {
              console.log(error);
        });
      },
    },
    mounted() {
      this.getData();
    },
  };
</script>

<style scoped>

</style>
代码解析:

浏览器页面:
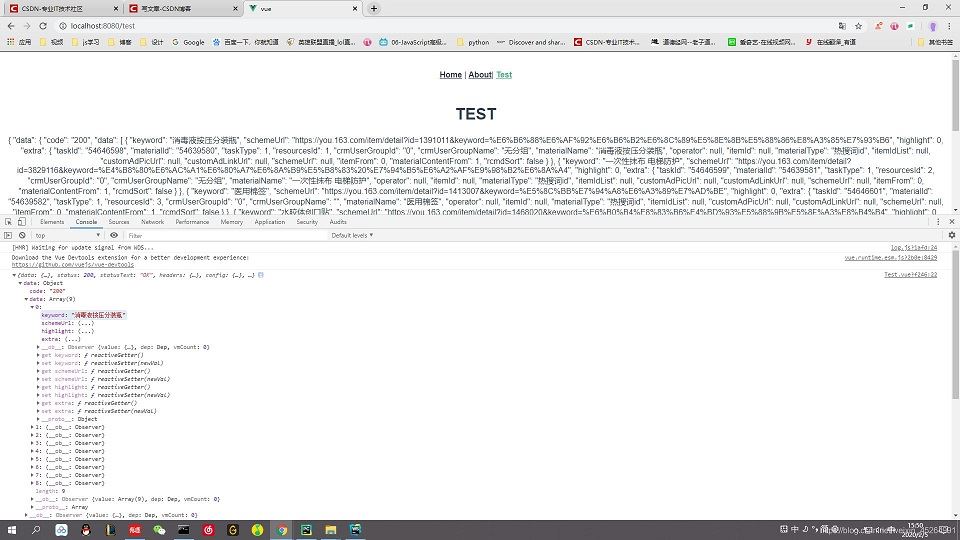
剩下的就是把数据渲染到页面了。
实际示例
vue3 8080端口请求flask8081端口服务数据:
module.exports = {
  devServer: {
    host: '0.0.0.0',
    port: 8080,
    open: true,
    proxy: {
      '/api/testcase/': {
        target: 'http://127.0.0.1:8081/', //接口域名
        changeOrigin: true,       //是否跨域
        ws: true,            //是否代理 websockets
        secure: true,          //是否https接口
        pathRewrite: {         //路径重置
          '^/api/testcase/': '/api/testcase/'
        }
      }
    },
  },
}
flask接口地址:
# http://127.0.0.1:8081/api/testcase/@app.route('/api/testcase/')def alltestcase(): pass
以上就是本文的全部内容,希望对大家的学习有所帮助,也希望大家多多支持脚本之家。
相关文章
 jsMind是一个显示/编辑思维导图的纯javascript类库,其基于 html5的canvas进行设计,这篇文章主要给大家介绍了关于vue使用jsMind思维导图的相关资料,需要的朋友可以参考下2023-01-01
 在开发Vue应用时,我们经常需要在多个组件中复用一些通用的函数或方法,这些函数可能是我们自己编写的工具函数,也可能是从第三方库中导入的,下面我们就来看看如何正确引用和使用外部方法吧2024-01-01
 今天小编就为大家分享一篇vue动态路由:路由参数改变,视图不更新问题的解决,具有很好的参考价值,希望对大家有所帮助。一起跟随小编过来看看吧2019-11-11
Vue3实现Element Plus表格的多选功能与条件操作
Element-plus是ElementUI的升级版,是一套基于vue2与vue3的桌面端组件库,它提供了丰富的组件帮助开发人员快速构建功能强大、风格统一的页面,本文给大家介绍了Vue3实现Element Plus表格的多选功能与条件操作,需要的朋友可以参考下2024-08-08 响应式就是当对象本身(对象的增删值)或者对象属性(重新赋值)发生变化时,将会运行一些函数,最常见的就是render函数,下面这篇文章主要给大家介绍了关于Vue3响应式原理的相关资料,需要的朋友可以参考下2022-11-11
vue3+element-plus Dialog对话框的使用与setup 写法的用法
这篇文章主要介绍了vue3+element-plus Dialog对话框的使用 与 setup 写法的使用,本文通过两种方式结合实例代码给大家介绍的非常详细,对大家的学习或工作具有一定的参考借鉴价值,需要的朋友可以参考下2023-04-04 这篇文章主要介绍了关于vue-router路径计算问题,小编觉得挺不错的,现在分享给大家,也给大家做个参考。一起跟随小编过来看看吧2017-05-05
elementUI select组件value值注意事项详解
这篇文章主要介绍了elementUI select组件value值注意事项详解,文中通过示例代码介绍的非常详细,对大家的学习或者工作具有一定的参考学习价值,需要的朋友们下面随着小编来一起学习学习吧2019-05-05 本篇文章主要介绍了详解VueRouter进阶之导航钩子和路由元信息,具有一定的参考价值,感兴趣的小伙伴们可以参考一下2017-09-09
解决Vue控制台报错Failed to mount component: tem
这篇文章主要介绍了解决Vue控制台报错Failed to mount component: template or render function not defined.问题,具有很好的参考价值,希望对大家有所帮助,如有错误或未考虑完全的地方,望不吝赐教2024-06-06


最新评论