
Spring MVC文件配置以及参数传递示例详解
更新时间:2021年03月23日 09:05:40 作者:朱怀昌
这篇文章主要给大家介绍了关于Spring MVC文件配置以及参数传递的相关资料,文中通过示例代码介绍的非常详细,对大家的学习或者工作具有一定的参考学习价值,需要的朋友们下面随着小编来一起学习学习吧
web.xml文件配置
创建好一个SpringMVC项目后,需要在需要在WB-INF文件夹下配置web.xml文件
<?xml version="1.0" encoding="UTF-8"?>
<web-app xmlns="http://xmlns.jcp.org/xml/ns/javaee"
     xmlns:xsi="http://www.w3.org/2001/XMLSchema-instance"
     xsi:schemaLocation="http://xmlns.jcp.org/xml/ns/javaee http://xmlns.jcp.org/xml/ns/javaee/web-app_3_1.xsd"
     version="3.1">

  <display-name>SpringMVCdemo</display-name>
  <welcome-file-list>
    <welcome-file>index.jsp</welcome-file>
  </welcome-file-list>

  <!--加载springMVC的配置文件-->
  <context-param>
    <param-name>contextConfigLocation</param-name>
    <param-value>classpath*:springMVC.xml</param-value>
  </context-param>

  <listener>
    <listener-class>org.springframework.web.context.ContextLoaderListener</listener-class>
  </listener>

  <servlet>
    <servlet-name>dispatcher</servlet-name>
    <!--中央核心控制器-->
    <servlet-class>org.springframework.web.servlet.DispatcherServlet</servlet-class>
    <load-on-startup>1</load-on-startup>
  </servlet>
  <servlet-mapping>
    <servlet-name>dispatcher</servlet-name>
    <!--请求-->
    <url-pattern>*.do</url-pattern>
  </servlet-mapping>

  <!--过滤器,编码格式-->
  <filter>
    <filter-name>characterEncodingFilter</filter-name>
    <filter-class>org.springframework.web.filter.CharacterEncodingFilter</filter-class>
    <init-param>
      <param-name>encoding</param-name>
      <param-value>UTF-8</param-value>
    </init-param>
  </filter>
  <filter-mapping>
    <filter-name>characterEncodingFilter</filter-name>
    <url-pattern>/*</url-pattern>
  </filter-mapping>
</web-app>
springMVC.xml文件配置
在src文件夹下创建springMVC.xml文件
<?xml version="1.0" encoding="UTF-8"?>
<beans xmlns="http://www.springframework.org/schema/beans"
    xmlns:xsi="http://www.w3.org/2001/XMLSchema-instance"
    xmlns:aop="http://www.springframework.org/schema/aop"
    xmlns:context="http://www.springframework.org/schema/context"
    xmlns:tx="http://www.springframework.org/schema/tx"
    xmlns:mvc="http://www.springframework.org/schema/mvc"
    xsi:schemaLocation="http://www.springframework.org/schema/beans
    http://www.springframework.org/schema/beans/spring-beans.xsd
    http://www.springframework.org/schema/aop
    http://www.springframework.org/schema/aop/spring-aop.xsd
    http://www.springframework.org/schema/tx
    http://www.springframework.org/schema/tx/spring-tx.xsd
    http://www.springframework.org/schema/context
    http://www.springframework.org/schema/context/spring-context.xsd
    http://www.springframework.org/schema/mvc
    http://www.springframework.org/schema/mvc/spring-mvc.xsd">

  <!--自动扫描上下文包-->
  <context:component-scan base-package="cn.zhc.*"></context:component-scan>

  <!--自动开启MVC模式注解-->
  <mvc:annotation-driven></mvc:annotation-driven>
  <!--将请求映射到标注@RequestMapping注解的控制器和处理方法上-->
  <mvc:default-servlet-handler></mvc:default-servlet-handler>

  <!--视图解析器-->
  <bean id="internalResourceViewResolver" class="org.springframework.web.servlet.view.InternalResourceViewResolver">
    <!--前缀后缀-->
    <property name="prefix" value="/"></property>
    <property name="suffix" value=".jsp"></property>
  </bean>
</beans>
第一个SpringMVC实例
index.jsp
<%@ page contentType="text/html;charset=UTF-8" language="java" %>
<html>
 <head>
  <title>$Title$</title>
 </head>
 <body>
 哈哈哈哈哈
 </body>
</html>
测试类:
package cn.zhc.test;

import org.springframework.stereotype.Controller;
import org.springframework.web.bind.annotation.RequestMapping;

@Controller
public class Test {
  @RequestMapping("/hello.do")
  public String hello(){
    System.out.println("hhhhhhhhhhhh");
    return "index";
  }
}
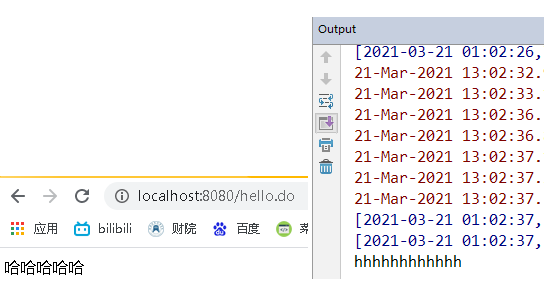
在项目运行后,在前端页面路径后输入/hello.do,控制台会输出hhhhhhhhhhhh
参数传递
view到controller 四种方式
	@RequestMapping("/hello.do")
  public String hello(String name){
    //路径后加?name=  不加会传null
    System.out.println(name);
    return "index";
  }

  //Controller方法方法中参数前加@RequestParam进行直接入参

  @RequestMapping("/hello.do")
  public String hello(@RequestParam String name){
    //不传参会请求错误400
    System.out.println(name);
    return "index";
  }

  @RequestMapping("/hello.do")
  public String hello(@RequestParam(value = "name" ,required = false) String name){
    //required是否需要传参
    System.out.println(name);
    return "index";
  }

  @RequestMapping(value = "/hello.do",method = RequestMethod.GET,params = "name")
  public String hello(String name){
    //不传参会请求错误400
    System.out.println(name);
    return "index";
  }
controller到view 三种方式
	@RequestMapping("/hello.do")
  public ModelAndView hello(){
    ModelAndView mv = new ModelAndView();
    mv.addObject("name","zhu");//添加模型数据
    mv.setViewName("index");//设置视图名称
    return mv;
  }

  @RequestMapping("/hello.do")
  public String hello(Model model){
    model.addAttribute("name","huai");
    model.addAttribute("chang");
    //在model中若不指定key,则使用默认对象的类型作为key
    return "index";
  }

  @RequestMapping("/hello.do")
  public String hello(Map<String,Object> map){
    map.put("name","lisa");
    return "index";
  }
总结
到此这篇关于Spring MVC文件配置以及参数传递的文章就介绍到这了,更多相关SpringMVC文件配置参数传递内容请搜索脚本之家以前的文章或继续浏览下面的相关文章希望大家以后多多支持脚本之家!
相关文章

spring事务@Transactional失效原因及解决办法小结
今天就跟大家聊聊有关spring中@Transactional失效原因及解决办法小结,主要从三个方面考虑,具有一定的参考价值,感兴趣的可以了解一下2023-08-08 这篇文章主要介绍了Java中IO流FileWriter写数据操作,FileWriter类提供了多种写入字符的方法,包括写入单个字符、写入字符数组和写入字符串等,它还提供了一些其他的方法,如刷新缓冲区、关闭文件等,需要的朋友可以参考下2023-10-10
springboot如何配置上传文件的maxRequestSize
这篇文章主要介绍了springboot如何配置上传文件的maxRequestSize,具有很好的参考价值,希望对大家有所帮助。如有错误或未考虑完全的地方,望不吝赐教2022-03-03 这篇文章主要介绍了springboot-jpa的实现操作,具有很好的参考价值,希望对大家有所帮助。一起跟随小编过来看看吧2021-03-03
 这篇文章主要介绍了详解IntelliJ IDEA2020.1和JDK14体验,文中通过示例代码介绍的非常详细,对大家的学习或者工作具有一定的参考学习价值,需要的朋友们下面随着小编来一起学习学习吧2020-05-05
SpringBoot基于Swagger2构建API文档过程解析
这篇文章主要介绍了SpringBoot基于Swagger2构建API文档过程解析,文中通过示例代码介绍的非常详细,对大家的学习或者工作具有一定的参考学习价值,需要的朋友可以参考下2019-11-11
Mybatis-Plus读写Mysql的Json字段的操作代码
这篇文章主要介绍了Mybatis-Plus读写Mysql的Json字段的操作代码,文中通过实例代码给大家介绍的非常详细,对大家的学习或工作具有一定的参考借鉴价值,需要的朋友可以参考下2022-04-04
SpringBoot集成Redis—使用RedisRepositories详解
这篇文章主要介绍了SpringBoot集成Redis—使用RedisRepositories详解,具有很好的参考价值,希望对大家有所帮助。如有错误或未考虑完全的地方,望不吝赐教2022-03-03 这篇文章主要介绍了Nacos docker单机模式部署实现过程详解,文中通过示例代码介绍的非常详细,对大家的学习或者工作具有一定的参考学习价值,需要的朋友可以参考下2020-09-09
 这篇文章主要介绍了JAVA设计模式之责任链模式详解,需要的朋友可以参考下2015-04-04


最新评论