
SpringMVC的工程搭建步骤实现
更新时间:2021年04月07日 14:25:49 作者:Ai清
这篇文章主要介绍了SpringMVC的工程搭建步骤实现,文中通过示例代码介绍的非常详细,对大家的学习或者工作具有一定的参考学习价值,需要的朋友们下面随着小编来一起学习学习吧
一、创建项目
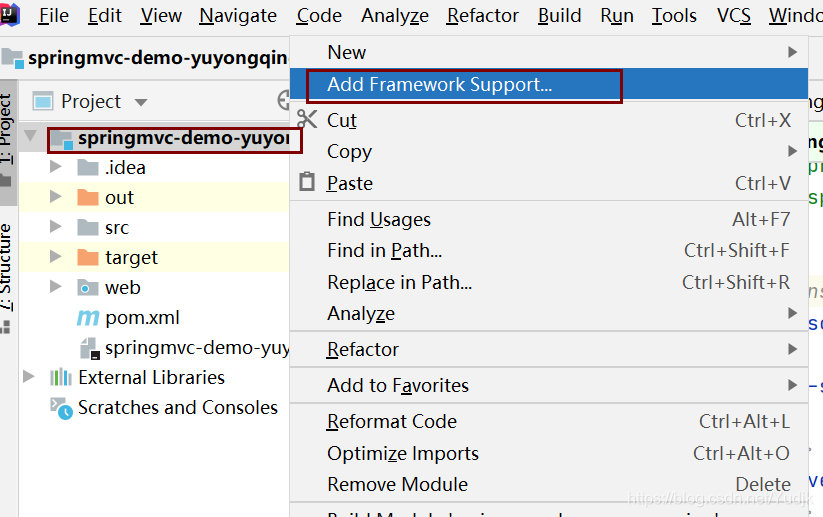
1、新建一个项目名为:springmvc-demo-yuyongqing
右键项目名选择Add Framework Support
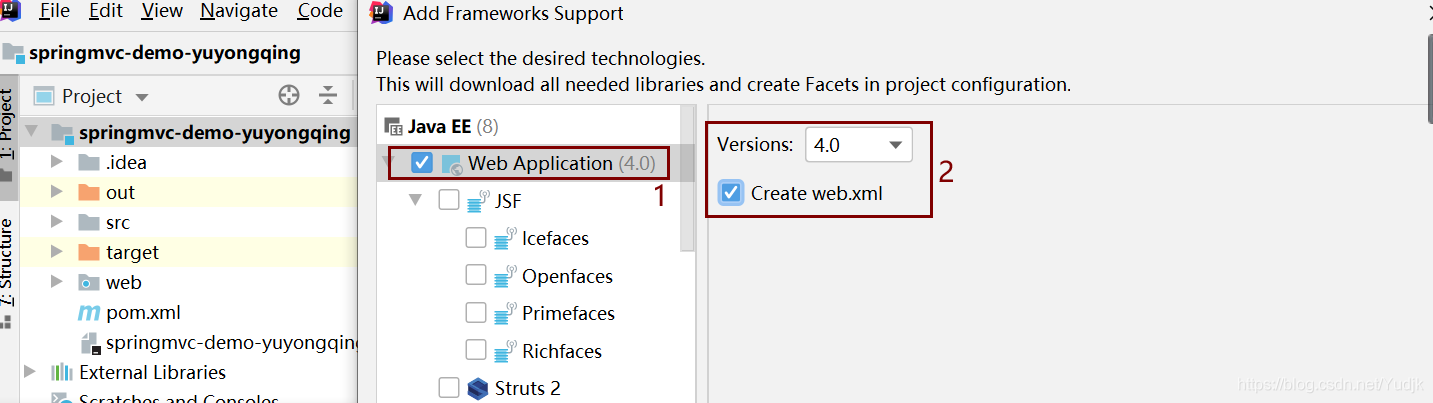
2、选择Web Application
3、配置SpringMVC
pom.xml
<dependencies>
<dependency>
 <groupId>junit</groupId>
 <artifactId>junit</artifactId>
 <version>4.13.2</version>
 <scope>test</scope>
</dependency>
<dependency>
 <groupId>org.springframework</groupId>
 <artifactId>spring-webmvc</artifactId>
 <version>5.2.13.RELEASE</version>
</dependency>
<dependency>
 <groupId>javax.servlet</groupId>
 <artifactId>servlet-api</artifactId>
 <version>2.5</version>
</dependency>
<dependency>
 <groupId>javax.servlet</groupId>
 <artifactId>javax.servlet-api</artifactId>
 <version>4.0.1</version>
 <scope>provided</scope>
</dependency>
</dependencies>
刷新maven后再加入如下图所示代码

<build>
<resources>
 <resource>
  <directory>src/main/java</directory>
  <includes>
   <include>**/*.properties</include>
   <include>**/*.xml</include>
  </includes>
  <filtering>false</filtering>
 </resource>
 <resource>
  <directory>src/main/resources</directory>
  <includes>
   <include>**/*.properties</include>
   <include>**/*.xml</include>
  </includes>
  <filtering>false</filtering>
 </resource>
</resources>
</build>
二、配置核心文件
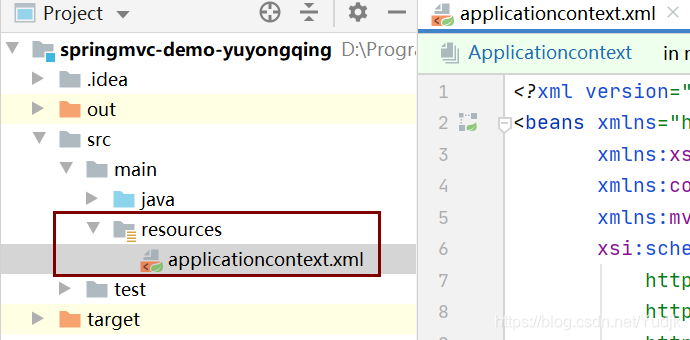
1、
<?xml version="1.0" encoding="UTF-8"?>
<beans xmlns="http://www.springframework.org/schema/beans"
 xmlns:xsi="http://www.w3.org/2001/XMLSchema-instance"
 xmlns:context="http://www.springframework.org/schema/context"
 xmlns:mvc="http://www.springframework.org/schema/mvc"
 xsi:schemaLocation="http://www.springframework.org/schema/beans
  http://www.springframework.org/schema/beans/spring-beans.xsd
  http://www.springframework.org/schema/context
  https://www.springframework.org/schema/context/spring-context.xsd
  http://www.springframework.org/schema/mvc
  https://www.springframework.org/schema/mvc/spring-mvc.xsd
 ">

<!-- bean definitions here -->
2、添加SpringMVC配置内容
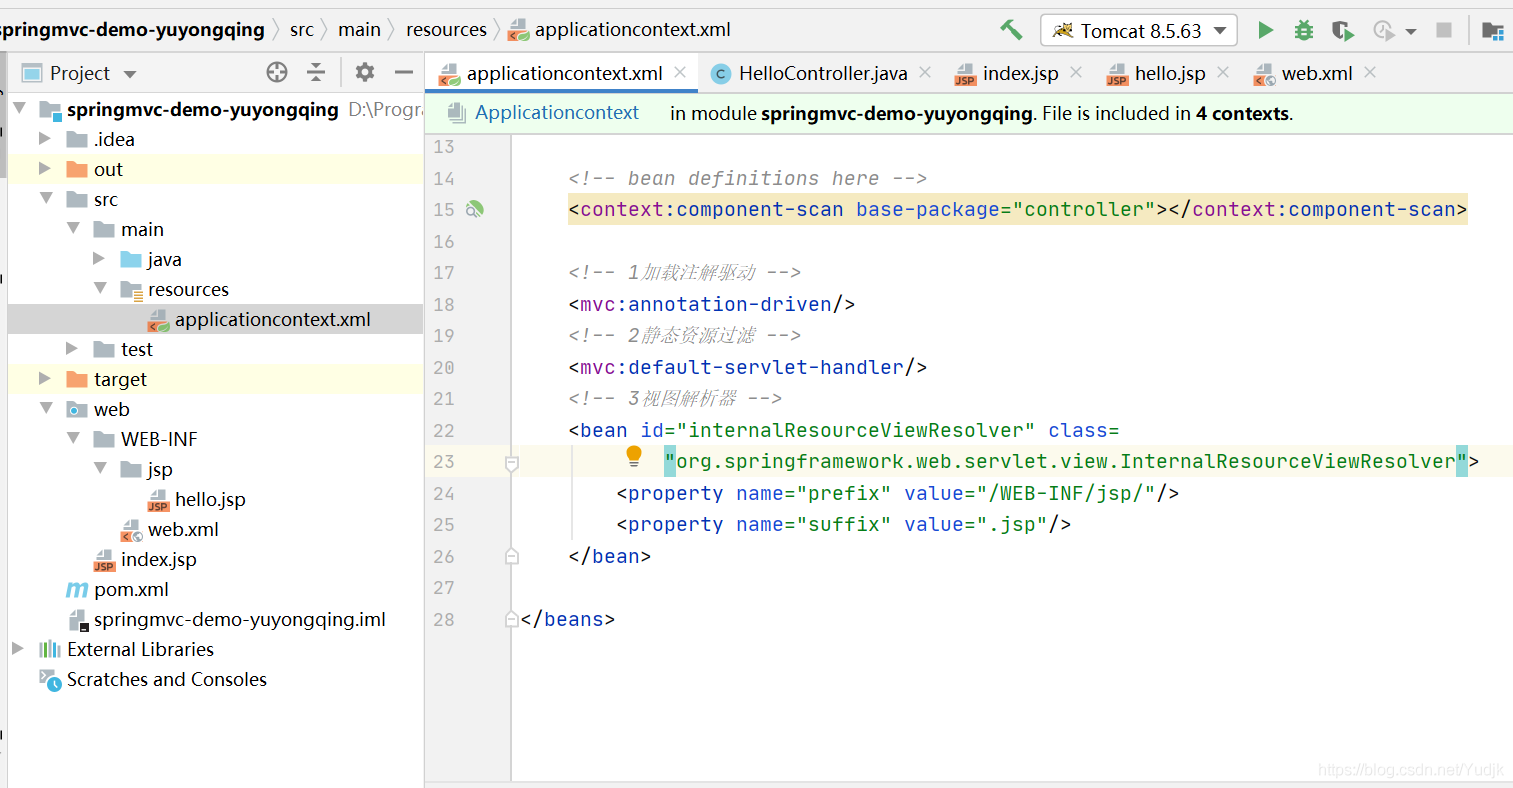
 <!-- 自动扫描包,让指定包下的注解生效,由IOC容器统一管理 -->
  <context:component-scan base-package="controller"/>

<!-- 1加载注解驱动 -->
<mvc:annotation-driven/>
 <!-- 2静态资源过滤 -->
<mvc:default-servlet-handler/>
<!-- 3视图解析器 -->
<bean id="internalResourceViewResolver" class=
 "org.springframework.web.servlet.view.InternalResourceViewResolver">
<property name="prefix" value="/WEB-INF/jsp/"/>
<property name="suffix" value=".jsp"/>
</bean>
3、Controller层
新建一个HelloController类
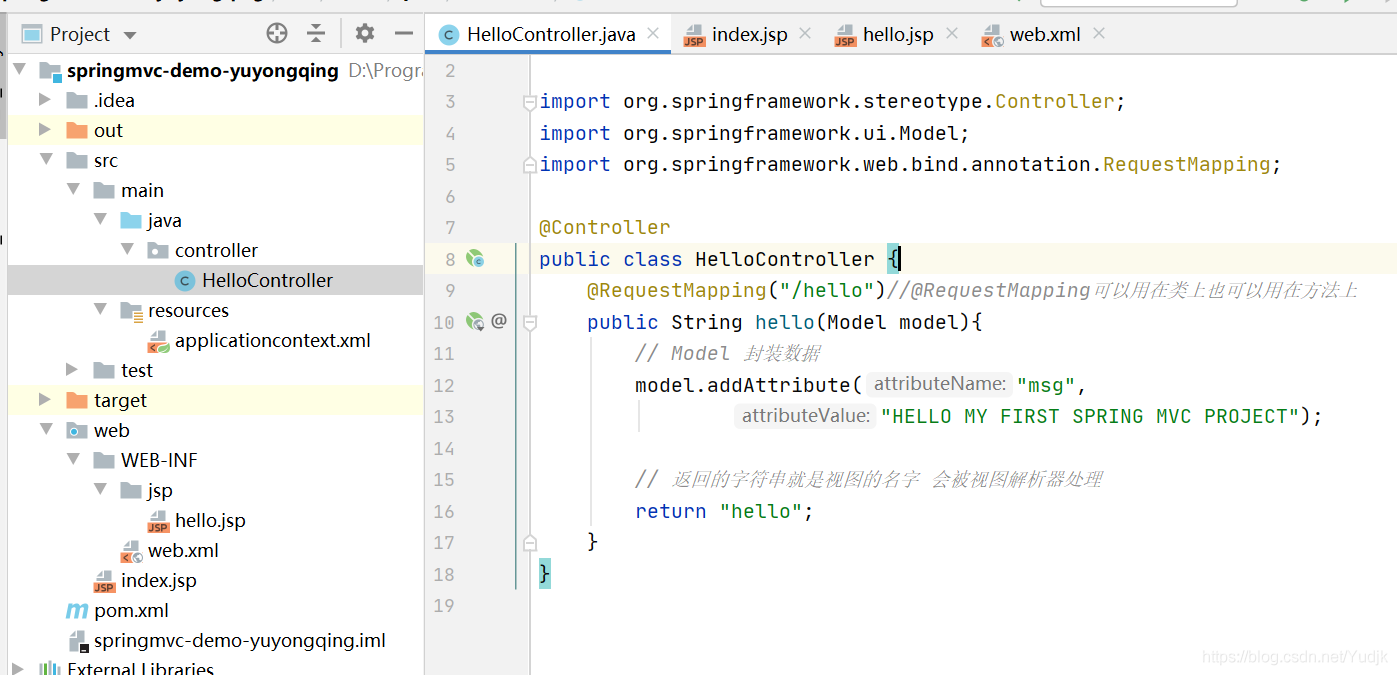
package controller;
@Controller
public class HelloController {
@RequestMapping("/hello")
public String hello(Model model){
// Model 封装数据
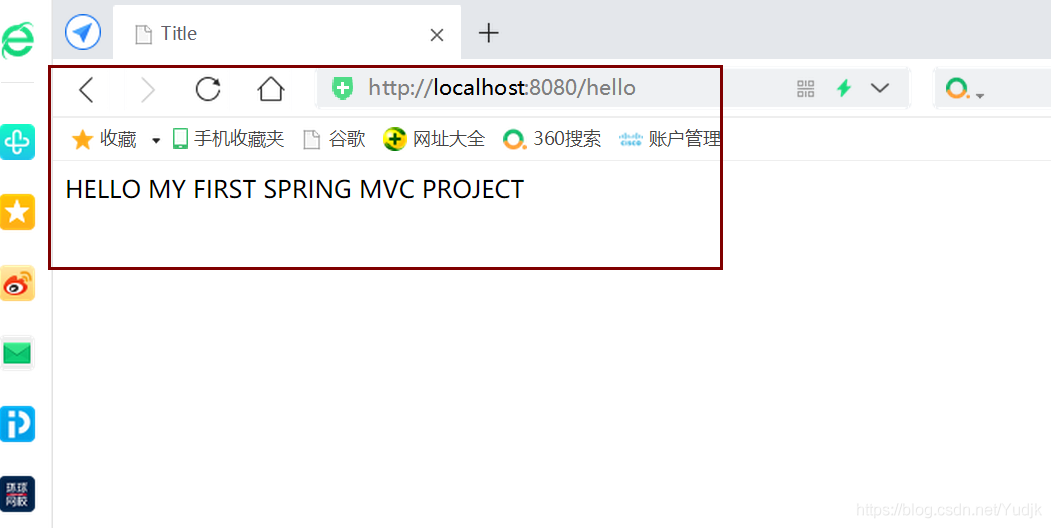
model.addAttribute("msg","HELLO MY FIRST SPRING MVC PROJECT");
// 返回的字符串就是视图的名字 会被视图解析器处理
return "hello";
}
}
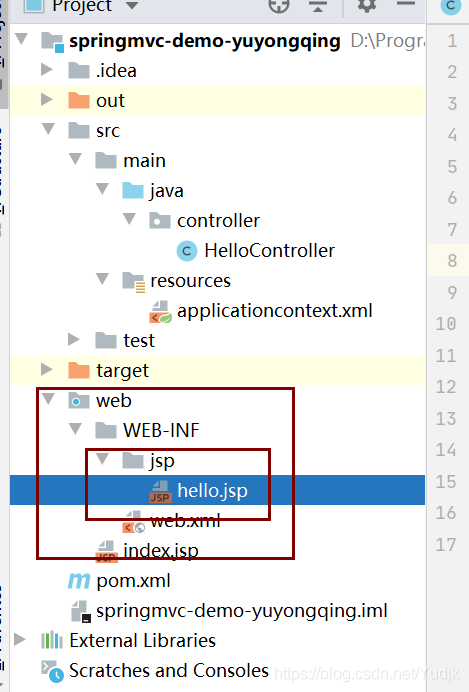
4、JSP
在JSP包下新建hello.jsp
 <%@ page contentType="text/html;charset=UTF-8" language="java" %>
 <html>
 <head>
<title>Title</title>
 </head>
 <body>
${msg}
 </body>
 </html>
三、web.xml
1、配置前端控制器
<!-- 配置前端控制器 -->
<servlet>
<servlet-name>springmvc</servlet-name>
<servlet-class>org.springframework.web.servlet.DispatcherServlet</servlet-class>
2、配置初始化参数
<!-- 配置初始化参数 -->
<init-param>
<param-name>contextConfigLocation</param-name>
<param-value>classpath:applicationcontext.xml</param-value>
</init-param>
3、设置启动级别
<!-- 设置启动级别 -->
<load-on-startup>1</load-on-startup>
</servlet>
4、设置SpringMVC拦截请求
<!-- 设置SpringMVC拦截请求 -->
<servlet-mapping>
 <servlet-name>springmvc</servlet-name>
 <url-pattern> / </url-pattern> <!--拦截除.jsp的请求-->
</servlet-mapping>
5、乱码过滤
 <!-- 乱码过滤 -->
<filter>
<filter-name>encodingFilter</filter-name>
<filter-class>org.springframework.web.filter.CharacterEncodingFilter</filter-class>
<init-param>
 <param-name>encoding</param-name>
 <param-value>utf-8</param-value>
</init-param>
</filter>
<filter-mapping>
<filter-name>encodingFilter</filter-name>
<url-pattern>/*</url-pattern>
</filter-mapping>
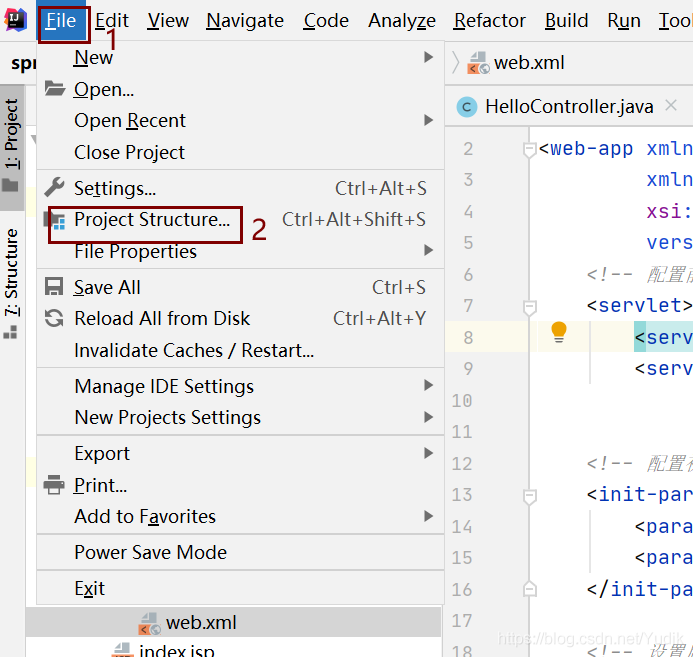
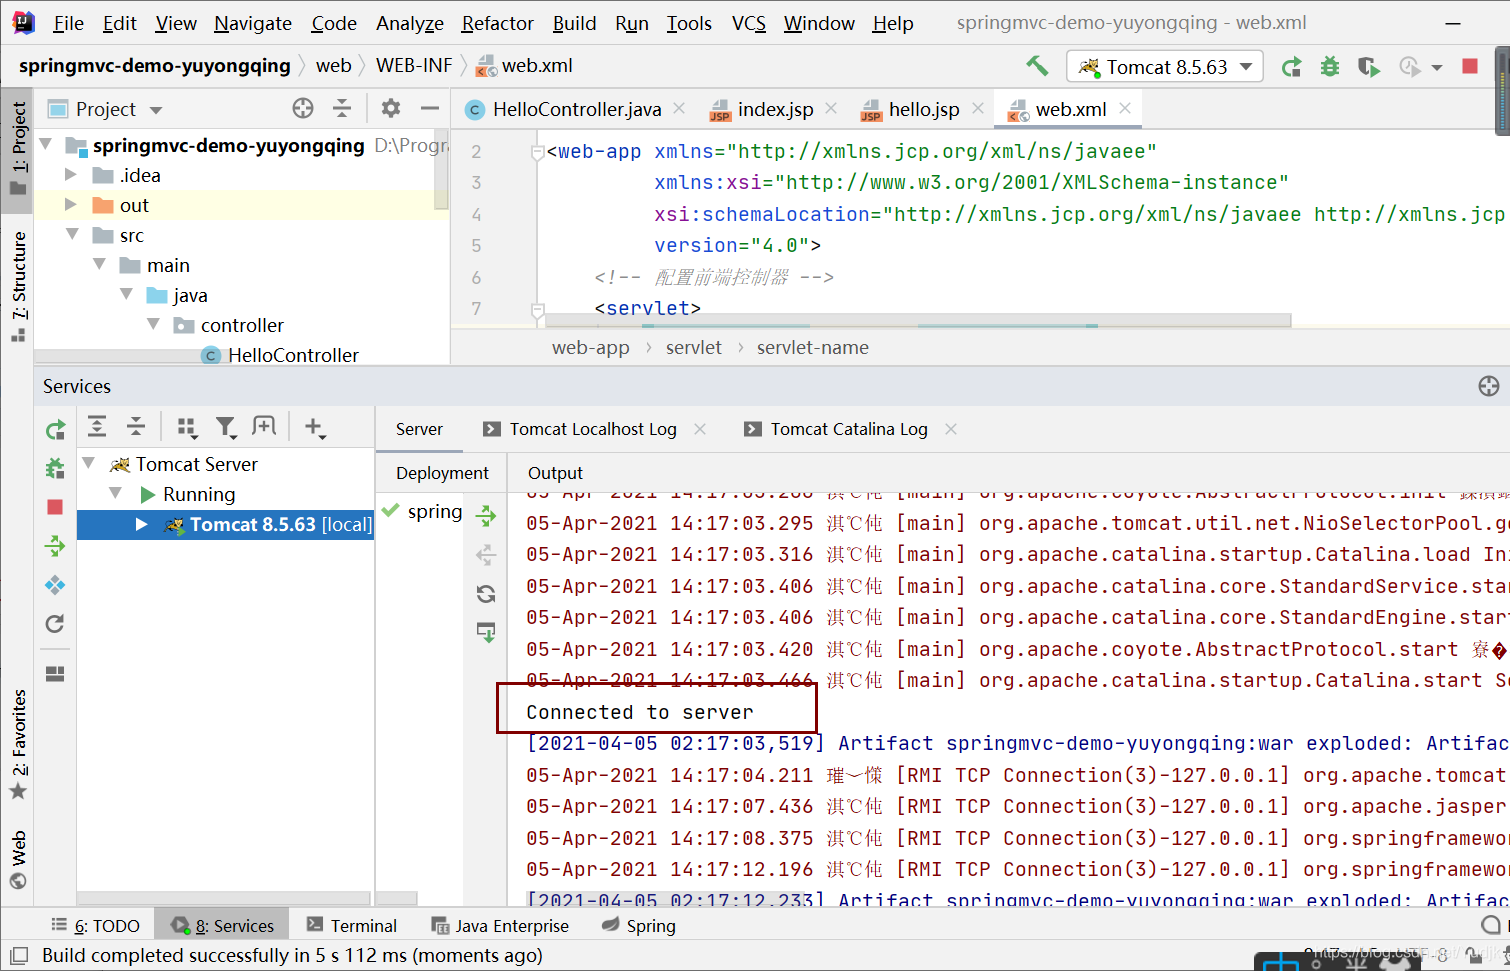
6、运行web
打包
File→Project Structure
删除默认的包
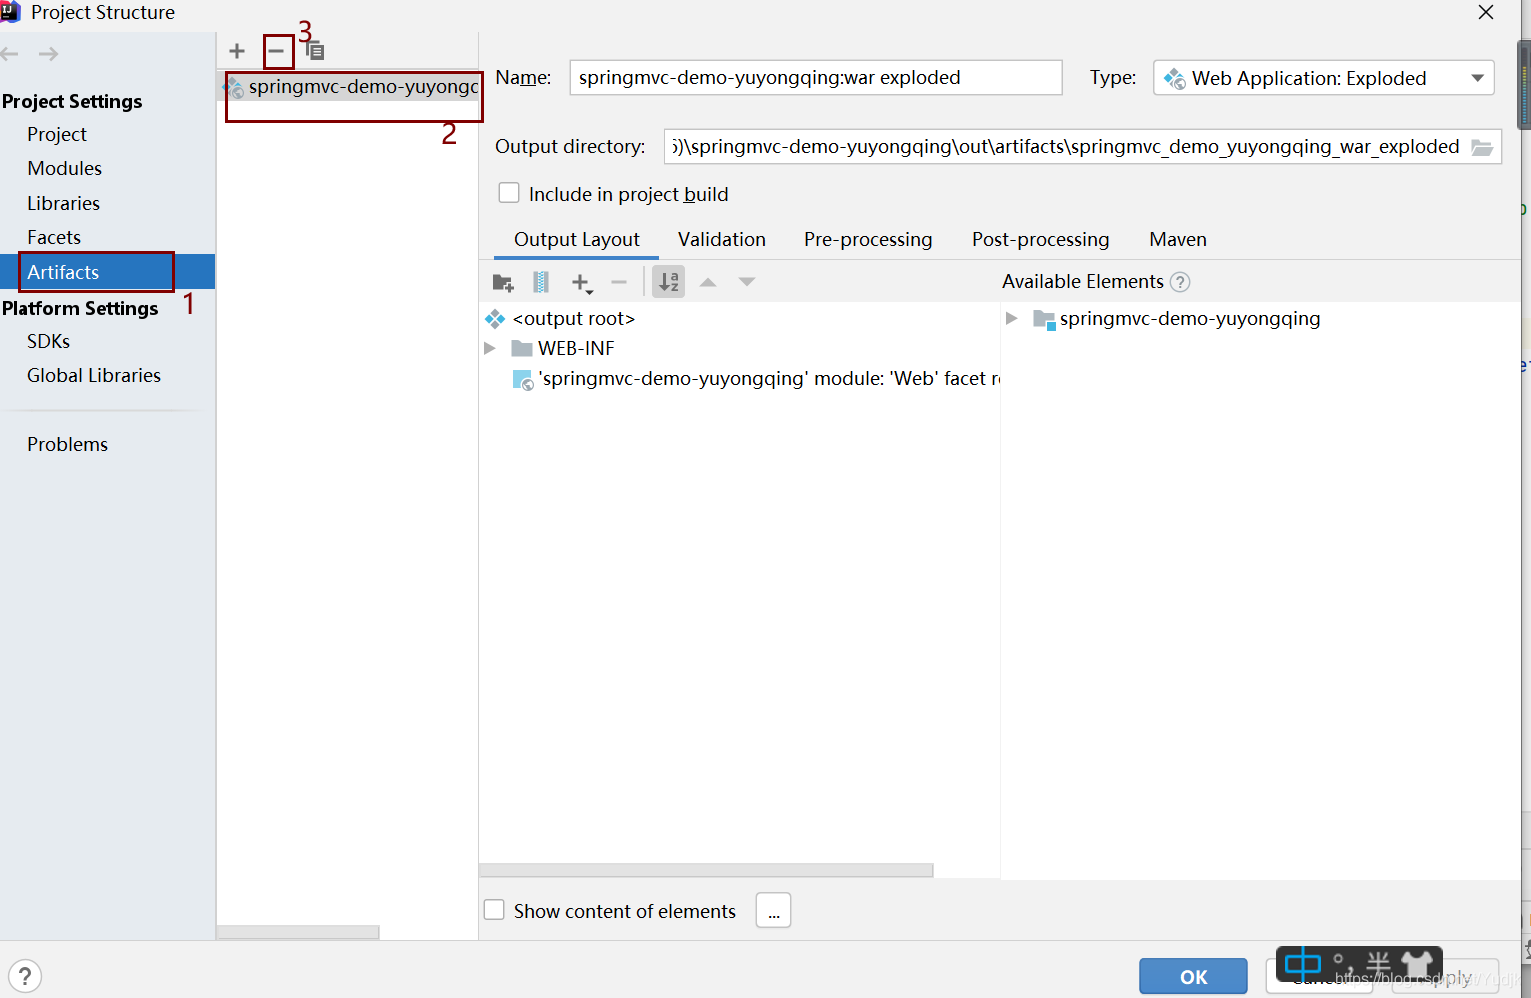
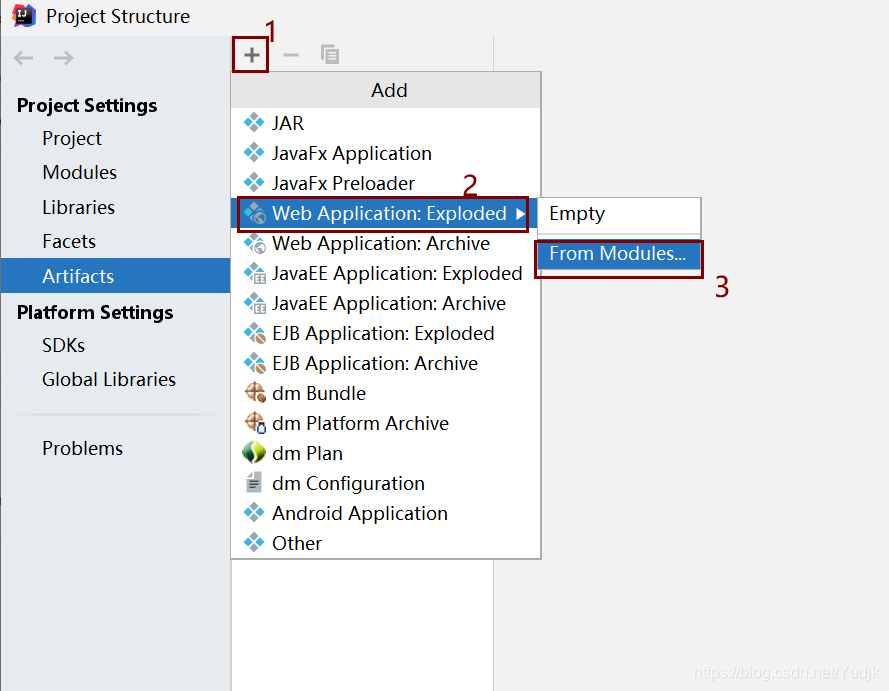
点ok→ok

四、配置TomCat
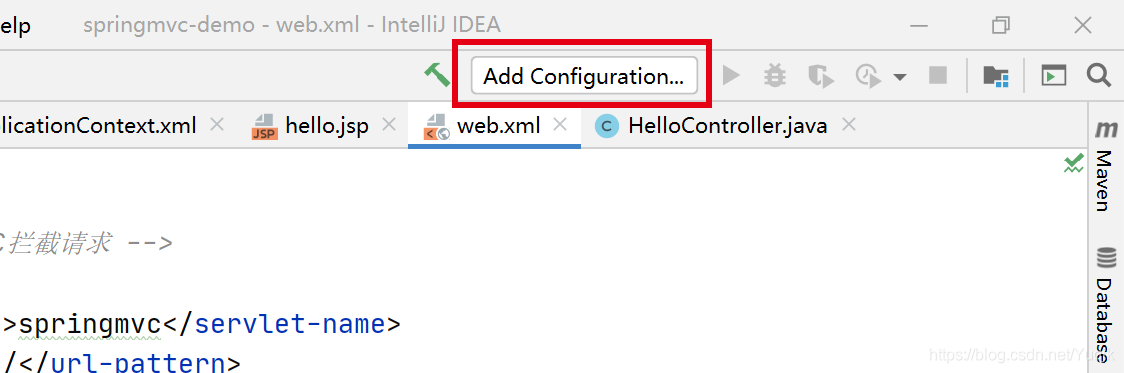
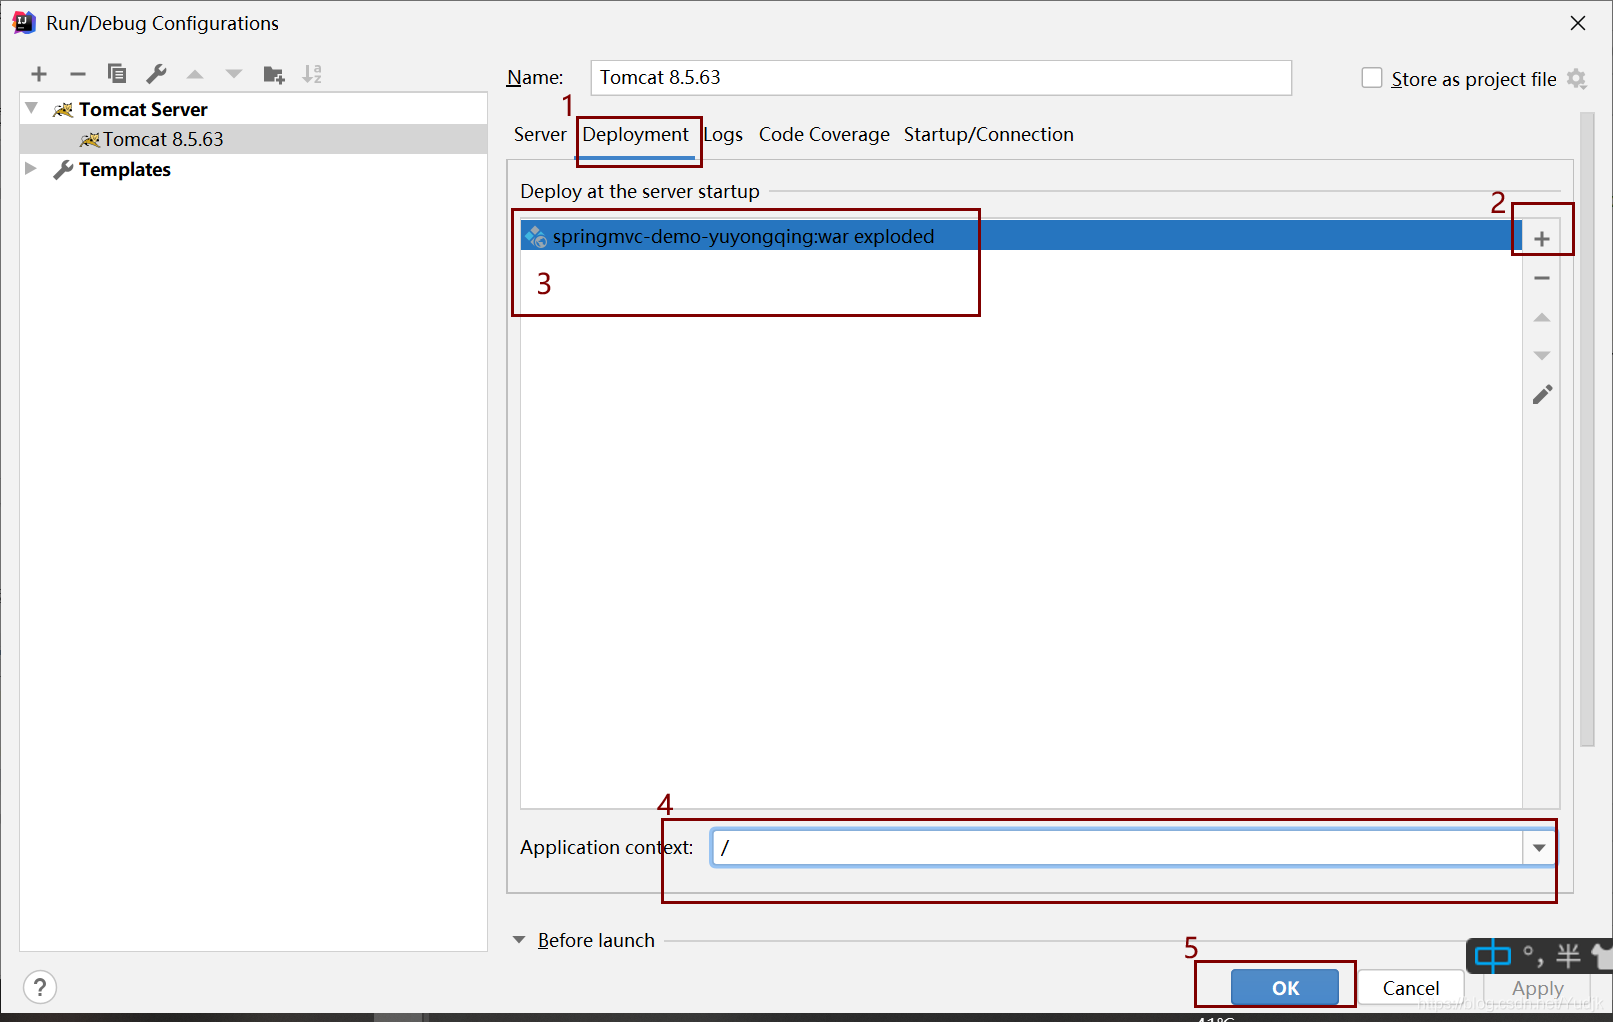
1、点击 Add Configuration… 进入运行配置框
2、点 + 选择Tomcat Server 下的 Local
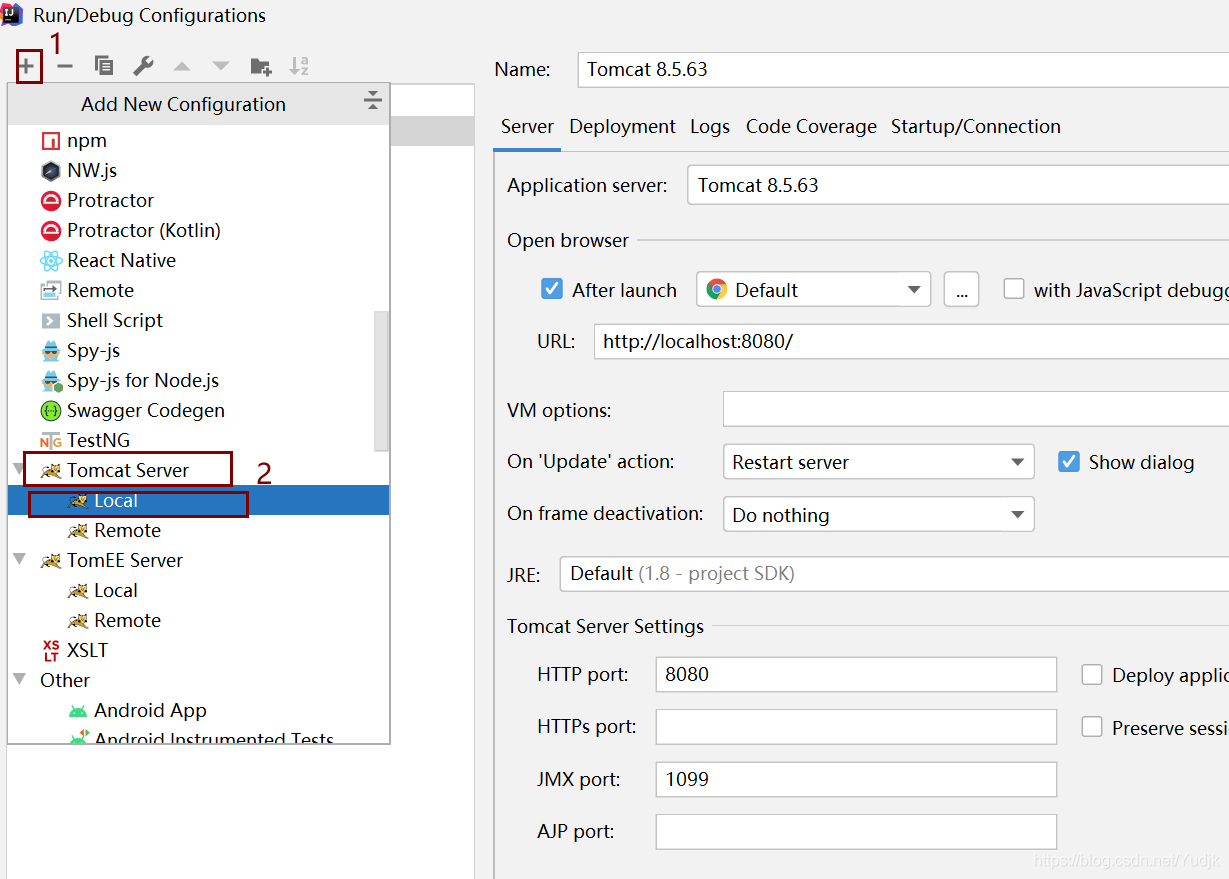
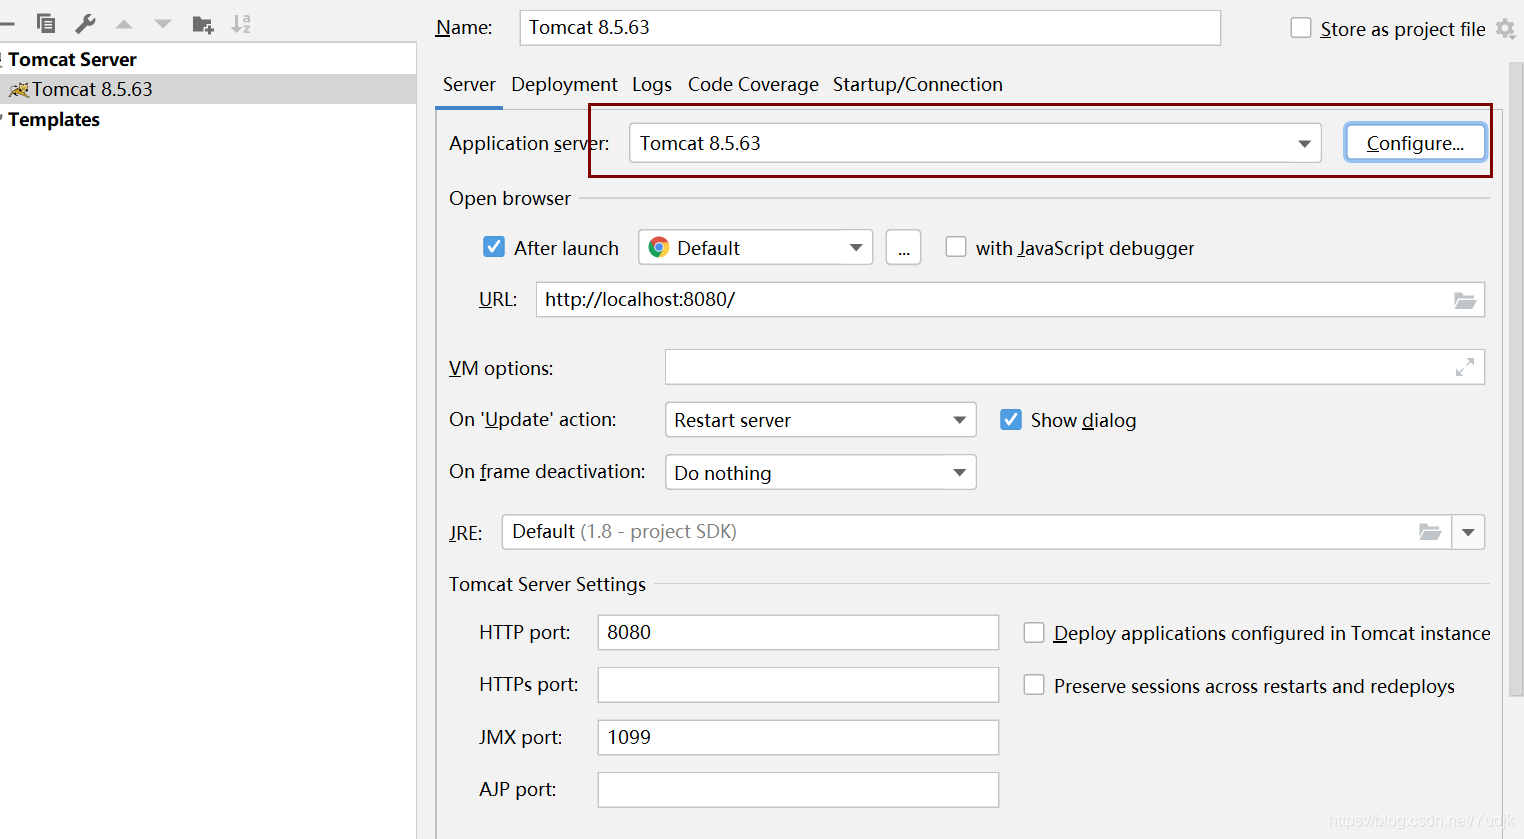
3、点击 Configure 选择我们自己的TomCat
五、运行TomCat
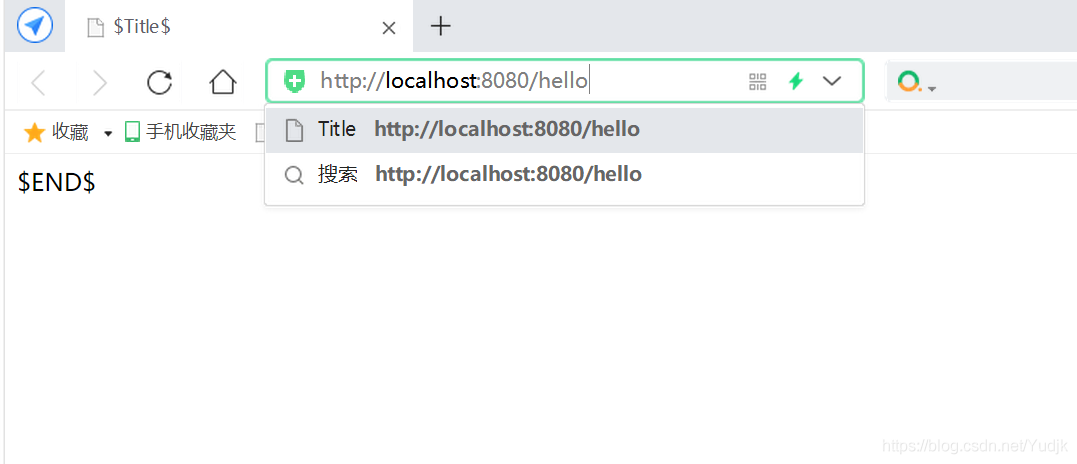
在浏览器输入http://localhost:8080/hello
外链:
https://mvnrepository.com/
到此这篇关于SpringMVC的工程搭建步骤实现的文章就介绍到这了,更多相关SpringMVC的工程搭建 内容请搜索脚本之家以前的文章或继续浏览下面的相关文章希望大家以后多多支持脚本之家!
相关文章
 本文将展示如何在 Java 项目中结合 MyBatis 实现动态排序,尤其是在涉及多表查询的情况下,具有一定的参考价值,感兴趣的可以了解一下2024-05-05
IDEA中HTML通过servlet3.0注解名提交表单到servlet类找不到页面的问题
这篇文章主要介绍了IDEA中HTML通过servlet3.0注解名提交表单到servlet类找不到页面的问题,本文通过场景描述及问题解析,给大家介绍的非常详细,对大家的学习或工作具有一定的参考借鉴价值,需要的朋友可以参考下2020-07-07 这篇文章主要介绍了如何查看JVM使用的默认的垃圾收集器,具有很好的参考价值,希望对大家有所帮助。如有错误或未考虑完全的地方,望不吝赐教2021-10-10
 本文主要介绍了spring 重复注解和aop拦截的实现示例,文中通过示例代码介绍的非常详细,对大家的学习或者工作具有一定的参考学习价值,需要的朋友们下面随着小编来一起学习学习吧2021-08-08
java开发之基于Validator接口的SpringMVC数据校验方式
这篇文章主要介绍了java开发之基于Validator接口的SpringMVC数据校验方式,文中附含详细示例代码,有需要的朋友可以借鉴参考下2021-09-09 这篇文章主要介绍了Java 动态生成类和实例, 并注入方法操作,结合实例形式分析了Java 动态生成类和实例以及动态注入相关操作技巧,需要的朋友可以参考下2020-02-02
 这篇文章主要给大家介绍了关于Java导出Excel通用工具类的相关资料,文中通过示例代码介绍的非常详细,对大家的学习或者工作具有一定的参考学习价值,需要的朋友们下面随着小编来一起学习学习吧2021-04-04
 有的时候Text需要实现这种那种的样式。先提供在不使用StyledText类的情况:2009-06-06
 这篇文章主要为大家详细介绍了如何利用Java语言进行压缩文件操作,文中的示例代码讲解详细,感兴趣的小伙伴可以跟随小编一起学习一下2022-08-08
 在Java项目中使用Maven管理依赖时,如果需要添加memcached.jar依赖,可以通过本文介绍的步骤进行配置,文章通过代码示例讲解的非常详细,对大家的学习或工作有一定的帮助,需要的朋友可以参考下2024-12-12


最新评论