
Java Spring boot实现生成二维码
更新时间:2022年02月09日 09:16:40 作者:weixin_43763430
大家好,本篇文章主要讲的是Java Spring boot实现生成二维码,感兴趣的同学赶快来看一看吧,对你有帮助的话记得收藏一下
一、引入spring boot依赖:
   <!--引入生成二维码的依赖-->
   <!-- https://mvnrepository.com/artifact/com.google.zxing/core -->
   <dependency>
       <groupId>com.google.zxing</groupId>
       <artifactId>core</artifactId>
       <version>3.3.0</version>
   </dependency>
   <!-- https://mvnrepository.com/artifact/com.google.zxing/javase -->
   <dependency>
       <groupId>com.google.zxing</groupId>
       <artifactId>javase</artifactId>
       <version>3.3.0</version>
   </dependency>
二、工具类代码:
import com.google.zxing.*;
import com.google.zxing.client.j2se.BufferedImageLuminanceSource;
import com.google.zxing.common.BitMatrix;
import com.google.zxing.common.HybridBinarizer;
import com.google.zxing.qrcode.decoder.ErrorCorrectionLevel;

import javax.imageio.ImageIO;
import java.awt.*;
import java.awt.geom.RoundRectangle2D;
import java.awt.image.BufferedImage;
import java.io.File;
import java.io.IOException;
import java.io.InputStream;
import java.io.OutputStream;
import java.util.Hashtable;

/**
 * 二维码生成工具类
 */
public class QrCodeUtils {
    private static final String CHARSET = "utf-8";
    public static final String FORMAT = "JPG";
    // 二维码尺寸
    private static final int QRCODE_SIZE = 300;
    // LOGO宽度
    private static final int LOGO_WIDTH = 60;
    // LOGO高度
    private static final int LOGO_HEIGHT = 60;

    /**
     * 生成二维码
     *
     * @param content      二维码内容
     * @param logoPath     logo地址
     * @param needCompress 是否压缩logo
     * @return 图片
     * @throws Exception
     */
    public static BufferedImage createImage(String content, String logoPath, boolean needCompress) throws Exception {
        Hashtable<EncodeHintType, Object> hints = new Hashtable<EncodeHintType, Object>();
        hints.put(EncodeHintType.ERROR_CORRECTION, ErrorCorrectionLevel.H);
        hints.put(EncodeHintType.CHARACTER_SET, CHARSET);
        hints.put(EncodeHintType.MARGIN, 1);
        BitMatrix bitMatrix = new MultiFormatWriter().encode(content, BarcodeFormat.QR_CODE, QRCODE_SIZE, QRCODE_SIZE,
                hints);
        int width = bitMatrix.getWidth();
        int height = bitMatrix.getHeight();
        BufferedImage image = new BufferedImage(width, height, BufferedImage.TYPE_INT_RGB);
        for (int x = 0; x < width; x++) {
            for (int y = 0; y < height; y++) {
                image.setRGB(x, y, bitMatrix.get(x, y) ? 0xFF000000 : 0xFFFFFFFF);
            }
        }
        if (logoPath == null || "".equals(logoPath)) {
            return image;
        }
        // 插入图片
        QrCodeUtils.insertImage(image, logoPath, needCompress);
        return image;
    }

    /**
     * 插入LOGO
     *
     * @param source       二维码图片
     * @param logoPath     LOGO图片地址
     * @param needCompress 是否压缩
     * @throws IOException
     */
    private static void insertImage(BufferedImage source, String logoPath,
                                    boolean needCompress) throws Exception {
        File file = new File(logoPath);
        if (!file.exists()) {
            System.err.println(""+logoPath+"   该文件不存在!");
            return;
        }
        Image src = ImageIO.read(new File(logoPath));
        int width = src.getWidth(null);
        int height = src.getHeight(null);
        if (needCompress) { // 压缩LOGO
            if (width > LOGO_WIDTH) {
                width = LOGO_WIDTH;
            }
            if (height > LOGO_HEIGHT) {
                height = LOGO_HEIGHT;
            }
            Image image = src.getScaledInstance(width, height,
                    Image.SCALE_SMOOTH);
            BufferedImage tag = new BufferedImage(width, height,
                    BufferedImage.TYPE_INT_RGB);
            Graphics g = tag.getGraphics();
            g.drawImage(image, 0, 0, null); // 绘制缩小后的图
            g.dispose();
            src = image;
        }
        // 插入LOGO
        Graphics2D graph = source.createGraphics();
        int x = (QRCODE_SIZE - width) / 2;
        int y = (QRCODE_SIZE - height) / 2;
        graph.drawImage(src, x, y, width, height, null);
        Shape shape = new RoundRectangle2D.Float(x, y, width, width, 6, 6);
        graph.setStroke(new BasicStroke(3f));
        graph.draw(shape);
        graph.dispose();
    }

    /**
     * 生成二维码(指定路径保存)
     *
     * @param content 内容
     * @param imgPath logo图片地址(内嵌图片)
     * @param destPath 生成二维码存放地址
     * @param needCompress 是否压缩logo
     * @throws Exception
     */
    public static void encode(String content, String imgPath, String destPath, boolean needCompress) throws Exception {
        BufferedImage image = QrCodeUtils.createImage(content, imgPath, needCompress);
        mkdirs(destPath);
        // String file = new Random().nextInt(99999999)+".jpg";
        // ImageIO.write(image, FORMAT_NAME, new File(destPath+"/"+file));
        ImageIO.write(image, FORMAT, new File(destPath));
    }

    /**
     * 生成二维码(直接将二维码以图片输出流返回)
     *
     * @param content 内容
     * @param imgPath logo图片地址(内嵌图片)
     * @param needCompress 是否压缩logo
     * @return
     * @throws Exception
     */
    public static BufferedImage encode(String content, String imgPath, boolean needCompress) throws Exception {
        BufferedImage image = QrCodeUtils.createImage(content, imgPath, needCompress);
        return image;
    }

    public static void mkdirs(String destPath) {
        File file = new File(destPath);
        // 当文件夹不存在时,mkdirs会自动创建多层目录,区别于mkdir.(mkdir如果父目录不存在则会抛出异常)
        if (!file.exists() && !file.isDirectory()) {
            file.mkdirs();
        }
    }

    /**
     * 生成二维码(内嵌LOGO)
     *
     * @param content      内容
     * @param logoPath     LOGO地址
     * @param output       输出流
     * @param needCompress 是否压缩LOGO
     * @throws Exception
     */
    public static void encode(String content, String logoPath, OutputStream output, boolean needCompress)
            throws Exception {
        BufferedImage image = QrCodeUtils.createImage(content, logoPath, needCompress);
        ImageIO.write(image, FORMAT, output);
    }

    /**
     * 获取指定文件的输入流,获取logo
     *
     * @param logoPath 文件的路径
     * @return
     */
    public static InputStream getResourceAsStream(String logoPath) {
        return QrCodeUtils.class.getResourceAsStream(logoPath);
    }

    /**
     * 解析二维码
     *
     * @param file
     *            二维码图片
     * @return
     * @throws Exception
     */
    public static String decode(File file) throws Exception {
        BufferedImage image;
        image = ImageIO.read(file);
        if (image == null) {
            return null;
        }
        BufferedImageLuminanceSource source = new BufferedImageLuminanceSource(image);
        BinaryBitmap bitmap = new BinaryBitmap(new HybridBinarizer(source));
        Result result;
        Hashtable<DecodeHintType, Object> hints = new Hashtable<DecodeHintType, Object>();
        hints.put(DecodeHintType.CHARACTER_SET, CHARSET);
        result = new MultiFormatReader().decode(bitmap, hints);
        String resultStr = result.getText();
        return resultStr;
    }

    /**
     * 解析二维码
     *
     * @param path
     *            二维码图片地址
     * @return
     * @throws Exception
     */
    public static String decode(String path) throws Exception {
        return QrCodeUtils.decode(new File(path));
    }

	//测试一:
    public static void main(String[] args) throws Exception {
        String text = "https://blog.csdn.net/weixin_43763430";
        String logoPath = "D:\\qrCode\\logo.jpg";
        String destPath = "D:\\qrCode\\csdn.jpg";
        QrCodeUtils.encode(text,logoPath,destPath,true);
    }
}
三、调用工具类生成二维码
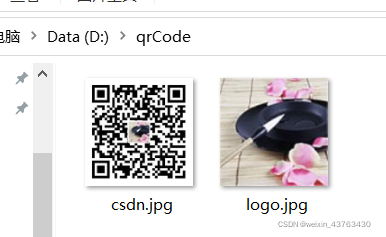
1、将链接生成二维码图片并保存到指定路径
工具类中的主方法是指定了二维码链接的内容是博客地址,并保存在D:\qrCode\csdn.jpg,二维码嵌套了头像的图片,期望实现的是生成二维码后被扫码直接进入到博客也没。如若不嵌入头像,直接将logoPath参数设为null。
	//测试一:
    public static void main(String[] args) throws Exception {
        String text = "https://blog.csdn.net/weixin_43763430";
        String logoPath = "D:\\qrCode\\logo.jpg";
        String destPath = "D:\\qrCode\\csdn.jpg";
        QrCodeUtils.encode(text,logoPath,destPath,true);
    }
运行该主方法后,可在指定路径中看到生成的二维码图片。
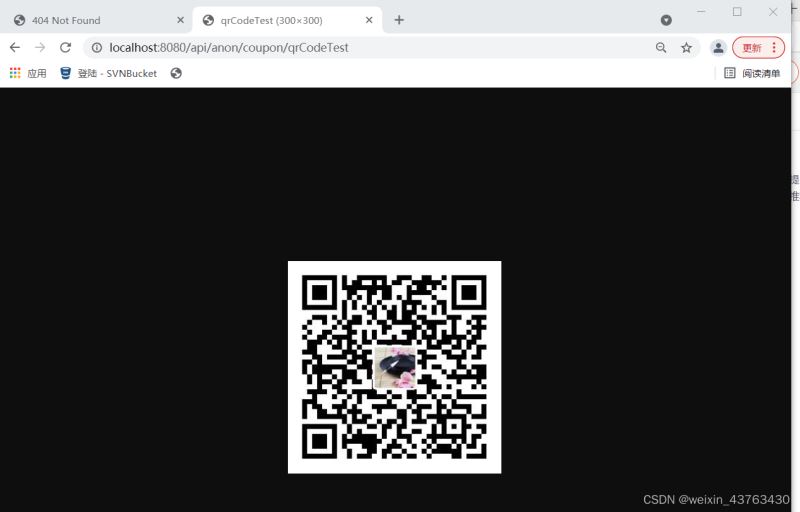
2、将链接生成二维码直接显示在页面
运用spring boot生成二维码无需将保存二维码的图片,只须前端调用springboot接口即可在页面上显示二维码。实现了实时生成二维码。Controller层接口代码示例如下:
	@GetMapping("/anon/coupon/qrCodeTest")
    @ApiOperation(value = "获取二维码")
    public void qrCodeTest(HttpServletResponse response) throws Exception {
        String text = "https://blog.csdn.net/weixin_43763430";
        String logoPath = "D:\\qrCode\\logo.jpg";
        //String destPath = "D:\\qrCode\\csdn.jpg";
        QrCodeUtils.encode(text,logoPath,response.getOutputStream(),true);
    }
打开浏览器访问该接口地址,页面就会显示生成的二维码。扫描二维码即可进入到博客页面。
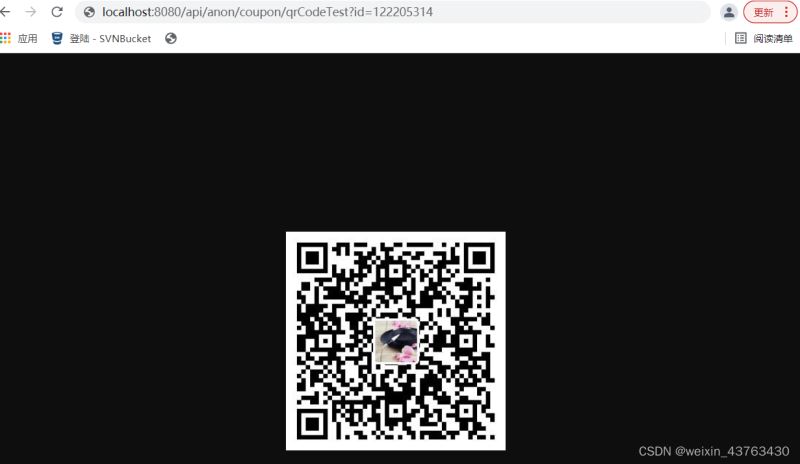
3、将以get请求传参链接生成二维码
二维码运用到各种业务中,通常需要根据不同用户识别其相对应的内容,如以上示例是访问的博客主页面,如若想根据访问者传递的参数访问博客中特定的文章,文章访问各篇文章是用的get请求方式,即可根据传参实现get请求传入不同参数生成二维码的内容不同。
	@GetMapping("/anon/coupon/qrCodeTest")
    @ApiOperation(value = "获取二维码")
    public void qrCodeTest(@RequestParam(value = "id") String id,HttpServletResponse response) throws Exception {
        String text = "https://blog.csdn.net/weixin_43763430/article/details/" + id;
        String logoPath = "D:\\qrCode\\logo.jpg";
        //String destPath = "D:\\qrCode\\csdn.jpg";
        QrCodeUtils.encode(text,logoPath,response.getOutputStream(),true);
    }
用浏览器访问该接口地址,页面生成二维码,用手机扫描二维码即可跳转到博客中该篇文章页面。
总结
到此这篇关于Java Spring boot实现生成二维码的文章就介绍到这了,更多相关Java Spring boot生成二维码内容请搜索脚本之家以前的文章或继续浏览下面的相关文章希望大家以后多多支持脚本之家!
相关文章
 这篇文章主要介绍了SpringBoot的概念、创建和运行,本文通过实例代码给大家介绍的非常详细,对大家的学习或工作具有一定的参考借鉴价值,需要的朋友可以参考下2022-07-07
springboot Actuator的指标监控可视化功能详解
SpringBoot Actuator是springboot为简化我们对微服务项目的监控功能抽取出来的模块,使得我们每个微服务快速引用即可获得生产界别的应用监控、审计等功能。这篇文章主要介绍了springboot Actuator的指标监控可视化,需要的朋友可以参考下2021-08-08
springcloud feign 接口指定接口服务ip方式
这篇文章主要介绍了springcloud feign 接口指定接口服务ip方式,具有很好的参考价值,希望对大家有所帮助。如有错误或未考虑完全的地方,望不吝赐教2022-03-03 这篇文章主要给大家详细介绍的是Java 线程同步的相关问题及代码示例,有需要的小伙伴可以参考下2016-03-03
使用Spring开启@Async异步方式(javaconfig配置)
这篇文章主要介绍了使用Spring开启@Async异步方式(javaconfig配置),具有很好的参考价值,希望对大家有所帮助。如有错误或未考虑完全的地方,望不吝赐教2021-08-08 这篇文章主要介绍了如何利用Java制作一个在线寄查快递系统,文中采用的技术有java、SpringBoot、FreeMarker、Mysql,需要的可以参考一下2022-02-02
 执行 Windows 开始菜单 => 所有程序 => 附件 => 命令提示符 或通过 Win+R 组合键调出 运行 对话框输入cmd 单击确定即可2013-09-09
 这篇文章主要介绍了Hadoop多Job并行处理的实例详解的相关资料,希望通过本文能帮助到大家,需要的朋友可以参考下2017-10-10
 这篇文章主要介绍了解决springboot上传图片后无法立即访问需重启的问题,本文给大家介绍的非常详细,对大家的学习或工作具有一定的参考借鉴价值,需要的朋友可以参考下2020-12-12
 这篇文章主要介绍了如何处理后台向前台传递的json数据,文中通过示例代码介绍的非常详细,对大家的学习或者工作具有一定的参考学习价值,需要的朋友可以参考下2020-02-02


最新评论