
Android底部导航组件BottomNavigationView
更新时间:2023年03月20日 10:20:48 作者:Dormiveglia-flx
这篇文章主要介绍了Android底部导航组件BottomNavigationView,BottomNavigationView是相当于一个导航的标签,但是它的形式就是像QQ微信之类的界面,至于写出后怎样绑定这三个界面,就得用Fragment,写这三个页面的布局
什么是BottomNavigationView
底部菜单栏
BottomNavigationView的简单用法
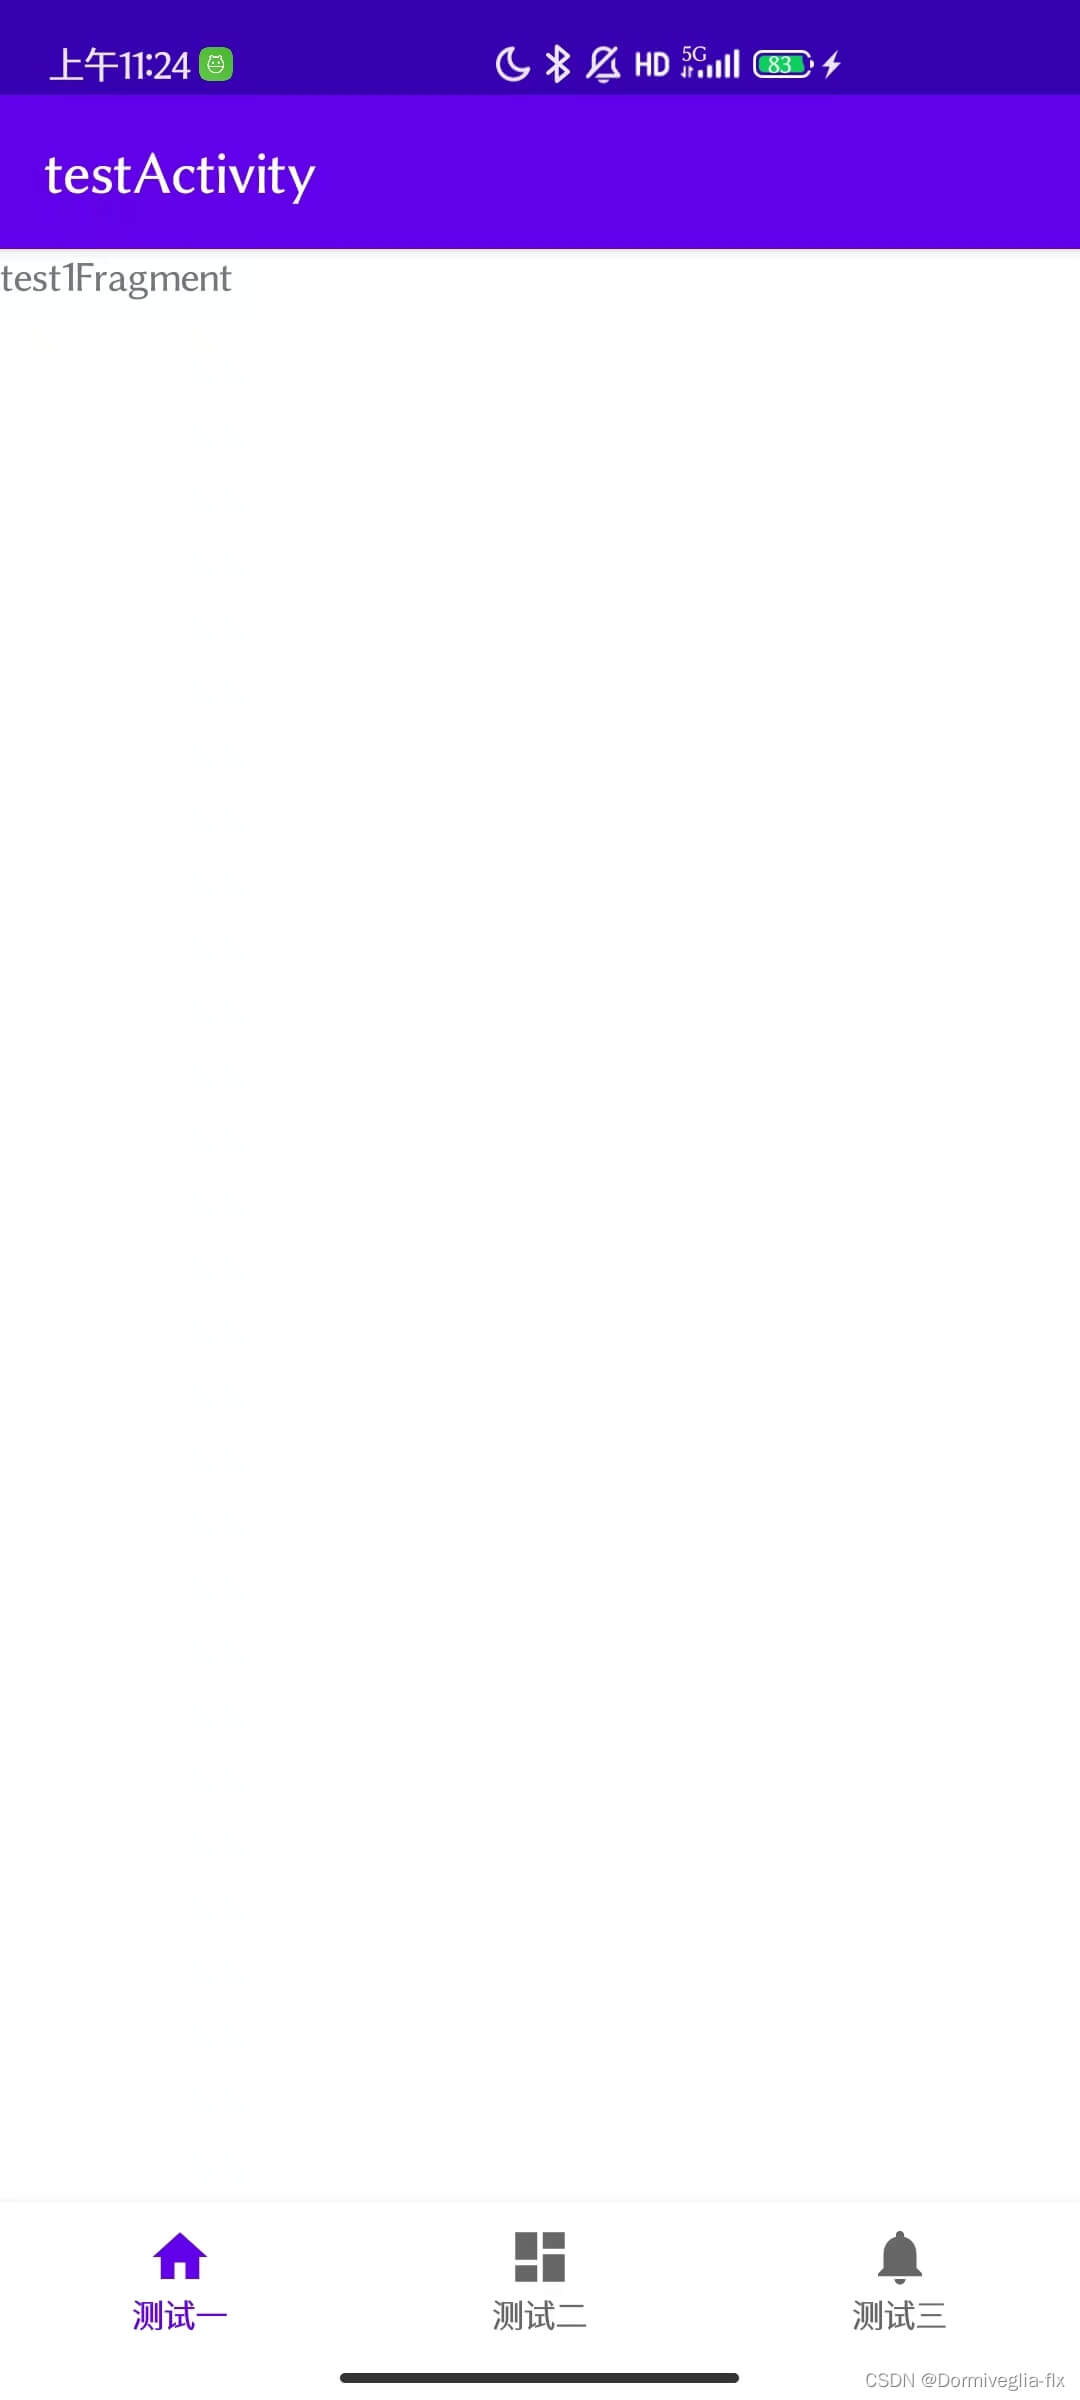
需求:如上图所示。点击测试一菜单,展示test1fragment。点击测试二菜单,展示test2fragment。点击测试三菜单,展示test3fragment。
第一步,testActivity布局
<?xml version="1.0" encoding="utf-8"?>
<LinearLayout xmlns:android="http://schemas.android.com/apk/res/android"
  xmlns:app="http://schemas.android.com/apk/res-auto"
  android:id="@+id/container"
  android:layout_width="match_parent"
  android:layout_height="match_parent"
  android:orientation="vertical">
  // 容器,承载fragment
  <FrameLayout
    android:id="@+id/nav_host_fragment"
    android:name="androidx.navigation.fragment.NavHostFragment"
    android:layout_width="match_parent"
    android:layout_height="0dp"
    android:layout_weight="1" />
  // BottomNavigationView
  <com.google.android.material.bottomnavigation.BottomNavigationView
    android:id="@+id/nav_view"
    android:layout_width="match_parent"
    android:layout_height="wrap_content"
    android:background="?android:attr/windowBackground"
    app:menu="@menu/bottom_nav_menu_test" />
</LinearLayout>
第二步,写BottomNavigationView所需要的菜单
<?xml version="1.0" encoding="utf-8"?>
<menu xmlns:android="http://schemas.android.com/apk/res/android">
  <item
    android:id="@+id/navigation_test1"
    android:icon="@drawable/ic_home_black_24dp"
    android:title="测试一" />
  <item
    android:id="@+id/navigation_test2"
    android:icon="@drawable/ic_dashboard_black_24dp"
    android:title="测试二" />
  <item
    android:id="@+id/navigation_test3"
    android:icon="@drawable/ic_notifications_black_24dp"
    android:title="测试三" />
</menu>
第三步,书写testActivity文件。重点是setOnNavigationItemSelectedListener点击事件
public class TestActivity extends AppCompatActivity {
  List<Fragment> mFragments = new ArrayList<>();
  test1Fragment t1f = new test1Fragment();
  test2Fragment t2f = new test2Fragment();
  test3Fragment t3f = new test3Fragment();
  @Override
  protected void onCreate(Bundle savedInstanceState) {
    super.onCreate(savedInstanceState);
    setContentView(R.layout.activity_test);
    BottomNavigationView navView = findViewById(R.id.nav_view);
    mFragments.add(t1f);
    mFragments.add(t2f);
    mFragments.add(t3f);
    // navView 点击事件
    navView.setOnNavigationItemSelectedListener((item)->{
      switchFragment(item.getItemId());
      return true;
    });
  }
  private void switchFragment(int id) {
    Fragment fragment = null;
    switch (id) {
      case R.id.navigation_test1:
        fragment = mFragments.get(0);
        break;
      case R.id.navigation_test2:
        fragment = mFragments.get(1);
        break;
      case R.id.navigation_test3:
        fragment = mFragments.get(2);
        break;
      default:
        break;
    }
    if (fragment != null) {
      getSupportFragmentManager().beginTransaction().replace(R.id.nav_host_fragment,fragment).commit();
    }
  }
}
到此这篇关于Android底部导航组件BottomNavigationView的文章就介绍到这了,更多相关Android BottomNavigationView内容请搜索脚本之家以前的文章或继续浏览下面的相关文章希望大家以后多多支持脚本之家!
相关文章
 这篇文章主要给大家介绍了关于DataBinding onClick的七种点击方式,文中通过示例代码介绍的非常详细,对各位Android开发者们具有一定的参考学习价值,需要的朋友们下面来一起学习学习吧2019-07-07
Android开发之APP安装后在桌面上不显示应用图标的解决方法
这篇文章主要介绍了Android开发之APP安装后在桌面上不显示应用图标的解决方法,涉及Android activity相关属性设置技巧,需要的朋友可以参考下2017-07-07 这篇文章主要介绍了Android 应用的全屏和非全屏实现代码的相关资料,需要的朋友可以参考下2017-05-05
Android中使用GridView进行应用程序UI布局的教程
GridView即平常我们见到的类似九宫格的矩阵型布局,只不过默认不带分割线,这里我们就从基础开始来看一下Android中使用GridView进行应用程序UI布局的教程2016-06-06 这篇文章主要介绍了Android ActionBar搜索功能用法,较为详细的分析了Android ActionBar搜索功能使用中的相关注意事项与操作技巧,需要的朋友可以参考下2016-07-07
 这篇文章主要为大家详细介绍了Android自定义控件实现通用验证码输入框的第二篇,文中示例代码介绍的非常详细,具有一定的参考价值,感兴趣的小伙伴们可以参考一下2021-01-01
 android中图片翻页效果简单的实现方法,需要的朋友可以参考一下2013-05-05
Android修行手册之ConstraintLayout布局使用详解
这篇文章主要为大家介绍了Android修行手册之ConstraintLayout使用示例详解,有需要的朋友可以借鉴参考下,希望能够有所帮助,祝大家多多进步,早日升职加薪2022-09-09 这篇文章主要介绍了Android ListView 条目多样式展示的相关资料,需要的朋友可以参考下2017-04-04
Android Studio中如何修改APP图标和APP名称
这篇文章主要介绍了Android Studio中如何修改APP图标和APP名称,具有很好的参考价值,希望对大家有所帮助。如有错误或未考虑完全的地方,望不吝赐教2022-11-11


最新评论