
vue使用动态组件实现TAB切换效果完整实例
更新时间:2023年05月13日 10:21:12 作者:鱿鱼丝2号
在实际项目开发中,我们经常会遇到选项卡切换,对于一个前端工程师来说,组件化/模块化开发是一种必备的行为规范,下面这篇文章主要给大家介绍了关于vue使用动态组件实现TAB切换效果的相关资料,需要的朋友可以参考下
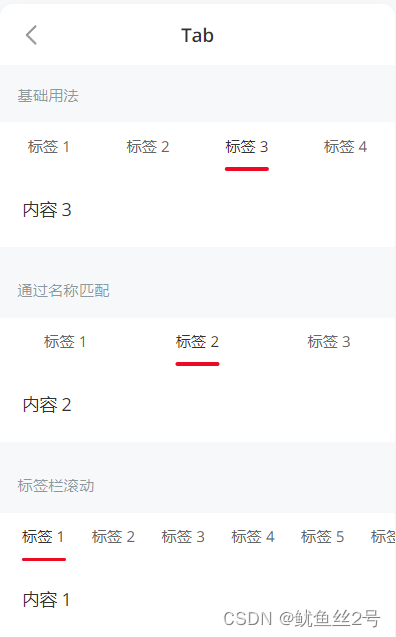
一、方法1:使用Vant组件库的tab组件
Vant 2 - Mobile UI Components built on Vue
二、 方法2:手动创建tab切换效果
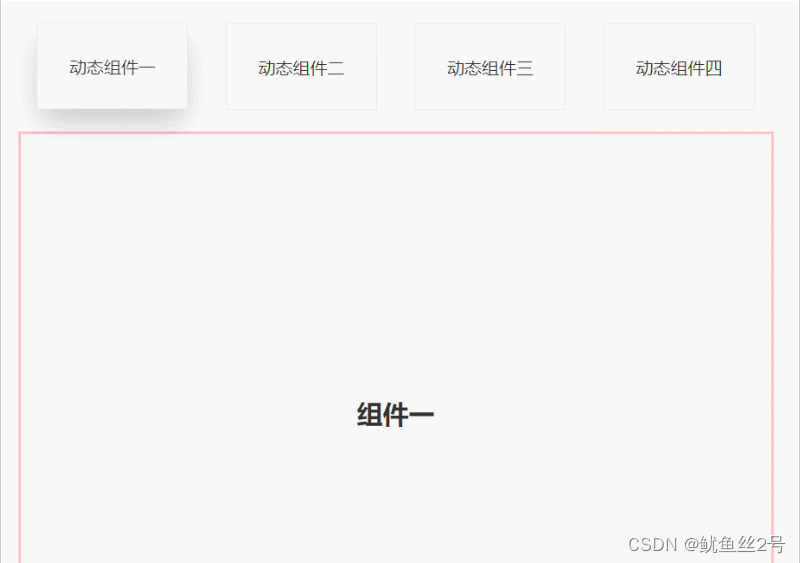
1.在components文件夹下创建切换的.vue页面、引入使用
import one from "./components/one";
import two from "./components/two";
import three from "./components/three";
import four from "./components/four";
components: {
    one,
    two,
    three,
    four,
},
2.布局:上面放tab点击的标签,下面放组件呈现对应内容
// 然后使用v-for循环出来呈现
<template>
   <div id="app">
      <div class="top">
      <!-- 放置tab点击标签 -->
         <div class="crad"
         :class="{ highLight: whichIndex == index }"
         v-for="(item, index) in cardArr"
         :key="index"
         @click="whichIndex = index">
            {{ item.componentName }}
        </div>
      </div>
      <div class="bottom">
        <!-- 放置动态组件... -->
       <!-- keep-alive缓存组件,这样的话,组件就不会被销毁,DOM就不会被重新渲染,
       浏览器也就不会回流和重绘,就可以优化性能。不使用的话页面加载就会慢一点 -->
       <keep-alive>
         <component :is="componentId"></component>
       </keep-alive>
      </div>
   </div>
</template>
3.写好上面的tab点击标签,定义数据修改样式
// 首先我们在data中定义数组cardArr存放点击tab的数据
data() {
   return {
      whichIndex: 0,
      cardArr: [
        {
          componentName: "动态组件一",
          componentId: "one",
        },{
          componentName: "动态组件二",
          componentId: "two",
        },{
          componentName: "动态组件三",
          componentId: "three",
        },{
          componentName: "动态组件四",
          componentId: "four",
        },
      ],
    };
},
// 又因为需要有高亮状态样式:默认索引0高亮
.highLight {
box-shadow: 0 15px 30px rgba(0, 0, 0, 0.2);
transform: translate3d(0, -1px, 0);
}三、完整代码
<template>
  <div id="app">
    <div class="top">
      <div
        class="crad"
        :class="{ highLight: whichIndex == index }"
        v-for="(item, index) in cardArr"
        :key="index"
        @click="
          whichIndex = index;
          componentId = item.componentId;
        "
      >
        {{ item.componentName }}
      </div>
    </div>
    <div class="bottom">
      <keep-alive>
        <component :is="componentId"></component>
      </keep-alive>
    </div>
  </div>
</template>
<script>
import one from "./components/one";
import two from "./components/two";
import three from "./components/three";
import four from "./components/four";
export default {
  components: {
    one,
    two,
    three,
    four,
  },
  data() {
    return {
      whichIndex: 0,
      componentId: "one",
      cardArr: [
        {
          componentName: "动态组件一",
          componentId: "one",
        },
        {
          componentName: "动态组件二",
          componentId: "two",
        },
        {
          componentName: "动态组件三",
          componentId: "three",
        },
        {
          componentName: "动态组件四",
          componentId: "four",
        },
      ],
    };
  },
};
</script>
<style lang="less" scoped>
#app {
  width: 100%;
  height: 100vh;
  box-sizing: border-box;
  padding: 50px;
  .top {
    width: 100%;
    height: 80px;
    display: flex;
    justify-content: space-around;
    .crad {
      width: 20%;
      height: 80px;
      line-height: 80px;
      text-align: center;
      background-color: #fff;
      border: 1px solid #e9e9e9;
    }
    .highLight {
      box-shadow: 0 15px 30px rgba(0, 0, 0, 0.2);
      transform: translate3d(0, -1px, 0);
    }
  }
  .bottom {
    margin-top: 20px;
    width: 100%;
    height: calc(100% - 100px);
    border: 3px solid pink;
    display: flex;
    justify-content: center;
    align-items: center;
  }
}
</style>
总结
到此这篇关于vue使用动态组件实现TAB切换效果的文章就介绍到这了,更多相关vue动态组件实现TAB切换内容请搜索脚本之家以前的文章或继续浏览下面的相关文章希望大家以后多多支持脚本之家!
相关文章

解决vue-element-admin安装依赖npm install报错问题
这篇文章主要介绍了解决vue-element-admin安装依赖npm install报错问题,具有很好的参考价值,希望对大家有所帮助,如有错误或未考虑完全的地方,望不吝赐教2024-06-06 这篇文章主要为大家介绍了Vue3中使用pnpm搭建monorepo开发环境示例详解,有需要的朋友可以借鉴参考下,希望能够有所帮助,祝大家多多进步,早日升职加薪2022-08-08
vue之el-upload使用FormData多文件同时上传问题
这篇文章主要介绍了vue之el-upload使用FormData多文件同时上传问题,具有很好的参考价值,希望对大家有所帮助。如有错误或未考虑完全的地方,望不吝赐教2023-05-05
vue3 elementPlus table实现列宽可拖拽功能
这篇文章主要介绍了vue3 elementPlus table实现列宽可拖拽功能,本文通过示例代码给大家介绍的非常详细,对大家的学习或工作具有一定的参考借鉴价值,需要的朋友可以参考下2022-08-08
Ant-design-vue Table组件customRow属性的使用说明
这篇文章主要介绍了Ant-design-vue Table组件customRow属性的使用说明,具有很好的参考价值,希望对大家有所帮助。一起跟随小编过来看看吧2020-10-10 今天小编就为大家分享一篇vue中 数字相加为字串转化为数值的例子,具有很好的参考价值,希望对大家有所帮助。一起跟随小编过来看看吧2019-11-11
vue代理请求之Request failed with status code 404问题及解决
这篇文章主要介绍了vue代理请求之Request failed with status code 404问题及解决方案,具有很好的参考价值,希望对大家有所帮助。如有错误或未考虑完全的地方,望不吝赐教2023-07-07 这篇文章主要给大家介绍了关于npm踩坑问题的相关资料,文中通过实例代码介绍的非常详细,对大家的学习或者工作具有一定的参考学习价值,需要的朋友可以参考下2022-03-03
 这篇文章主要介绍了Vue 数据绑定的原理,帮助大家更好的理解和使用vue框架,感兴趣的朋友可以了解下2020-11-11
 这篇文章主要介绍了vue的自定义指令传参方式,具有很好的参考价值,希望对大家有所帮助。如有错误或未考虑完全的地方,望不吝赐教2022-05-05


最新评论