
基于vue+h5实现车牌号输入框功能(demo)
哈喽,大家好,最近鹏仔开发的项目是学校校内车辆超速方面的统计检测方面的系统,在开发过程中发现有个小功能,就是用户移动端添加车牌号,刚开始想着就一个输入框,提交时正则效验一下格式就行,最后感觉不是很方便,所以就简单自己手写了一个H5车牌号软键盘,由于每天工作比较忙,就没封装成插件了,趁着晚上空闲,给大家整理一下demo,复制即可使用,或者自行封装一个组件调用也可以(代码中一些写法可能过于粗糙,时间有限,任务多,就粗糙写一下吧,反正功能是实现了)。
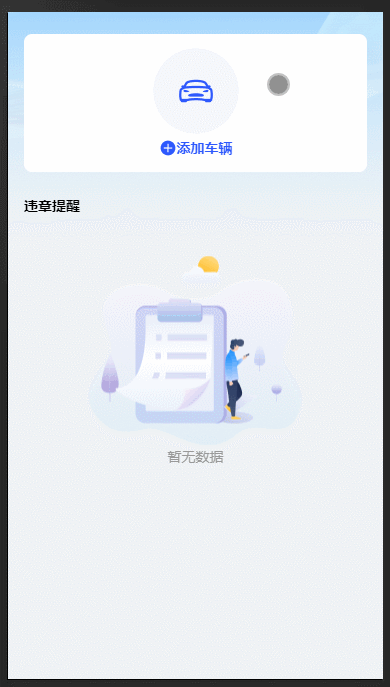
功能如上图所示,支持 8位电车车牌和7位油车车牌。
第一位是 省份,用户点击就会弹出省份软键盘;
第二位是 字母,用户点击只能输入字母;
第三、四、五、六位是字母和数字,不包含O;
第七位是 数字、字母、或者学、警之类汉字;
第八位是 电车选项。
用户点击软键盘对应的按键时会高亮,这个是后期加的,所以上图中没有展示出来。
鹏仔的移动端是rem布局,根元素是26.67vw,如果你使用,可自行根据自己的项目将css中所有的单位变化一下。
body,div,p,ul,ol,li,dl,dt,dd,table,tr,td,form,hr,h1,h2,h3,h4,h5,h6,fieldset,img,input {margin:0;padding:0}
body,html {width:100%;height:100%;font-size: 26.67vw;}
完整代码如下
<template>
  <div class="layer">
    <!-- content -->
    <div class="content-layer">
      <div class="my-car-layer">
        <!-- 添加车辆 -->
        <div class="my-car-layer-add" @click="addShow = true">
          <div class="add-text">
            <p>添加车辆</p>
          </div>
        </div>
      </div>
    </div>
    <!-- 添加车辆弹窗 -->
    <div class="shade-layer" v-if="addShow" @click="keyboardShow = false">
      <div class="add-content">
        <div class="add-header">
          <p>车辆信息</p>
          <span @click="addShow = false">关闭</span>
        </div>
        <div class="form-list">
          <p>车牌号:</p>
          <div class="car-num-input">
            <div v-for="(item,index) in carNumList" :key="index" @click.stop="selectCarNum(index)" :class="(carIndex == index ? 'active' : '') + ' ' + (item ? 'status-key' : '')">
              {{ index == 0 && !item ? '省' : index == carNumList.length-1 && !item ? '新能源' : item }}
            </div>
          </div>
        </div>
        <button class="submit-btn" @click="carSubmitBtn()" v-points>提交</button>
      </div>
      <!-- 车牌键盘 -->
      <div class="keyboard-layer" v-if="keyboardShow" @click.stop="">
        <div class="keyboard-header">
          <span @click="keyboardShow = false">完成</span>
        </div>
        <!-- 省份键盘 -->
        <div class="province-layer" v-if="carIndex == '0'">
          <span v-for="(item,index) in provinceList" :key="index" @click="keyboardBtn(item)" :class="activeKey == item ? 'active-hover' : ''">{{ item == 'del' ? '删除' : item }}</span>
        </div>
        <!-- 数字字母键盘 -->
        <div class="keyboard-item" v-if="carIndex != '0'">
          <div v-if="carIndex != '1'">
            <span v-for="(item,index) in keyboardList[0]" :key="index" @click="keyboardBtn(item)" :class="activeKey == item ? 'active-hover' : ''">{{ item }}</span>
          </div>
          <div>
            <span v-for="(item,index) in keyboardList[1]" :key="index" @click="keyboardBtn(item)" :class="((item == 'O' && carIndex != '1') ? 'no-btn' : '') + ' ' + (activeKey == item ? 'active-hover' : '')">{{ item }}</span>
          </div>
          <div>
            <span v-for="(item,index) in keyboardList[2]" :key="index" @click="keyboardBtn(item)" :class="activeKey == item ? 'active-hover' : ''">{{ item }}</span>
          </div>
          <div>
            <span v-for="(item,index) in keyboardList[3]" :key="index" @click="keyboardBtn(item)" :class="activeKey == item ? 'active-hover' : ''">{{ item == 'del' ? '删除' : item }}</span>
          </div>
          <div v-if="carIndex == carNumList.length-2">
            <span v-for="(item,index) in keyboardList[4]" :key="index" @click="keyboardBtn(item)" :class="activeKey == item ? 'active-hover' : ''">{{ item }}</span>
          </div>
        </div>
      </div>
    </div>
  </div>
</template>
<script>
export default {
  name: "car",
  mixins: [],
  components: {},
  data() {
    return {
      addShow: false, // 添加车辆弹窗显示隐藏
      formData: {
        carNumber: ''
      },
      carNumList: ['','','','','','','',''], // 车牌号数组
      activeKey: '', // 键盘按键选中激活
      timeoutId: null, // 定时器ID
      carIndex: null, // 车牌号输入光标索引
      keyboardShow: false, // 键盘显示/隐藏
      provinceList: [
        '京', '津', '沪', '渝', '冀', '豫', '云', '辽', '黑', '湘',
        '皖', '鲁', '新', '苏', '浙', '赣', '鄂', '桂', '甘', '晋',
        '蒙', '陕', '吉', '闽', '贵', '粤', '青', '藏', '川', '宁',
        '琼', '使', '领', '学', '警', '挂', 'del'
      ],
      keyboardList: [
        ['1', '2', '3', '4', '5', '6', '7', '8', '9', '0'],
        ['Q', 'W', 'E', 'R', 'T', 'Y', 'U', 'O', 'P'],
        ['A', 'S', 'D', 'F', 'G', 'H', 'J', 'K', 'L'],
        ['Z', 'X', 'C', 'V', 'B', 'N', 'M', 'del'],
        ['学','警','港','澳']
      ]
    };
  },
  mounted() {
  },
  methods: {
    // 添加车辆
    carSubmitBtn(){
      this.formData.carNumber = '';
      for(let i in this.carNumList){
        if(this.carNumList[i] == '' && i != this.carNumList.length-1){
          console.log('请输入完整车牌号');
          return;
        }
        this.formData.carNumber += this.carNumList[i];
      }
      console.log(this.formData.carNumber)
    },
    // 点击车牌号输入
    selectCarNum(inx){
      this.carIndex = inx;
      if(!this.keyboardShow){
        this.keyboardShow = true;
      }
    },
    // 键盘输入
    keyboardBtn(val){
      this.activeKey = val; // 键盘按键选中激活
      this.activeKeyBtn(); // 键盘按键激活定时器
      this.carNumList[this.carIndex] = val == 'del' ? '' : val;
      if(val == 'del' && this.carIndex > 0){
        this.carIndex--;
      }
      if(val != 'del' && this.carIndex < this.carNumList.length-1){
        this.carIndex++;
      }
      this.$forceUpdate();
    },
    // 键盘按键激活定时器
    activeKeyBtn() {
      // 清除之前的定时器
      if (this.timeoutId) clearTimeout(this.timeoutId)
      // 1秒后重置状态
      this.timeoutId = setTimeout(() => {
        this.activeKey = '';
      }, 300)
    }
  },
  watch: {
    "addShow"(){
      // 关闭弹窗时重置
      if(!this.addShow){
        this.formData = {
          carNumber: ''
        }
        this.carIndex = ''; // 车牌号输入光标索引
        this.carNumList = ['','','','','','','','']; // 车牌号数组
        this.keyboardShow = false; // 车牌键盘隐藏
      }
    }
  },
};
</script>
<style lang="scss" scoped>
.layer {
  padding: 0.22rem 0 0.64rem;
  box-sizing: border-box;
  .content-layer {
    width: 100%;
    position: relative;
    padding: 0 0.16rem;
    box-sizing: border-box;
    .my-car-layer{
      width: 100%;
      .my-car-layer-add{
        width: 100%;
        padding: 0.14rem 0.16rem;
        box-sizing: border-box;
        border-radius: 0.08rem;
        background: #FFF;
        display: flex;
        flex-direction: column;
        align-items: center;
        justify-content: center;
        .add-text{
          width: 100%;
          display: flex;
          align-items: center;
          justify-content: center;
          padding-top: 0.04rem;
          box-sizing: border-box;
          p{
            color: #2E59FD;
            font-family: "PingFang SC";
            font-size: 0.14rem;
            font-weight: 700;
            line-height: 0.2rem;
          }
        }
      }
    }
  }
  .shade-layer{
    position: fixed;
    top: 0;
    left: 0;
    z-index: 5;
    width: 100%;
    height: 100%;
    background: rgba(0,0,0,.4);
    padding: 0.16rem;
    box-sizing: border-box;
    display: flex;
    align-items: center;
    justify-content: center;
    .add-content{
      width: 100%;
      padding: 0.16rem 0.16rem 0.24rem;
      box-sizing: border-box;
      border-radius: 0.16rem;
      background: #FFF;
      .add-header{
        width: 100%;
        display: flex;
        align-items: center;
        justify-content: space-between;
        padding-bottom: 0.14rem;
        box-sizing: border-box;
        p{
          color: #000;
          font-family: "PingFang SC";
          font-size: 0.16rem;
          font-weight: 700;
          line-height: 0.22rem;
        }
        span{
          color: #0A61C5;
          font-family: "PingFang SC";
          font-size: 0.12rem;
          font-weight: 700;
          line-height: 0.24rem;
          cursor: pointer;
        }
      }
      .form-list{
        p{
          color: #6B7280;
          font-family: "PingFang SC";
          font-size: 0.14rem;
          font-weight: 500;
          line-height: 0.2rem;
        }
        input{
          display: block;
          font-size: 0.14rem;
          line-height: 0.2rem;
          width: 100%;
          border-radius: 0.08rem;
          border: none;
          background: #F5F7FA;
          padding: 0.12rem 0.16rem;
          box-sizing: border-box;
        }
        .car-num-input{
          width: 100%;
          display: flex;
          align-items: center;
          justify-content: space-between;
          padding: 0.04rem 0;
          box-sizing: border-box;
          div{
            width: 0.3rem;
            height: 0.36rem;
            background: rgba(0,0,0,.05);
            border-radius: 0.04rem;
            border: 0.01rem solid transparent;
            box-sizing: border-box;
            display: flex;
            align-items: center;
            justify-content: center;
            color: #000;
            font-size: 0.14rem;
            line-height: 0.18rem;
            &:first-child{
              color: rgba(0,0,0,.5);
            }
            &:last-child{
              border: 0.01rem dashed rgba(27, 171, 80, 0.8);
              color: rgba(0,0,0,.5);
              font-size: 0.08rem;
            }
          }
          .active{
            border: 0.01rem solid rgba(48, 112, 255, 0.8)!important;
          }
          .status-key{
            color: #000!important;
            font-size: 0.14rem!important;
            line-height: 0.18rem!important;
          }
        }
      }
      .submit-btn{
        display: block;
        width: 100%;
        border: none;
        padding: 0.06rem 0.1rem;
        box-sizing: border-box;
        border-radius: 0.52rem;
        background: linear-gradient(90deg, #0FA6F6 1.1%, #198CFE 99.99%);
        color: #FFF;
        text-align: center;
        font-family: "PingFang SC";
        font-size: 0.16rem;
        font-weight: 700;
        line-height: 0.24rem;
        margin-top: 0.24rem;
      }
    }
    .keyboard-layer{
      width: 100%;
      background: #D0D5DC;
      padding: 0.08rem 0.04rem 0.16rem;
      box-sizing: border-box;
      position: absolute;
      bottom: 0;
      left: 0;
      .keyboard-header{
        width: 100%;
        display: flex;
        align-items: center;
        justify-content: flex-end;
        padding: 0 0.08rem 0.08rem;
        box-sizing: border-box;
        span{
          color: #2E59FD;
          font-family: "PingFang SC";
          font-size: 0.14rem;
          font-weight: 700;
          line-height: 0.28rem;
          cursor: pointer;
        }
      }
      .province-layer{
        width: 100%;
        display: flex;
        align-items: center;
        justify-content: center;
        flex-wrap: wrap;
        span{
          color: #000;
          font-size: 0.14rem;
          line-height: 0.28rem;
          background: #fff;
          border-radius: 0.06rem;
          padding: 0.06rem 0.08rem;
          box-sizing: border-box;
          margin: 0.02rem;
          box-shadow: 0px 0.02rem 0.02rem 0px rgba(0, 0, 0, 0.1);
        }
      }
      .keyboard-item{
        width: 100%;
        div{
          display: flex;
          align-items: center;
          justify-content: center;
          span{
            color: #000;
            font-size: 0.14rem;
            line-height: 0.28rem;
            background: #fff;
            border-radius: 0.06rem;
            padding: 0.04rem 0.1rem;
            box-sizing: border-box;
            margin: 0.04rem;
            box-shadow: 0px 0.02rem 0.04rem 0px rgba(0, 0, 0, 0.3);
          }
        }
      }
      .no-btn{
        color: rgba(0,0,0,.4)!important;
        pointer-events: none;
      }
      .active-hover{
        background: #B3BAC7!important;
      }
    }
  }
}
</style>
原文:共享博客 sharedbk.com
vue h5实现车牌号输入框
哈喽,大家好,最近鹏仔开发的项目是学校校内车辆超速方面的统计检测方面的系统,在开发过程中发现有个小功能,就是用户移动端添加车牌号,刚开始想着就一个输入框,提交时正则效验一下格式就行,最后感觉不是很方便,所以就简单自己手写了一个H5车牌号软键盘,由于每天工作比较忙,就没封...,共享博客-(百变鹏仔)https://www.sharedbk.com/post/284.html
到此这篇关于基于vue+h5实现车牌号输入框功能的文章就介绍到这了,更多相关vue车牌号输入框内容请搜索脚本之家以前的文章或继续浏览下面的相关文章希望大家以后多多支持脚本之家!
相关文章
 在Vue中可以使用Vue.prototype向Vue的全局作用域添加属性或方法,文中通过示例代码介绍的非常详细,对大家的学习或者工作具有一定的参考学习价值,需要的朋友们下面随着小编来一起学习学习吧2024-06-06
 这篇文章主要给大家介绍了关于vue实现防抖的相关资料,文中通过示例代码介绍的非常详细,对大家的学习或者工作具有一定的参考学习价值,需要的朋友们下面随着小编来一起学习学习吧2021-01-01
 这篇文章主要介绍了Vue3 全局实例上挂载属性方法,本文通过示例代码给大家介绍的非常详细,对大家的学习或工作具有一定的参考借鉴价值,需要的朋友可以参考下2023-05-05
 这篇文章主要介绍了vue axios接口请求封装方式,具有很好的参考价值,希望对大家有所帮助。如有错误或未考虑完全的地方,望不吝赐教2023-01-01
 这篇文章主要介绍了Vue项目如何实现切换主题色思路,具有很好的参考价值,希望对大家有所帮助。如有错误或未考虑完全的地方,望不吝赐教2023-01-01
 这篇文章主要介绍了详解vue-router和vue-cli以及组件之间的传值,具有一定的参考价值,感兴趣的小伙伴们可以参考一下2017-07-07
import.meta.glob() 如何导入多个目录下的资源(最新推荐)
import.meta.glob() 其实不仅能接收一个字符串,还可以接收一个字符串数组,就是匹配多个位置,本文给大家介绍import.meta.glob() 如何导入多个目录下的资源,感兴趣的朋友一起看看吧2023-11-11
一文了解Vue 3 的 generate 是这样生成 render&n
本文介绍generate阶段是如何根据javascript AST抽象语法树生成render函数字符串的,本文中使用的vue版本为3.4.19,感兴趣的朋友跟随小编一起看看吧2024-06-06 这篇文章主要介绍了Vue Hook 封装通用型表格,设计通用型表格组件首先,需要设计一个基础的表格组件,它接受列配置、数据和分页信息等参数,本文给大家介绍的非常详细,需要的朋友可以参考下2024-08-08
 今天小编就为大家分享一篇vue之延时刷新实例,具有很好的参考价值,希望对大家有所帮助。一起跟随小编过来看看吧2019-11-11


最新评论