
vue3实现markdown预览和编辑详解
更新时间:2025年10月25日 10:13:23 作者:Z编程
本文介绍了如何在Vue3项目中集成Vditor Markdown编辑器,包括Vditor的简介、安装、预览、编辑以及一些高级功能和常见问题解决,Vditor支持多种编辑模式、图表、公式等,且高度可定制化
Markdown作为一种轻量级标记语言,已经成为开发者编写文档的首选工具之一。
在Vue3项目中集成Markdown编辑和预览功能可以极大地提升内容管理体验。
本文将介绍如何使用Vditor这一强大的开源Markdown编辑器在Vue3项目中实现这一功能。
一、Vditor简介
Vditor是一款浏览器端的Markdown编辑器,支持所见即所得(WYSIWYG)、即时渲染(IR)和分屏预览模式。
它具有以下特点:
- 支持三种编辑模式:WYSIWYG、IR和SV
- 内置流程图、甘特图、时序图等图表支持
- 数学公式、音视频、代码高亮等丰富功能
- 高度可定制化的主题和工具栏
- 官网Vditor - 一款浏览器端的 Markdown 编辑器,支持所见即所得(富文本)、即时渲染(类似 Typora)和分屏预览模式 (b3log.org)
二、安装Vditor
在项目中安装Vditor:
npm install vditor --save
三、实现预览
Vdior中提供了专门的预览方法来针对不需要编辑仅需要展示markdown文档的场景
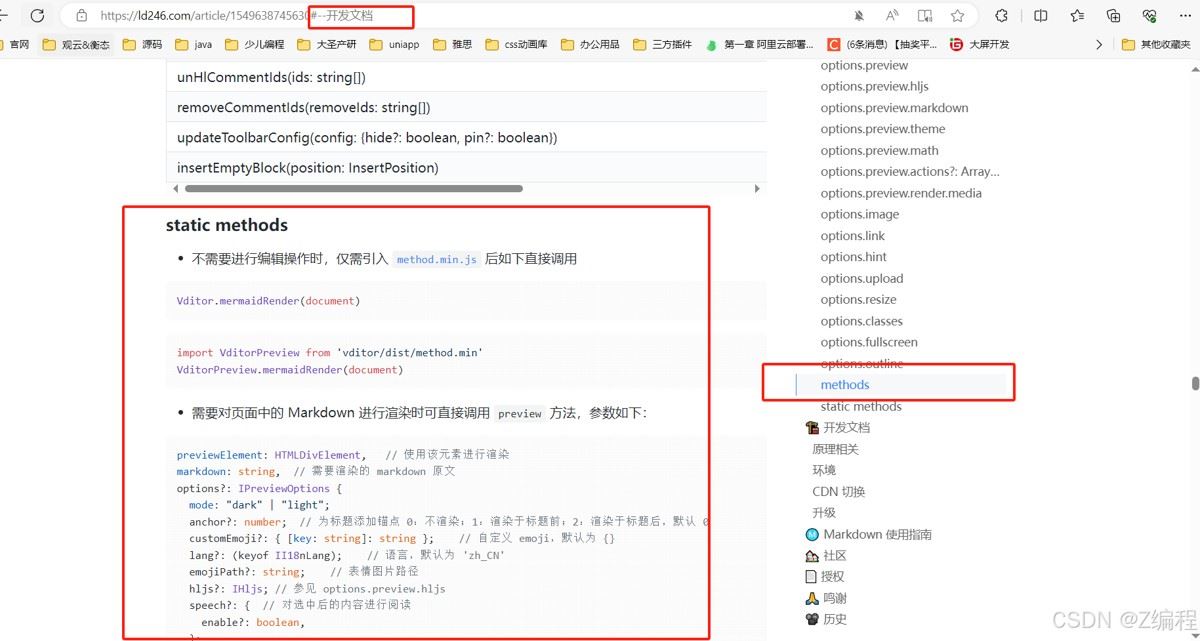
下面是我封装的一个预览组件
<script setup lang="ts">
import { ref, onMounted, watch } from "vue";
import VditorPreview from "vditor/dist/method.min";

/**
 * Markdown预览组件
 * @component
 */
const props = defineProps({
  /**
   * Markdown内容
   */
  content: {
    type: String,
    required: true
  },
  /**
   * 预览选项
   */
  options: {
    type: Object,
    default: () => ({})
  }
});

/**
 * 预览容器引用
 */
const previewRef = ref<HTMLDivElement | null>(null);

/**
 * 默认预览配置
 */
const defaultOptions = {
  cdn: "https://ld246.com/js/lib/vditor",
  mode: "dark",
  anchor: 1,
  hljs: {
    lineNumber: true,
    style: "github"
  },
  math: {
    inlineDigit: true,
    macros: {}
  },
  theme: {
    current: "dark"
  },
  lazyLoadImage: "//unpkg.com/vditor/dist/images/img-loading.svg"
};

/**
 * 合并配置项
 */
const mergedOptions = {
  ...defaultOptions,
  ...props.options
};

/**
 * 渲染Markdown内容
 */
const renderMarkdown = () => {
  if (previewRef.value) {
    VditorPreview.preview(previewRef.value, props.content, mergedOptions);
  }
};

/**
 * 组件挂载完成后渲染Markdown
 */
onMounted(() => {
  renderMarkdown();

  // 渲染其他特殊语法
  VditorPreview.mermaidRender(document);
  VditorPreview.codeRender(document);
  VditorPreview.mathRender(document);
  VditorPreview.abcRender(document);
  VditorPreview.chartRender(document);
  VditorPreview.mindmapRender(document);
  VditorPreview.graphvizRender(document);
});

/**
 * 监听内容变化重新渲染
 */
watch(
  () => props.content,
  () => {
    renderMarkdown();
  }
);
</script>

<template>
  <div class="vditor-preview-container">
    <div ref="previewRef" class="vditor-preview" />
  </div>
</template>

<style scoped>
.vditor-preview-container {
  width: 100%;
}

.vditor-preview {
  box-sizing: border-box;
  padding: 16px;
  color: #ccc;
  background-color: #1a1a1a;
  border-radius: 8px;
}

:deep(.vditor-reset) {
  background: #1a1a1a;
}

:deep(.vditor-reset h1),
:deep(.vditor-reset h2),
:deep(.vditor-reset h3),
:deep(.vditor-reset h4),
:deep(.vditor-reset h5),
:deep(.vditor-reset h6) {
  /* color: #06ad7e; */
  margin-top: 1.5em;
  margin-bottom: 0.5em;
  font-weight: 600;
  border-bottom: none;
}

:deep(.vditor-reset h3) {
  padding-bottom: 0.3em;
  font-size: 1.3em;
}

:deep(.vditor-reset strong) {
  font-weight: 600;
  color: #fff;
}
</style>
使用:
<script setup lang="ts">
import { ref } from "vue";
import VditorPreview from "@/components/markdown/VditorPreview.vue";
const chiefComplaint = ref("");
</script>
<template>
            <VditorPreview
              :content="chiefComplaint"
              :options="{
                mode: 'dark',
                theme: {
                  current: 'dark'
                }
              }"
            />
</template>
四、实现编辑
编辑组件按照Vditor文档来使用Vditor编辑器即可
<script setup lang="ts">
import "vditor/dist/index.css";
import Vditor from "vditor";
import { useIntervalFn } from "@vueuse/core";
import { onMounted, ref, watch, toRaw, onUnmounted } from "vue";

const emit = defineEmits([
  "update:modelValue",
  "after",
  "focus",
  "blur",
  "esc",
  "ctrlEnter",
  "select"
]);

const props = defineProps({
  options: {
    type: Object,
    default() {
      return {};
    }
  },
  modelValue: {
    type: String,
    default: ""
  },
  isDark:{
    type: Boolean,
    default: true
  },
});

const editor = ref<Vditor | null>(null);
const markdownRef = ref<HTMLElement | null>(null);

onMounted(() => {
  editor.value = new Vditor(markdownRef.value as HTMLElement, {
    ...props.options,
    value: props.modelValue,
    cache: {
      enable: false
    },
    fullscreen: {
      index: 10000
    },
    toolbar: [
      "headings",
      "bold",
      "italic",
      "strike",
      "|",
      "line",
      "quote",
      "list",
      "ordered-list",
      "|",
      "check",
      "insert-after",
      "|",
      "insert-before",
      "undo",
      "redo",
      "link",
      "|",
      "table",
      "br",
      "fullscreen"
    ],
    cdn: "https://ld246.com/js/lib/vditor",
    after() {
      emit("after", toRaw(editor.value));
    },
    input(value: string) {
      emit("update:modelValue", value);
    },
    focus(value: string) {
      emit("focus", value);
    },
    blur(value: string) {
      emit("blur", value);
    },
    esc(value: string) {
      emit("esc", value);
    },
    ctrlEnter(value: string) {
      emit("ctrlEnter", value);
    },
    select(value: string) {
      emit("select", value);
    }
  });
});

watch(
  () => props.modelValue,
  newVal => {
    if (newVal !== editor.value?.getValue()) {
      editor.value?.setValue(newVal);
    }
  }
);

watch(
  () => props.isDark,
  newVal => {
    const { pause } = useIntervalFn(() => {
      if (editor.value.vditor) {
        newVal
          ? editor.value.setTheme("dark", "dark", "rose-pine")
          : editor.value.setTheme("classic", "light", "github");
        pause();
      }
    }, 20);
  }
);

onUnmounted(() => {
  const editorInstance = editor.value;
  if (!editorInstance) return;
  try {
    editorInstance?.destroy?.();
  } catch (error) {
    console.log(error);
  }
});
</script>

<template>
  <div ref="markdownRef" />
</template>
使用
 <Vditor
            v-model="chiefComplaintContent"
            :options="{
              mode: 'ir',
              outline: { enable: false, position: 'right' },
              toolbarConfig: {
                pin: true
              }
            }"
          />
五、高级功能实现
这些都是options中的配置项,如果需要使用,直接将其加入options对象中即可
1. 自定义工具栏
Vditor允许完全自定义工具栏配置。以下是一个精简版的工具栏配置:
toolbar: [
  'headings',
  'bold',
  'italic',
  'strike',
  '|',
  'list',
  'ordered-list',
  'check',
  '|',
  'quote',
  'code',
  'inline-code',
  '|',
  'upload',
  '|',
  'undo',
  'redo',
  '|',
  'fullscreen',
],
2. 图片上传处理
upload: {
accept: 'image/*',
handler(files) {
// 这里实现上传逻辑
const file = files[0];
const formData = new FormData();
formData.append('file', file);
// 示例:使用axios上传
axios.post('/api/upload', formData)
.then(response => {
const url = response.data.url;
editor.value.insertValue(``);
})
.catch(error => {
console.error('上传失败:', error);
});
return false; // 阻止默认上传行为
},
},六、常见问题解决
1. 自定义样式
我采用的方式是给父容器加一个样式,然后不使用scope写css解决
<style lang="scss">
/* 自定义抽屉样式 */
.report-drawer .el-drawer__header {
  padding: 8px 20px !important;
  margin-bottom: 0 !important;
  font-size: 16px !important;
  color: #fff !important;
  border-bottom: 1px solid #383838 !important;
}

.report-drawer .vditor-ir {
  overflow-x: hidden !important;
}

.report-drawer .vditorv .ditor-toolbar {
  overflow-x: auto;
}

.report-drawer .vditor--dark .vditor--fullscreen .ditor-toolbar {
  overflow-y: auto;
}

.report-drawer .vditor--dark .vditor--fullscreen .ditor {
  height: 100% !important;
}

/* Vditor的预览区域样式 */
.report-drawer .vditor-preview {
  overflow-x: hidden !important;

}

.report-drawer .vditor-ir pre.vditor-reset {
  max-height: 100vh !important;
  overflow-y: auto;
  padding: 0 60px !important;
}

/* 按钮样式 */
.el-button {
  border-radius: 4px !important;
}
</style>需要注意的是预览区域的样式和选择的模式有关,如果我设置的是ir,那么我预览区域的样式是.vditor-ir pre.vditor-reset
2.中文提示
Vditor的默认提示是英文的,可以设置中文:
new Vditor(editorContainer.value, {
  lang: 'zh_CN',
  // ...其他配置
});
3.cdn配置
在使用时可能会碰到css文件和js文件无法加载的情况,这是因为Vditor默认的cdn地址失效,需要在options中传入最新的可用cdn地址,目前可用的是https://ld246.com/js/lib/vditor
cdn: "https://ld246.com/js/lib/vditor",
总结
以上为个人经验,希望能给大家一个参考,也希望大家多多支持脚本之家。
相关文章
 在实际的项目中,和后台的数据交互是少不了的,我通常使用的是 axios 库,所以下面这篇文章主要给大家介绍了关于vue封装axios与api接口管理的相关资料,需要的朋友可以参考下2022-01-01
vue鼠标hover(悬停)改变background-color移入变色问题
这篇文章主要介绍了vue鼠标hover(悬停)改变background-color移入变色问题,具有很好的参考价值,希望对大家有所帮助。如有错误或未考虑完全的地方,望不吝赐教2022-10-10 这篇文章主要介绍了vue一直自动换行的问题及解决方案,具有很好的参考价值,希望对大家有所帮助,如有错误或未考虑完全的地方,望不吝赐教2024-03-03
 本篇文章给大家详细介绍了vue跨域处理问题的方式以及相关知识点介绍,对此有兴趣的朋友学习下。2018-02-02
vue watch中如何获取this.$refs.xxx节点
这篇文章主要介绍了vue watch中获取this.$refs.xxx节点的方式,具有很好的参考价值,希望对大家有所帮助。如有错误或未考虑完全的地方,望不吝赐教2022-08-08 这篇文章主要给大家介绍了关于vue.js Router中嵌套路由的相关资料,所谓嵌套路由就是路由里面嵌套他的子路由,文章通过示例代码介绍的非常详细,需要的朋友可以参考下2021-06-06
 组件的二次封装:保留组件已有的功能,需要重写组件方法,当组件已有大量功能时候,则需要重写很多重复代码,且组件功能进行修改的时候,封装的组件也需要对应修改,从而造成许多开发和维护成本,本文给大家分享了Vue3实现组件二次封装的小技巧,需要的朋友可以参考下2024-09-09
 这篇文章主要为大家详细介绍了vue-cropper组件实现图片切割上传,文中示例代码介绍的非常详细,具有一定的参考价值,感兴趣的小伙伴们可以参考一下2021-05-05
 vue开发网站的时候,往往图标是起着很重要的作用,下面这篇文章主要给大家介绍了关于Vue3使用icon的两种方式,文中通过示例代码介绍的非常详细,需要的朋友可以参考下2021-11-11
 本文主要介绍了如何解决el-menu标题过长显示不全问题,文中通过示例代码介绍的非常详细,对大家的学习或者工作具有一定的参考学习价值,感兴趣的朋友们跟着小编来一起学习学习吧2023-12-12


最新评论