Qt+QWidget实现简约美观的加载动画
更新时间:2024年02月28日 14:51:39 作者:Halsey Walker
这篇文章主要为大家详细介绍了Qt如何结合QWidget实现简约美观的加载动画,文中的示例代码讲解详细,感兴趣的小伙伴可以跟随小编一起学习一下
给大家分享两个小方块风格的加载动画
第五季来啦
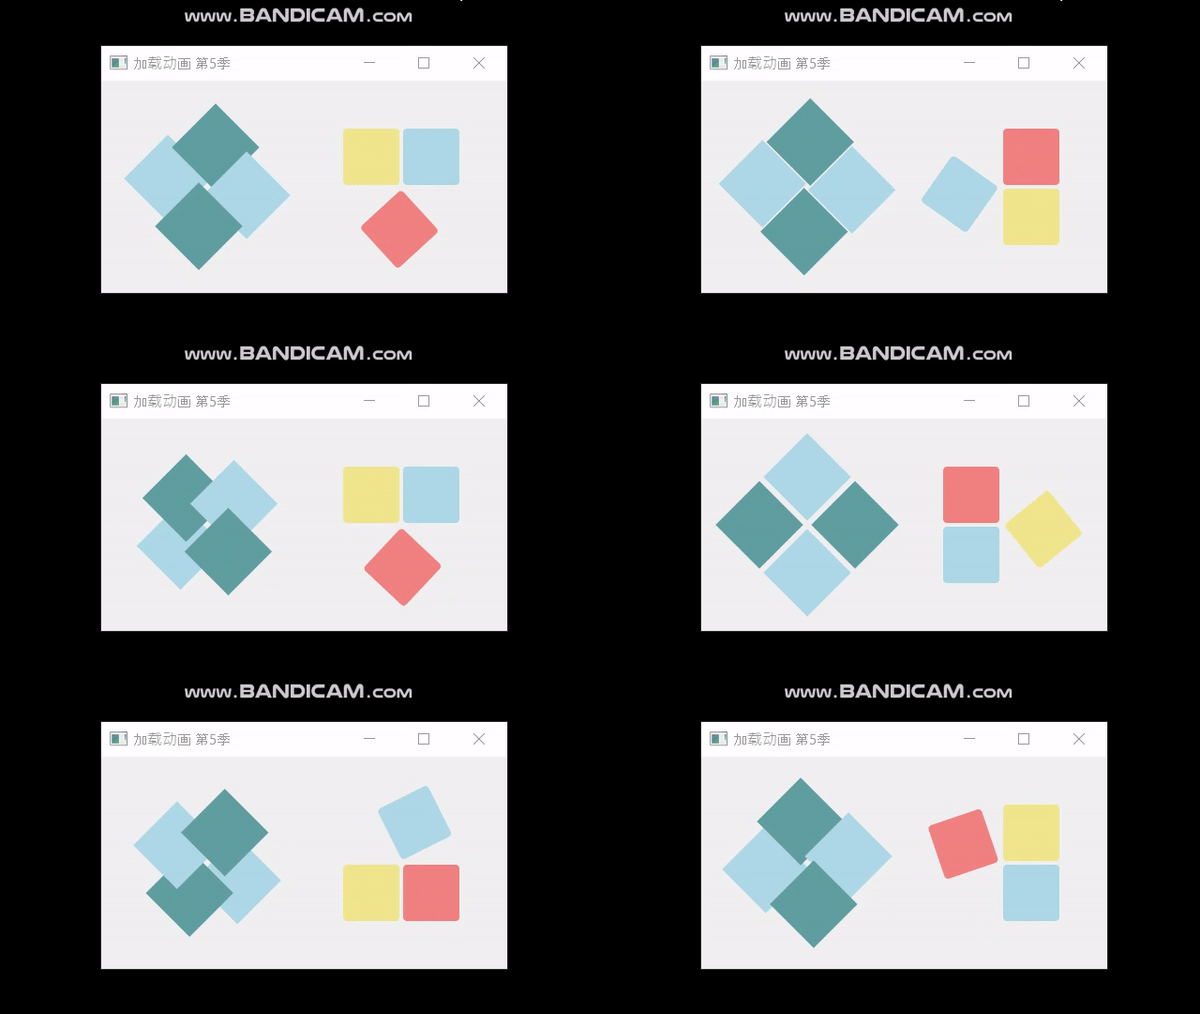
效果如下:

一个三个文件,可以直接编译运行
//main.cpp
#include "LoadingAnimWidget.h"
#include <QApplication>
#include <QGridLayout>
int main(int argc, char *argv[])
{
    QApplication a(argc, argv);

    QWidget w;
    w.setWindowTitle("加载动画 第5季");
    QGridLayout * mainLayout = new QGridLayout;

    auto* anim1= new RhombusShift;
    mainLayout->addWidget(anim1,0,0);

    auto* anim2 = new TiltingBricks;
    mainLayout->addWidget(anim2,0,1);

    w.setLayout(mainLayout);
    w.show();
    anim1->start();
    anim2->start();
    return a.exec();
}
//LoadingAnimWidget.h
#ifndef LOADINGANIMWIDGET_H
#define LOADINGANIMWIDGET_H
#include <QPropertyAnimation>
#include <QWidget>
class LoadingAnimBase:public QWidget
{
Q_OBJECT
Q_PROPERTY(qreal angle READ angle WRITE setAngle)
public:
LoadingAnimBase(QWidget* parent=nullptr);
virtual ~LoadingAnimBase();
qreal angle()const;
void setAngle(qreal an);
public slots:
virtual void exec();
virtual void start();
virtual void stop();
protected:
QPropertyAnimation mAnim;
qreal mAngle;
};
class RhombusShift:public LoadingAnimBase{//做斜向平移的四个菱形
public:
explicit RhombusShift(QWidget* parent = nullptr);
protected:
void paintEvent(QPaintEvent*);
};
class TiltingBricks:public LoadingAnimBase{//三个正方形一个接一个倾斜倒向右侧
public:
explicit TiltingBricks(QWidget* parent = nullptr);
protected:
void paintEvent(QPaintEvent*);
};
#endif // LOADINGANIMWIDGET_H//LoadingAnimWidget.cpp
#include "LoadingAnimWidget.h"
#include <QDebug>
#include <QPaintEvent>
#include <QPainter>
#include <QtMath>
LoadingAnimBase::LoadingAnimBase(QWidget* parent):QWidget(parent){
mAnim.setPropertyName("angle");
mAnim.setTargetObject(this);
mAnim.setDuration(2000);
mAnim.setLoopCount(-1);//run forever
mAnim.setEasingCurve(QEasingCurve::Linear);
setFixedSize(200,200);
mAngle = 0;
}
LoadingAnimBase::~LoadingAnimBase(){}
void LoadingAnimBase::exec(){
if(mAnim.state() == QAbstractAnimation::Stopped){
start();
}
else{
stop();
}
}
void LoadingAnimBase::start(){
mAnim.setStartValue(0);
mAnim.setEndValue(360);
mAnim.start();
}
void LoadingAnimBase::stop(){
mAnim.stop();
}
qreal LoadingAnimBase::angle()const{ return mAngle;}
void LoadingAnimBase::setAngle(qreal an){
mAngle = an;
update();
}
RhombusShift::RhombusShift(QWidget* parent):LoadingAnimBase (parent){
mAnim.setDuration(4800);
}
void RhombusShift::paintEvent(QPaintEvent*){
QPainter painter(this);
painter.setRenderHint(QPainter::Antialiasing);
painter.setPen(Qt::NoPen);
const int x = width();
const int y = height();
static const int cornerGap = 4;//菱形内部顶点和中心点的距离
static const int edgeGap = 2;//菱形顶点和外边框的距离
const qreal edgeLen = (x/2 - cornerGap - edgeGap) / 1.42;// 菱形的边长
const int halfDiagonalx = (x/2 - edgeGap - cornerGap )/2;//水平方向一半对角线长度
const int halfDiagonaly = (y/2 - edgeGap - cornerGap )/2;//垂直方向一半对角线长度
const QPointF point1(x/2,edgeGap + halfDiagonaly); //上方
const QPointF point2(x/2 + cornerGap + halfDiagonalx , y/2);//右侧
const QPointF point3(x/2, y/2 + cornerGap + halfDiagonaly); //下方
const QPointF point4(edgeGap + halfDiagonalx,y/2); //左侧
const QList<QPointF> pointList{point1,point2,point3,point4,point1,point2,point3,point4};
QPainterPath pathList[4];
for(int i = 0;i < 4; ++i){
auto & path = pathList[i];
path.moveTo(pointList[i]);
path.lineTo(pointList[i+1]);
path.lineTo(pointList[i+2]);
path.lineTo(pointList[i+3]);
path.lineTo(pointList[i+4]);
}
static const QColor brushList[4] = {"lightblue" , "cadetblue" , "lightblue" , "cadetblue"};
static const int staticTime = 15;//每次移动到四个节点上面,要静止一段时间,这个值在0-90之间
for(int i = 0;i < 4;++i){
qreal proportion = 0;
const auto rest = fmod(mAngle,90);//余数
const auto quotient = (int)mAngle / 90 * 0.25;//商
if(rest > 90 - staticTime) proportion = quotient + 0.25;
else proportion = rest / (90 - staticTime) * 0.25 + quotient;
const QPointF center = pathList[i].pointAtPercent(proportion);
painter.translate(center);
painter.rotate(45);
painter.setBrush(QBrush(brushList[i]));
painter.drawRect(-edgeLen/2,-edgeLen/2,edgeLen,edgeLen);
painter.resetTransform();
}
}
TiltingBricks::TiltingBricks(QWidget* parent):LoadingAnimBase (parent){
mAnim.setDuration(4000);
}
void TiltingBricks::paintEvent(QPaintEvent*){
QPainter painter(this);
painter.setRenderHint(QPainter::Antialiasing);
painter.setPen(Qt::NoPen);
static const QColor brushList[3] = {"lightcoral" , "lightblue" , "khaki"};
const int x = width();
const int y = height();
painter.translate(x/2,y/2);
const int cornerGap = 2;
const int edgeLen = x/3;//小方块边长
const QRectF rct1(-edgeLen-cornerGap,-edgeLen-cornerGap,edgeLen,edgeLen);//左上
const QRectF rct2(-edgeLen-cornerGap,cornerGap,edgeLen,edgeLen);//左下
const QRectF rct3(cornerGap,cornerGap,edgeLen,edgeLen);//右下
const QRectF baseRectList[3] = {rct1,rct2,rct3};
qreal ang = mAngle;
int round = (int)ang / 90;
if(round >= 4) round = 0;
ang = fmod(ang,90);
const int rectIdx = (int)ang / 30;
ang = fmod(ang,30) * 3;
painter.rotate(90*round);
for(int i = 0;i < 3;++i){
painter.setBrush(QBrush(brushList[i]));
if(i == rectIdx){
painter.rotate(ang);
painter.drawRoundedRect(baseRectList[i],4,4);
painter.rotate(-ang);
}
else{
if(i < rectIdx){
painter.rotate(90);
painter.drawRoundedRect(baseRectList[i],4,4);
painter.rotate(-90);
}
else{
painter.drawRoundedRect(baseRectList[i],4,4);
}
}
}
}
到此这篇关于Qt+QWidget实现简约美观的加载动画的文章就介绍到这了,更多相关Qt加载动画内容请搜索脚本之家以前的文章或继续浏览下面的相关文章希望大家以后多多支持脚本之家!


最新评论