
Java调用Deepseek-R1.1.5b大模型的超详细教程(附代码)
更新时间:2025年03月05日 08:40:18 作者:小星袁
这篇文章主要为大家介绍了Java调用Deepseek-R1.1.5b大模型的超详细教程并附上了代码,文中的教程讲解详细,有需要的小伙伴可以参考一下
一、部署本地 DeepSeek 模型(核心步骤)
步骤可参考:deepseek本地部署及java、python调用步骤详解
二、Java本地测试代码
public class OllamaDemo {

    private static final String API_URL = "http://localhost:11435/api/generate";

    public static final String askDeepSeek(String prompt) {
        JSONObject param = new JSONObject();
        param.set("model", "deepseek-r1:1.5b")
                .set("prompt", prompt)
                .set("stream", false)
                .set("temperature", 0.7);
        return HttpRequest.post(API_URL)
                .body(param.toString())
                .timeout(30000)
                .execute()
                .body();
    }

    public static void main(String[] args) {
        Scanner scanner = new Scanner(System.in);
        System.out.println("请输入你的问题(输入退出停止运行):");
        String question = scanner.nextLine();
        System.out.println(askDeepSeek(question));
    }
}
三、Java实现跨域代码
3.1 Controller类
public JsonResult getQuestion(String question) {
        return JsonResult.ok(questionService.getAnswer(question));
    }
3.2 Service接口
String getAnswer(String question);
3.3 Service类
private static final String API_URL = "http://localhost:11435/api/generate";

public String getAnswer(String question) {
        JSONObject param = new JSONObject();
        param.set("model", "deepseek-r1:1.5b")
                .set("prompt", prompt)
                .set("stream", false)
                .set("temperature", 0.7);
        String responseBody = HttpRequest.post(API_URL)
                .body(param.toString())
                .timeout(30000)
                .execute()
                .body();
        JSONObject responseJson = new JSONObject(responseBody);
        return responseJson.getStr("response");
    }
3.4 html代码
<!DOCTYPE html>
<html lang="zh-CN">
<head>
<meta charset="UTF-8">
<meta name="viewport" content="width=device-width, initial-scale=1.0">
<title>DeepSeek 智能对话</title>
<style>
:root {
--user-bg: #4F46E5;
--bot-bg: #F3F4F6;
--text-primary: #1F2937;
--border-color: #E5E7EB;
}
body {
margin: 0;
min-height: 100vh;
font-family: 'Segoe UI', system-ui, -apple-system;
background: #F9FAFB;
display: flex;
flex-direction: column;
}
.chat-container {
flex: 1;
max-width: 800px;
margin: 0 auto;
width: 100%;
padding: 1rem;
overflow-y: auto;
}
.message {
display: flex;
gap: 1rem;
margin-bottom: 1.5rem;
animation: fadeIn 0.3s ease;
}
.user-message {
flex-direction: row-reverse;
}
.avatar {
width: 32px;
height: 32px;
border-radius: 6px;
background: var(--user-bg);
display: flex;
align-items: center;
justify-content: center;
color: white;
font-weight: 500;
}
.bot .avatar {
background: #6B7280;
}
.content {
max-width: 85%;
padding: 1rem;
border-radius: 0.75rem;
background: white;
box-shadow: 0 2px 4px rgba(0,0,0,0.05);
}
.user .content {
background: var(--user-bg);
color: white;
}
.typing-indicator {
display: inline-flex;
gap: 0.25rem;
padding: 0.5rem;
}
.typing-dot {
width: 6px;
height: 6px;
background: #9CA3AF;
border-radius: 50%;
animation: bounce 1.4s infinite;
}
@keyframes bounce {
0%, 100% { transform: translateY(0); }
50% { transform: translateY(-4px); }
}
.input-area {
border-top: 1px solid var(--border-color);
padding: 1.5rem;
background: white;
}
.input-wrapper {
max-width: 800px;
margin: 0 auto;
display: flex;
gap: 1rem;
align-items: center;
}
#question {
flex: 1;
padding: 0.75rem 1rem;
border: 1px solid var(--border-color);
border-radius: 0.75rem;
resize: none;
min-height: 44px;
max-height: 200px;
}
</style>
</head>
<body>
<div class="chat-container" id="chatContainer">
<!-- 示例对话 -->
<div class="message bot">
<div class="avatar">AI</div>
<div class="content">您好!我是DeepSeek智能助手,有什么可以帮您?</div>
</div>
</div>
<div class="input-area">
<div class="input-wrapper">
<textarea
id="question"
placeholder="输入消息..."
rows="1"
onkeydown="handleKeyDown(event)"
></textarea>
<button onclick="sendMessage()" class="send-btn">
发送
</button>
</div>
</div>
<script>
function sendMessage() {
const input = document.getElementById('question');
const message = input.value.trim();
if (!message) return;
// 添加用户消息
addMessage(message, 'user');
input.value = '';
// 显示加载状态
const loader = addLoader();
fetch(`http://localhost:8081/ai/get?question=${encodeURIComponent(message)}`)
.then(response => response.json())
.then(data => {
removeLoader(loader);
if(data.code === 2001) {
typewriterEffect(data.data);
} else {
addMessage(`错误:${data.msg}`, 'bot');
}
})
.catch(() => {
removeLoader(loader);
addMessage("服务暂时不可用,请稍后再试", 'bot');
});
}
function addMessage(text, type) {
const container = document.getElementById('chatContainer');
const messageDiv = document.createElement('div');
messageDiv.className = `message ${type}`;
messageDiv.innerHTML = `
<div class="avatar">${type === 'user' ? '你' : 'AI'}</div>
<div class="content">${text}</div>
`;
container.appendChild(messageDiv);
container.scrollTop = container.scrollHeight;
}
function addLoader() {
const container = document.getElementById('chatContainer');
const loaderDiv = document.createElement('div');
loaderDiv.className = 'message bot';
loaderDiv.innerHTML = `
<div class="avatar">AI</div>
<div class="content">
<div class="typing-indicator">
<div class="typing-dot"></div>
<div class="typing-dot"></div>
<div class="typing-dot"></div>
</div>
</div>
`;
container.appendChild(loaderDiv);
container.scrollTop = container.scrollHeight;
return loaderDiv;
}
function removeLoader(element) {
element.remove();
}
function typewriterEffect(text) {
const container = document.getElementById('chatContainer');
const messageDiv = document.createElement('div');
messageDiv.className = 'message bot';
messageDiv.innerHTML = `
<div class="avatar">AI</div>
<div class="content"></div>
`;
container.appendChild(messageDiv);
const contentDiv = messageDiv.querySelector('.content');
let index = 0;
function type() {
if (index < text.length) {
contentDiv.innerHTML += text.charAt(index);
index++;
setTimeout(type, 20);
container.scrollTop = container.scrollHeight;
}
}
type();
}
function handleKeyDown(event) {
if (event.key === 'Enter' && !event.shiftKey) {
event.preventDefault();
sendMessage();
}
}
</script>
</body>
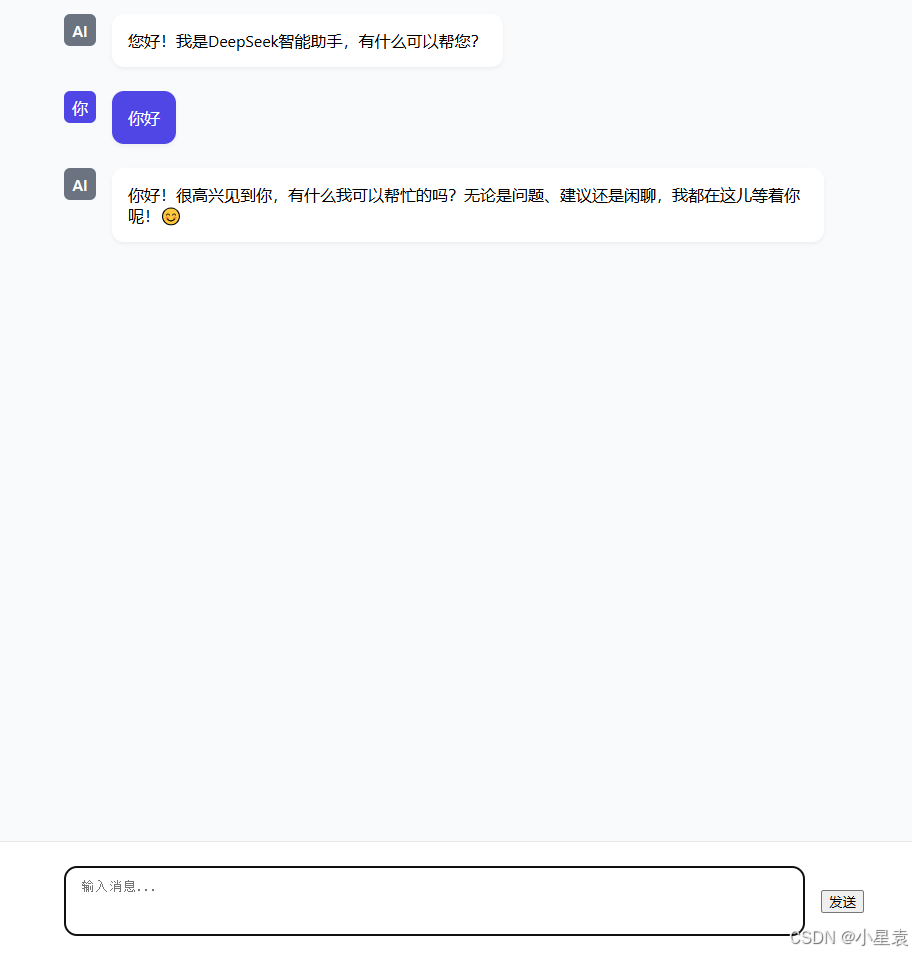
</html>3.5 结果展示
到此这篇关于Java调用Deepseek-R1.1.5b大模型的超详细教程的文章就介绍到这了,更多相关Java调用Deepseek-R1.1.5b模型内容请搜索脚本之家以前的文章或继续浏览下面的相关文章希望大家以后多多支持脚本之家!
相关文章
 本文是通过AnnotationConfigApplicationContext读取配置类来一步一步去了解Spring的启动过程。本文重点给大家介绍Spring启动过程源码分析及基本概念,感兴趣的朋友一起看看吧2021-10-10
 这篇文章主要介绍了Spring IOC控制反转的实现,IOC是Spring的核心思想之一,它通过将对象的创建、依赖注入和生命周期管理交给容器来实现解耦,使开发者能够更专注于业务逻辑的实现,需要的朋友可以参考下2025-02-02
 Spring 事务的传播特性说的是,当多个事务同时存在的时候,Spring 如何处理这些事务的特性,下面这篇文章主要给大家介绍了关于Spring事务失效场景的相关资料,需要的朋友可以参考下2022-02-02
 今天去官网查看spring boot资料时,在特性中看见了系统的事件及监听章节,所以下面这篇文章主要给大家介绍了关于SpringBoot事件发布和监听的相关资料,文中通过实例代码介绍的非常详细,需要的朋友可以参考下2021-11-11
 下面小编就为大家带来一篇Java发送带html标签内容的邮件实例代码。小编觉得挺不错的,现在就分享给大家,也给大家做个参考。一起跟随小编过来看看吧2016-11-11
Java 线程池ExecutorService详解及实例代码
这篇文章主要介绍了Java 线程池ExecutorService详解及实例代码的相关资料,线程池减少在创建和销毁线程上所花的时间以及系统资源的开销.如果不使用线程池,有可能造成系统创建大量线程而导致消耗系统内存以及”过度切换“2016-11-11
SpringBoot的@EnableAsync和@Async注解分析
这篇文章主要介绍了SpringBoot的@EnableAsync和@Async注解分析,Spring Boot是一个快速开发框架,可以帮助开发人员快速构建基于Spring的应用程序,需要的朋友可以参考下2023-07-07
2020macOS Big Sur配置Java开发环境之jdk安装过程
这篇文章主要介绍了2020macOS Big Sur配置Java开发环境之jdk安装,本文给大家介绍的非常详细,对大家的学习或工作具有一定的参考借鉴价值,需要的朋友可以参考下2021-02-02 在现代操作系统中,任务管理器是一个非常重要的工具,用于监控和管理计算机的运行状态,包括CPU使用率、内存占用等,对于开发者和系统管理员来说,了解这些性能数据有助于优化应用程序和系统性能,本文将介绍如何使用Java编写一个简单的程序来监控网络性能数据2025-01-01
 今天小编就为大家分享一篇关于Java中的接口回调实例,小编觉得内容挺不错的,现在分享给大家,具有很好的参考价值,需要的朋友一起跟随小编来看看吧2019-01-01


最新评论