
Android使用Tint为图标Icon动态着色的操作方法
更新时间:2025年11月25日 08:39:22 作者:kerli
本文介绍了在Android中使用Tint为图标动态着色的方法,可以通过xml或代码设置Tint属性,从而实现单张图片的动态着色,节省包体积,需要注意的是,同时设置ImageView与Drawable的Tint时,要关注覆盖问题,需要的朋友可以参考下
1. 背景
在 App 当中,会有很多 形状相同、颜色不同 的 Icon。
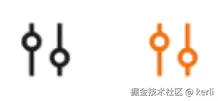
例如上图这个场景,是筛选项的 icon,对应的代码可能为:
- Xml 中初始化颜色为黑色
<ImageView
    ...
    android:src="@drawable/icon_filter_black" />
- 代码中根据筛选状态,切换不同颜色的 icon
// XXXFragment.kt

imageView.setImageDrawable(
    if (isSelect) {
        // 筛选后为橙色
        resources.getDrawable(R.drawable.icon_filter_orange);
    } else {
        // 未筛选为黑色
        resources.getDrawable(R.drawable.icon_filter_black);
    }
)
如果为每种颜色的 Icon 都保存一张图片,会增加包体积。同时,会增加设计的工作负担。有没有什么办法可以做到只需要一张图片,然后动态的着色呢?
2. 使用 Tint 动态着色
2.1 使用方式
有以下几种方式:
- xml 中设置
<ImageView
    ...
    android:src="@drawable/icon_filter"
    app:tint="@color/black"
    />
- 代码中为 ImageView 设置
imageView.imageTintList = ColorStateList(...)
- 代码中直接为 Drawable 设置
val drawable = resources.getDrawable(R.drawable.icon_filter)
drawable.setTint = Color.BLACK

imageView.setImageDrawable(drawable)
设置 tint 后,绘制时就会用 tint 的颜色渲染 icon。这样,就算只有一张图片,也可以渲染为多种颜色。很大程度的节省了包体积。
2.2 原理分析
- ImageView 会将 Tint 传给 Drawable
 // ImageView.java
public void setImageTintList(@Nullable ColorStateList tint) {
    mDrawableTintList = tint;
    mHasDrawableTint = true;

    applyImageTint();
}

private void applyImageTint() {
    if (mDrawable != null && (mHasDrawableTint || mHasDrawableBlendMode)) {
        mDrawable = mDrawable.mutate();

        if (mHasDrawableTint) {
            mDrawable.setTintList(mDrawableTintList); // 将 tint 传递给 Drawable!
        }
        // ...
    }
}
- Drawable 在 收到 Tint 时会创建 ColorFilter,在 draw 时会用它做颜色过滤处理。这里拿 VectorDrawable 举例:
public class VectorDrawable extends Drawable {
    private BlendModeColorFilter mBlendModeColorFilter ;

    @Override
    public void setTintList(ColorStateList tint) {
        // 使用 tint 创建 ColorFilter
        updateColorFilters(... , tint) ;
    }

    private void updateColorFilters(@Nullable BlendMode blendMode , ColorStateList tint) {
        // ...
    mBlendModeColorFilter = updateBlendModeFilter(mBlendModeColorFilter , tint , blendMode) ;
    }

    @Override
    public void draw(Canvas canvas) {
        // 绘制时,如果外部没有设置 mColorFilter,则使用 mBlendModeColorFilter
        final ColorFilter colorFilter = (mColorFilter == null ? mBlendModeColorFilter : mColorFilter) ;
        // ...
    }
}

public abstract class Drawable {
    @Nullable
    BlendModeColorFilter updateBlendModeFilter(@Nullable ColorStateList tint , ... ) {
        // ...
        final int color = tint.getColorForState(getState() , Color.TRANSPARENT) ;

        if (blendFilter == null || blendFilter.getColor() != color
                || blendFilter.getMode() != blendMode) {
            return new BlendModeColorFilter(color , blendMode) ;
        }

        return blendFilter ;
    }
}
3. 注意事项
3.1 同时设置 ImageView 与 Drawable,Drawable 的设置会失效
- 例如,我们在 xml 中设置 tint 为黑色
<ImageView
    ...
    android:src="@drawable/icon_filter"
    app:tint="@color/black"
    />
- 在代码中,为 Drawable 设置为黄色
val drawable = resources.getDrawable(R.drawable.icon_filter)
drawable.setTint = Color.YELLOW

imageView.setImageDrawable(drawable)
- 此时,对 Drawable 的设置是不生效的,因为此时 ImageView.setImageDrawable 会覆盖掉 Drawable 自身的 tint
// ImageView.kt

public void setImageDrawable(@Nullable Drawable drawable) {
    updateDrawable(drawable) ;
}

private void updateDrawable(Drawable d) {
    applyImageTint() ;
}

private void applyImageTint() {
    if (mHasDrawableTint) {
        mDrawable.setTintList(mDrawableTintList) ;
    }
}
- 所以如果同时设置 ImageView 与 Drawable 的 tint,要关注覆盖问题。
到此这篇关于Android使用Tint为图标Icon动态着色的操作方法的文章就介绍到这了,更多相关Android Tint为Icon动态着色内容请搜索脚本之家以前的文章或继续浏览下面的相关文章希望大家以后多多支持脚本之家!
相关文章
 这篇文章主要为大家详细介绍了基于Android实现网络访问拦截器的几种常见方式,文中的示例代码讲解详细,感兴趣的小伙伴可以跟随小编一起学习一下2025-07-07
 这篇文章主要为大家详细介绍了Android点击WebView实现图片缩放及滑动浏览效果,具有一定的参考价值,感兴趣的小伙伴们可以参考一下2017-12-12
Android 仿高德地图可拉伸的BottomSheet的示例代码
这篇文章主要介绍了Android 仿高德地图可拉伸的BottomSheet的示例代码,小编觉得挺不错的,现在分享给大家,也给大家做个参考。一起跟随小编过来看看吧2018-07-07 本篇文章介绍了,Android中图片处理实例介绍,需要的朋友参考下2013-04-04
 大家都知道Android 中的动画有很多,除了在一个界面上使用帧动画、属性动画将一个或多个 View 进行动画处理以外,还可以用于两个界面之间过渡、跳转。本文的内容包括:Android 5.0+ 的转场动画和Android 4.X 模拟实现 Android 5.0+ 转场效果。有需要的可以参考借鉴。2016-10-10
Activity透明/半透明效果的设置transparent(两种实现方法)
两种方法实现Activity透明/半透明效果的设置,代码思路很有调理,感兴趣的朋友可以参考下,希望本文可以帮助到你2013-02-02 本文主要介绍了Mac Android Studio安装教程,文中通过图文代码介绍的非常详细,具有一定的参考价值,感兴趣的小伙伴们可以参考一下2021-08-08
 本文主要介绍Android源码的下载和编译,这里整理了相关资料及如何下载和编译的详细步骤,有需要的小伙伴可以参考下2016-09-09
Android 让自定义TextView的drawableLeft与文本一起居中
本文主要介绍Android 自定义控件TextView显示居中问题,在开发过程中经常会遇到控件的重写,这里主要介绍TextView的drawableLeft与文本一起居中的问题2016-07-07 这篇文章主要介绍了Android的图片在界面随意拖动的功能,小编觉得挺不错的,现在分享给大家,也给大家做个参考,一起跟随小编过来看看吧2018-04-04


最新评论