
Nginx配置支持IPV6地址的方法示例
更新时间:2024年11月11日 09:10:35 作者:zxguan
本文主要介绍了如何搭建并测试Nginx以支持IPV6地址的过程,包括下载安装包、编译安装、配置和启动Nginx等步骤,同时,文章还解决了在测试IPV6地址时遇到的两个问题:curl解析错误和阿里云、腾讯云IPV6地址配置问题
搭建并测试
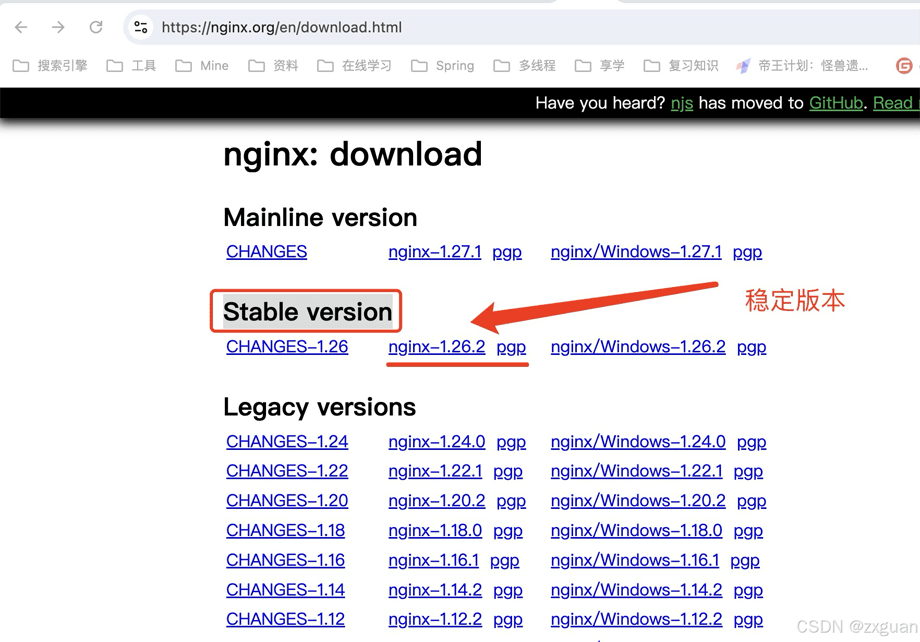
1. 下载 NG 安装包
点击进入 Nginx 网址,下载安装包
2. 安装编译工具及库文件
yum -y install make zlib zlib-devel gcc-c++ libtool openssl openssl-devel pcre-devel
3. 上传并解压安装包
// 进入指定目录,ftp 上传压缩包

tar -zxvf nginx-1.26.2.tar.gz
4. 编译
./configure --prefix=/usr/local/nginx --with-http_stub_status_module --with-http_ssl_module --with-ipv6
5. 安装
make && make install
6. 修改配置
# 进入 NG 配置文件夹
cd /usr/local/nginx/conf

# 修改 NG 配置文件
vim nginx.conf
http {
	......
    server {
    	......
        listen       80;     	# IPV4
        listen       [::]:80;	# IPV6
		......
    }
	......
}
7. 启动 NG
# 启动 NG
./nginx

# 停止 NG
./nginx -s stop

# 重启 NG
./nginx -s reload
8. 查看 IP 地址
[root@iZf8z6w83m8z8cj3m3lmubZ conf]# ip a
1: lo: <LOOPBACK,UP,LOWER_UP> mtu 65536 qdisc noqueue state UNKNOWN group default qlen 1000
    link/loopback 00:00:00:00:00:00 brd 00:00:00:00:00:00
    inet 127.0.0.1/8 scope host lo
       valid_lft forever preferred_lft forever
    inet6 ::1/128 scope host
       valid_lft forever preferred_lft forever
2: eth0: <BROADCAST,MULTICAST,UP,LOWER_UP> mtu 1500 qdisc pfifo_fast state UP group default qlen 1000
    link/ether 00:16:3e:0a:74:78 brd ff:ff:ff:ff:ff:ff
    inet 172.18.133.39/20 brd 172.18.143.255 scope global dynamic eth0
       valid_lft 315340442sec preferred_lft 315340442sec
    inet6 2408:4008:1105:4901:b3f7:6c00:f1d7:e412/64 scope global
       valid_lft forever preferred_lft forever
9. 测试 IP 地址
9.1. 测试 IPV4 地址
[root@iZf8z6w83m8z8cj3m3lmubZ conf]# curl 172.18.133.39:80
<!DOCTYPE html>
<html>
<head>
<title>Welcome to nginx!</title>
<style>
html { color-scheme: light dark; }
body { width: 35em; margin: 0 auto;
font-family: Tahoma, Verdana, Arial, sans-serif; }
</style>
</head>
<body>
<h1>Welcome to nginx!</h1>
<p>If you see this page, the nginx web server is successfully installed and
working. Further configuration is required.</p>

<p>For online documentation and support please refer to
<a href="http://nginx.org/" rel="external nofollow"  rel="external nofollow" >nginx.org</a>.<br/>
Commercial support is available at
<a href="http://nginx.com/" rel="external nofollow"  rel="external nofollow" >nginx.com</a>.</p>

<p><em>Thank you for using nginx.</em></p>
</body>
</html>
9.2. 测试 IPV6 地址
[root@iZf8z6w83m8z8cj3m3lmubZ conf]# curl -6 -g http://[2408:4008:1105:4901:b3f7:6c00:f1d7:e412]:80
[root@iZf8z6w83m8z8cj3m3lmubZ conf]# curl http://2408:4008:1105:4901:b3f7:6c00:f1d7:e412:80
<!DOCTYPE html>
<html>
<head>
<title>Welcome to nginx!</title>
<style>
html { color-scheme: light dark; }
body { width: 35em; margin: 0 auto;
font-family: Tahoma, Verdana, Arial, sans-serif; }
</style>
</head>
<body>
<h1>Welcome to nginx!</h1>
<p>If you see this page, the nginx web server is successfully installed and
working. Further configuration is required.</p>

<p>For online documentation and support please refer to
<a href="http://nginx.org/" rel="external nofollow"  rel="external nofollow" >nginx.org</a>.<br/>
Commercial support is available at
<a href="http://nginx.com/" rel="external nofollow"  rel="external nofollow" >nginx.com</a>.</p>

<p><em>Thank you for using nginx.</em></p>
</body>
</html>
IPV6 测试失败原因
1. curl: [globbing] error: bad range specification after pos 9
IPV6 地址中含有 : 等符号,可能在解析时报错,需要使用 [] 将 IPV6 地址包起来,避免解析报错。
# 错误写法
curl http://[2408:4008:1105:4901:b3f7:6c00:f1d7:e412]
或
curl http://[2408:4008:1105:4901:b3f7:6c00:f1d7:e412:80]
2. curl: Failed to connect to 0.0.0.10: Invalid argument
原因存在多种,我遇到是一个比较奇葩的原因。在阿里云和腾讯云中,curl 指定的 IPV6 地址必须与控制台分配的 IPV6 地址一致,自己手动配置的不行。
到此这篇关于Nginx配置支持IPV6地址的方法示例的文章就介绍到这了,更多相关Nginx配置支持IPV6地址内容请搜索脚本之家以前的文章或继续浏览下面的相关文章希望大家以后多多支持脚本之家!
相关文章
 现在的网站支持Https几乎是标配功能,Nginx能很好的支持Https功能,本文主要介绍了Nginx配置同时支持http和https的两种方式,具有一定的参考价值,感兴趣的可以了解一下2024-03-03
nginx如何实现同个ip、端口访问不同的项目(以路径区分项目)
这篇文章主要介绍了nginx如何实现同个ip、端口访问不同的项目(以路径区分项目),具有很好的参考价值,希望对大家有所帮助,如有错误或未考虑完全的地方,望不吝赐教2023-12-12 本文主要介绍了Nginx+keepalived配置的实现步骤,实现配置Nginx和keepalived、编写脚本以及测试配置,具有一定的参考价值,感兴趣的可以了解一下2025-05-05
 这篇文章主要为大家介绍了nginx的配置转发到其他网站过程详解,有需要的朋友可以借鉴参考下,希望能够有所帮助,祝大家多多进步,早日升职加薪2022-08-08
 这篇文章主要介绍了Nginx从搭建到配置支持HTTPS的方法,非常不错,具有一定的参考借鉴价值,需要的朋友可以参考下2018-07-07
 本文给大家分享Nginx源码编译安装过程,本文给大家介绍的非常详细,对大家的学习或工作具有一定的参考借鉴价值,需要的朋友参考下吧2021-11-11
 我们在使用的时候会遇到很多的恶意IP攻击,这个时候就要用到Nginx 禁止IP访问了,本文主要介绍了Nginx禁止IP访问只允许域名访问及Nginx防盗链设置,具有一定的参考价值,感兴趣的可以了解一下2023-10-10
 本文主要介绍了nginx 老网站域名重定向到新网站的方法,以减少业务影响并确保流量导向新域名,文中通过示例代码介绍的非常详细,对大家的学习或者工作具有一定的参考学习价值,需要的朋友们下面随着小编来一起学习学习吧2025-02-02
 这篇文章主要介绍了浅谈Nginx七层反向代理和负载均衡,小编觉得挺不错的,现在分享给大家,也给大家做个参考。一起跟随小编过来看看吧2018-07-07
 本文主要介绍了Nginx日志定期清理设置实现,文中通过示例代码介绍的非常详细,对大家的学习或者工作具有一定的参考学习价值,需要的朋友们下面随着小编来一起学习学习吧2025-12-12


最新评论