
linux自建证书全流程分享
更新时间:2026年04月16日 08:56:48 作者:゚遇见
本文记录了在项目开发过程中配置minio HTTPS证书的过程,包括生成私钥、pem文件、创建CA签名证书、创建配置文件、创建签名证书等生成所需证书文件,最后说明了配置HTTPS证书后本地开发可能会遇到的问题及解决方法
前言:本文记录一下在项目开发过程中,minio配置https证书的过程
1.生成私钥:(minio是自定义的名字)
openssl genrsa -des3 -out minio.key 2048
输入完这个命令会让输入两次密码,密码自定义就可以,两次输入需要一致

2.消除私钥key的密码
就是把上面那个文件的密码消除掉
openssl rsa -in minio.key -out minio.key
输入完命令让输入密码确认,这里输入第一步的密码

3.生成pem文件(这里的minio.key,是上面创建的文件)
openssl req -utf8 -x509 -new -nodes -key minio.key -sha256 -days 825 -out minio.pem
输入完命令会让输入以下几个信息:
Country Name (2 letter code) [AU]:
State or Province Name (full name) [Some-State]:
Locality Name (eg, city) []:
Organization Name (eg, company) [Internet Widgits Pty Ltd]:
Organizational Unit Name (eg, section) []:
Common Name (e.g. server FQDN or YOUR name) []:
Email Address []:

4.创建CA签名证书
生成私钥(server.key自定义名称)
openssl genrsa -out minio_server.key 2048
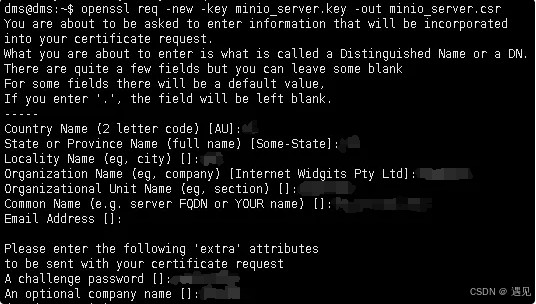
5.创建证书签名请求(server.key这个是第四步创建的文件)
openssl req -new -key minio_server.key -out minio_server.csr
输入完命令会让输入以下几个信息:
Country Name (2 letter code) [AU]:
State or Province Name (full name) [Some-State]:
Locality Name (eg, city) []:
Organization Name (eg, company) [Internet Widgits Pty Ltd]:
Organizational Unit Name (eg, section) []:
Common Name (e.g. server FQDN or YOUR name) []:
Email Address []:
Please enter the following 'extra' attributes
to be sent with your certificate request
A challenge password []:
An optional company name []:
6.创建一个配置文件
vim minio_server.ext
authorityKeyIdentifier=keyid,issuer
basicConstraints=CA:FALSE
keyUsage = digitalSignature, nonRepudiation, keyEncipherment, dataEncipherment
subjectAltName = @alt_names
[alt_names]
DNS.1 = xx.xx.xxx.xxx
IP.1 = xx.xx.xxx.xxx
7.创建签名证书
openssl x509 -req -in minio_server.csr -CA minio.pem -CAkey minio.key -CAcreateserial -out minio_server.crt -days 3650 -sha256 -extfile minio_server.ext

8.得到所需证书文件
minio_server.crt
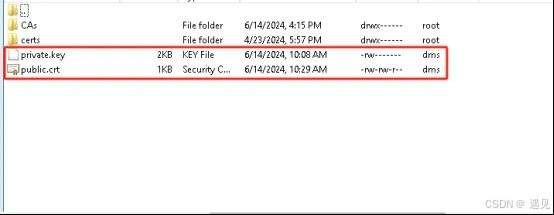
9.将上面生成的minio_server.key重命名为private.key
将上一步生成的minio_server.crt重命名为public.crt
10.配置证书
minio启动命令,将上面重命名后的private.key和public.crt放到/minio/config这个目录下
	sudo docker run -p 9000:9000 -p 9001:9001 -d --name minio
	-v /minio/data:/data
	-v /minio/config:/root/.minio/certs
	-e "MINIO_ROOT_USER=admin"
	-e "MINIO_ROOT_PASSWORD=Minio@2024#qwe"
	minio/minio server /data --console-address ":9001"
最后:配置完https证书后,本地开发使用minio会报错,是因为证书不受信任的原因
解决方法:
1.配置证书到自己本地库:
cmd进本地jre的/lib/security/下
执行命令:
keytool -import -alias public -keystore cacerts -file D://public.crt(自己的路径,文件为上面生成的证书文件)
密钥口令输入:changeit
是否信任此证书:Y
以上添加完之后可解决本地上传图片报错的问题
2.绕过https证书验证:
public OssClient(String configKey, OssProperties ossProperties) {
        this.configKey = configKey;
        this.properties = ossProperties;
        try {
            AwsClientBuilder.EndpointConfiguration endpointConfig =
                new AwsClientBuilder.EndpointConfiguration(properties.getEndpoint(), properties.getRegion());
            AWSCredentials credentials = new BasicAWSCredentials(properties.getAccessKey(), properties.getSecretKey());
            AWSCredentialsProvider credentialsProvider = new AWSStaticCredentialsProvider(credentials);
            ClientConfiguration clientConfig = new ClientConfiguration();
            if (OssConstant.IS_HTTPS.equals(properties.getIsHttps())) {
                clientConfig.setProtocol(Protocol.HTTPS);
                // 绕过https证书验证
                TrustStrategy trustStrategy =(X509Certificate[] chain, String authType) ->true;
                SSLContext sslContext =new SSLContextBuilder().loadTrustMaterial(null, trustStrategy).build();
                SSLConnectionSocketFactory sslsf =new SSLConnectionSocketFactory(sslContext, new String[]{"TLSv1.2"}, null, NoopHostnameVerifier.INSTANCE);
                clientConfig.getApacheHttpClientConfig().setSslSocketFactory(sslsf);
            } else {
                clientConfig.setProtocol(Protocol.HTTP);
            }
            AmazonS3ClientBuilder build = AmazonS3Client.builder()
                .withEndpointConfiguration(endpointConfig)
                .withClientConfiguration(clientConfig)
                .withCredentials(credentialsProvider)
                .disableChunkedEncoding();
            if (!StringUtils.containsAny(properties.getEndpoint(), OssConstant.CLOUD_SERVICE)) {
                // minio 使用https限制使用域名访问 需要此配置 站点填域名
                build.enablePathStyleAccess();
            }
            this.client = build.build();

            createBucket();
        } catch (Exception e) {
            if (e instanceof OssException) {
                throw e;
            }
            throw new OssException("配置错误! 请检查系统配置");
        }
    }
总结
以上为个人经验,希望能给大家一个参考,也希望大家多多支持脚本之家。
相关文章

apache与iis下让html格式的页面也同样具有shtml的动态解析
apache下让html格式的页面也同样具有shtml的动态解析,方便有此需要的朋友。2011-03-03 本文详细介绍了如何在VMware虚拟机中安装和配置CentOS 7操作系统,包括安装步骤、配置过程、网络设置、更换yum源等2026-03-03
 文章详细介绍了多种Linux内存获取工具和方法,包括LiME、AVML、fmem等,以及在虚拟化环境和紧急响应场景下的应用,文章还强调了内存获取的最佳实践,如权限要求、系统影响和法律合规性,并推荐LiME作为主流工具,需要的朋友可以参考下2025-12-12
 本篇文章详细介绍了linux下使用rsync同步目录,使用rsync同步后可以保持目录的一致性,有需要的可以了解一下。2016-11-11
 这篇文章主要介绍了详解bash中的初始化机制,文中通过示例代码介绍的非常详细,对大家的学习或者工作具有一定的参考学习价值,需要的朋友们下面随着小编来一起学习学习吧2020-03-03
 这篇文章主要介绍了详解Linux动态库生成与使用指南,文中通过示例代码介绍的非常详细,对大家的学习或者工作具有一定的参考学习价值,需要的朋友们下面随着小编来一起学习学习吧2020-07-07
 今天小编就为大家分享一篇Linux部署python爬虫脚本,并设置定时任务的方法,具有很好的参考价值,希望对大家有所帮助。一起跟随小编过来看看吧2019-06-06
 这篇文章主要介绍了centos7.6 安装Tomcat-8.5.39的方法,非常不错,具有一定的参考借鉴价值,需要的朋友可以参考下2019-09-09
 文章主要介绍了在Ubuntu 20.04系统中安装WiFi网卡驱动的方法,包括通过软件和更新、更换软件源、激活BCM无线网卡等步骤2026-03-03
 最近在研究怎么让Discuz!去应用Memcache去做一些事情,记录下Memcache安装的过程。2010-05-05


最新评论