
Illustrator(AI)模仿设计出一个逼真的色彩斑澜的U盘实例教程
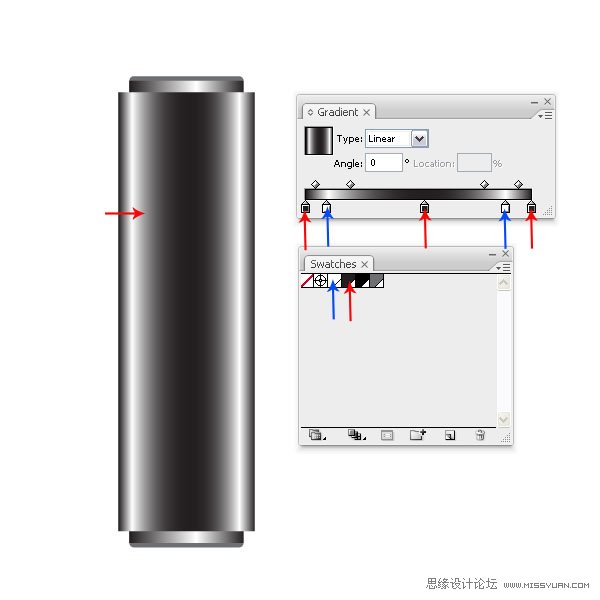
Step 8
Apply yet another linear gradient and make sure that you use Global Colors. Align the shape centered to the others.
8. 再应用另一个线性渐变,确定你使用的是全局色。然后所有形状居中对齐。
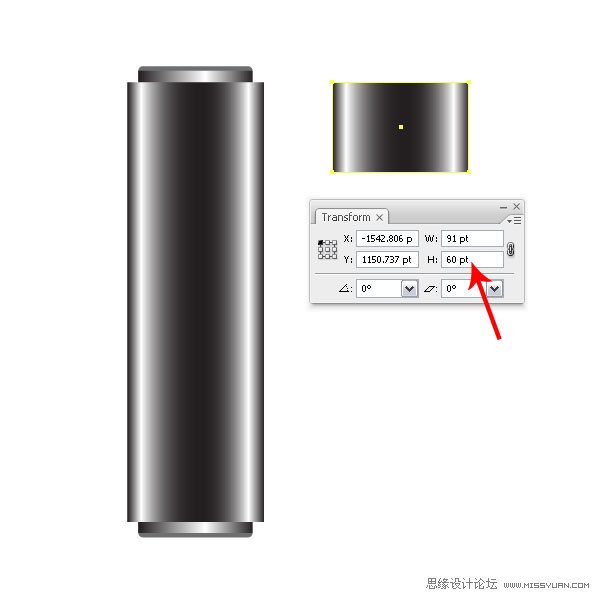
Step 9
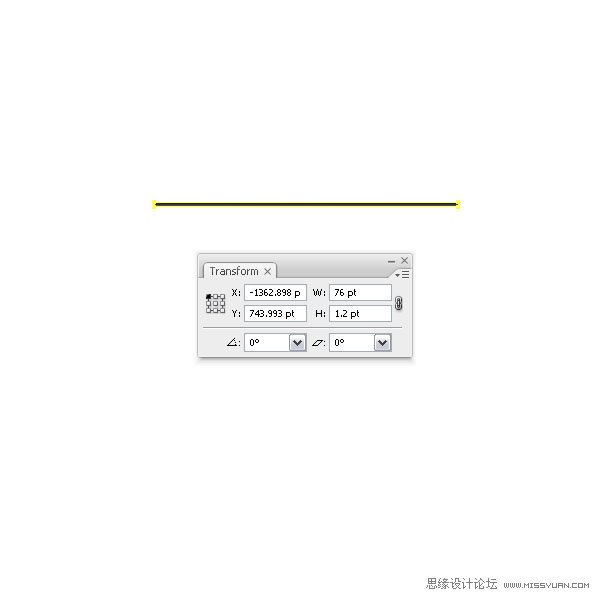
Make a copy of the newly created shape, then transform it to the sizes 91pt by 60pt. You can do so using the Transform Palette. Just type in the numbers while the selection is active.
9. 再制作一个刚刚绘制的矩形的副本,然后更改它的大小为91*60pt,你可以使用变换调板来更改,只要选中对象,然后输入数值就可以。
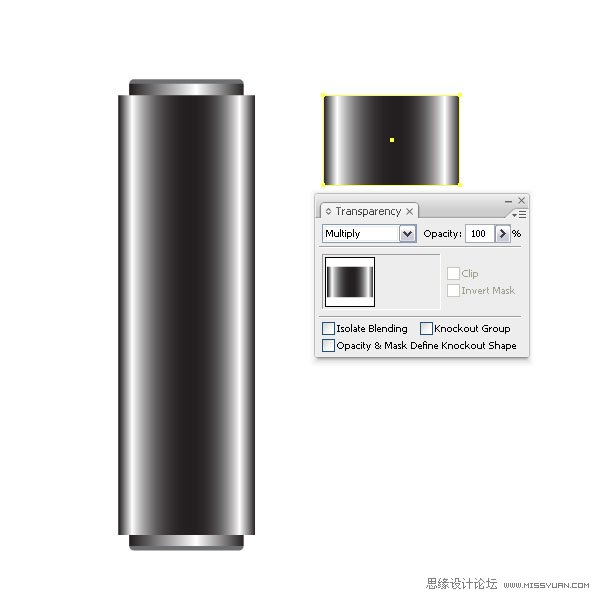
Step 10
Set the Layer mode of the small rectangle to Multiply.
10. 这个小矩形的混合模式设置为“正片叠底”。
图示Transparency:透明度调板
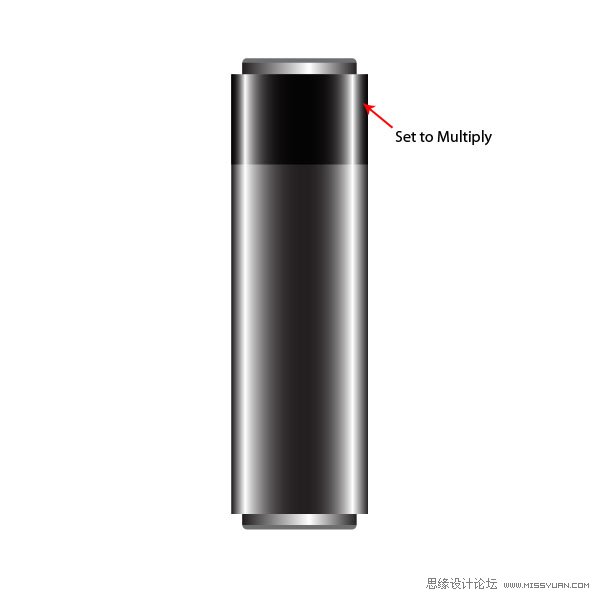
Step 11
Align it with the bigger rectangle along the top and vertically in the center. This will be our cap.
11. 选中小矩形和大矩形,然后在大矩形上点一下(译者提示:在大矩形上点一下,目的是为了在执行对齐时以大矩形为参考对齐对象),切到对齐调板,点“垂直顶对齐”按钮。这就是U盘的盖子了。
Step 12
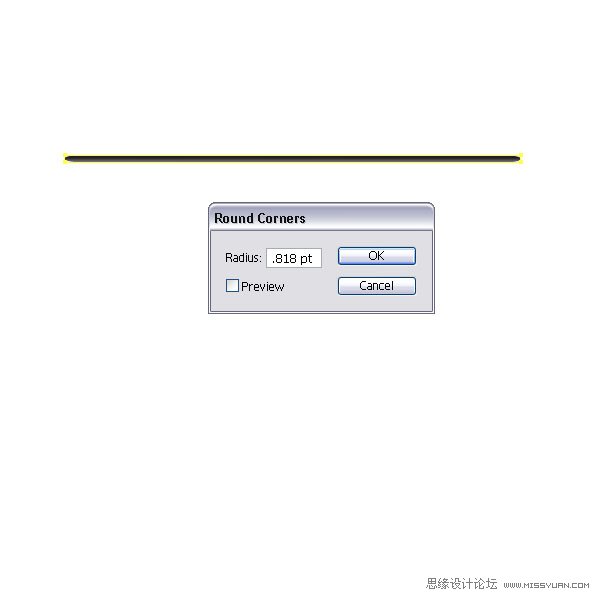
Create a tiny long rectangle with the sizes 76pt x 1.2pt and fill it with a gray linear gradient. Go to Effect > Stylize > Round Corners and choose a radius of .818pt.
12. 绘制一个76*1.2pt的扁长矩形,填充灰色线性渐变,然后执行效果菜单>风格化>圆角,输入圆角半径:0.818pt。
Step 13
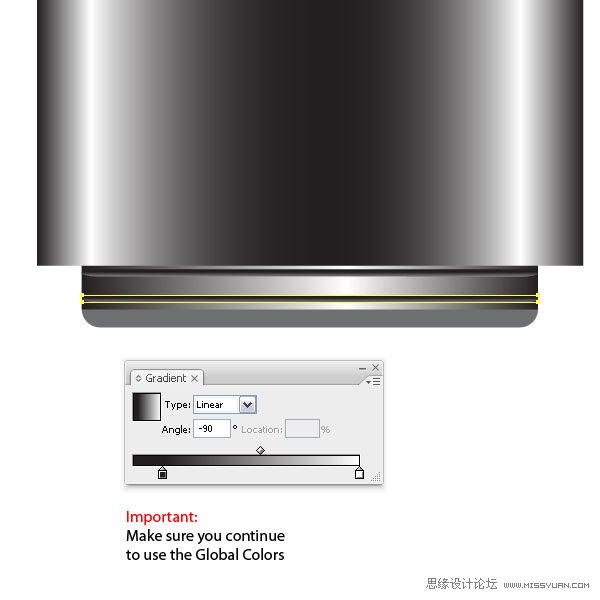
Make a copy of the shape, align them and place them on the bottom of the flash stick shape. They will be a small accent to the bottom part. Again, make sure that the gradients have Global Colors set.
13. 绘制一个扁长矩形的副本,然后使它们和其它形状对齐,然后把它们移到U盘的最下面。它们就是U盘底下小的凸起部分。同样的,确定一下渐变上的颜色使用的是全局色。
Step 14
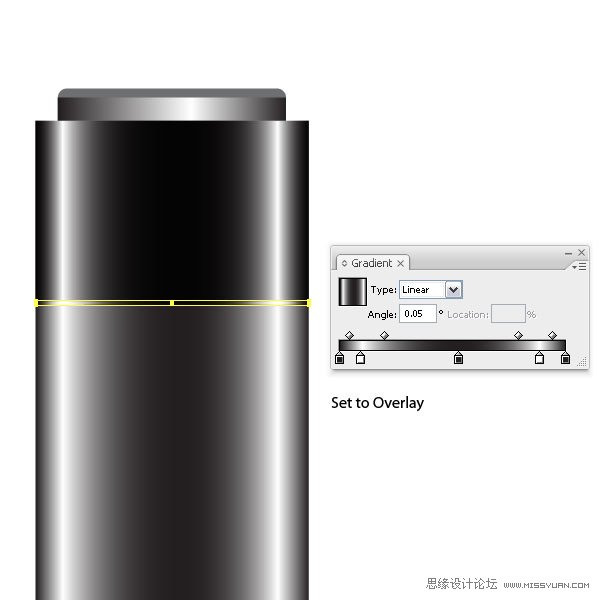
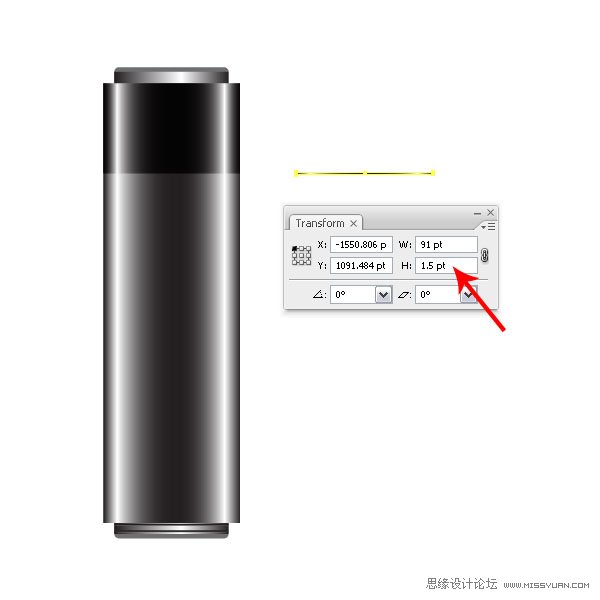
Make a copy of the cap we created in Step 9 and change the height to 1.5pt via the Transform Palette. Keep the gradient, but add a Stroke of 0.25pt in dark gray to it. Set the Layer Mode to Overlay and place it just below the cap shape.
14. 制作一个我们在第9步绘制的盖子的副本,然后切到变换调板,更改高度为1.5pt。渐变保持不变,然后描边颜色设置为深灰色,描边宽度设置为0.25pt。图层混合模式设置为“叠加”,然后把它移到盖子形状的下面。
Step 15
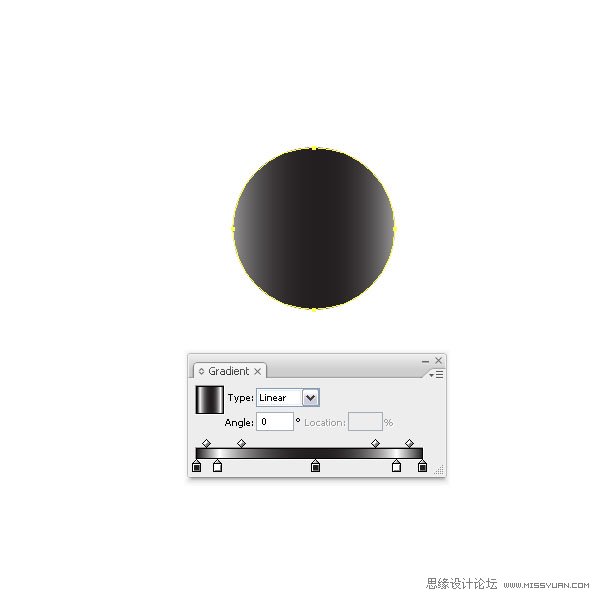
Create a small circle and fill it with the same gradient as the cap shape. Duplicate it and fill it with a pink, or whatever color you prefer. This is not a Global Color, as I don’t want it to change later on. Set the Layer Mode to Overlay at 68%.
15. 绘制一个小圆,填充和盖子形状一样的渐变。然后复制它,填充粉色,或者其它你喜欢的颜色。这里的粉色不是全局色,因为在之后我不会再去更改颜色了。然后图层混合模式设置为“叠加”,透明度:68%。
Step 16
With the pink circle still selected, go to Effect > Stylized > Inner Glow and set: the Mode to Normal, Opacity to 75%, a Blur of 2pt, and the color set to black. Also, center both circles.
16. 粉色的圆仍是选中状态,然后执行效果菜单>风格化>内发光,设置混合模式为“正常”,透明度:75%,模糊:2pt,颜色设置为黑色。然后将这2个圆居中对齐。
相关文章
 偏移文本或偏移路径意味着偏离了原来的位置,虽然听起来可能不太理想或杂乱无章,但在Illustrator中使用偏移技术处理文本可以给您带来一些很酷的效果,详细请看下文介绍2026-03-03
ai怎么混合两种颜色? illustrator混合两个色块的颜色的方法
ai填充不同颜色的图形重叠以后,想要将两种颜色混合,该怎么混合颜色呢?下面我们就来看看详细的教程2024-07-18 ai网格线间距默认的不是很喜欢,想要自己调整一下,该怎么调整呢?今天我们就来看看参考线调整技巧2024-05-28
ai路径平均效果怎么用? illustrator使用平均路径的教程
Adobe Illustrator中有一个路径平均功能,如何使用呢?下面小编为大家演示路径平均功能的一种使用方法2024-05-21ai保存pdf格式出现多余内容怎么解决? 去掉pdf文件多余内容的技巧
ai保存pdf格式出现多余内容怎么解决?ai中的文档保存为pdf文件的时候,发现有多余内容,该怎么操作呢?下面我们就来看看去掉pdf文件多余内容的技巧2023-12-19- ai描边在哪里?ai中想要设置描边,该怎么操作呢?下面我们就来看看ai设置描边的多种方法2023-12-19
- ai原位复制怎么用?复制图形的时候,想要原位复制粘贴,该怎么操作呢?下面我们就来看看ai原位复制快捷键介绍2023-12-19
ai怎么让文字随着路径变形? illustrator区域文字不跟着变换方向问题的
ai怎么让文字随着路径变形?选中文字后,发现文字不跟随变换区域旋转该怎么办呢?下面我们就来看看illustrator区域文字不跟着变换问题的解决办法2023-11-30ai渐变色怎么调方向? illustrator将渐变颜色反向的技巧
ai渐变色怎么调方向?ai中给图形填渐变色,想要进行反向,该怎么操作呢?下面我们就来看看illustrator将渐变颜色反向的技巧2023-11-30
Ai彩色logo怎么做反白反黑效果? ai彩色logo转化为黑白稿的技巧
Ai彩色logo怎么做反白反黑效果?设计的彩色logo想要做黑白稿,就是反黑反白效果,下面我们就来看看ai彩色logo转化为黑白稿的技巧2023-11-12


最新评论