
Illustrator(AI)模仿设计出一个逼真的色彩斑澜的U盘实例教程
22. 现在绘制一个矩形,宽度同之前缩放的矩形宽度,然后填充线性渐变。这就是我们制作的U盘了。
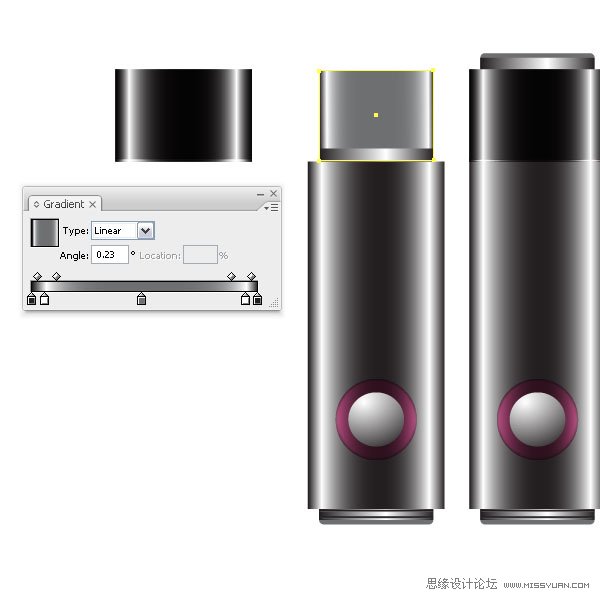
Step 23
Zoom into the tip part and create a small square and fill it with a linear dark gray gradient. Duplicate it on top (Command + C +F) and scale it (E) slightly bigger than the original. Set the Layer Mode to Screen. This will give us an optical illusion that the tip has a metal cutout. Select both and copy them for the right side. Then create two small squares with a dark linear gradient and place them underneath the others.
23. 放大U盘的上半部,绘制一个小正方形,填充深灰色线性渐变。然后在它上面复制一个(Ctrl+C,Ctrl+F),使用自由变换工具(E),使它比原大小大一点。图层混合模式设置为滤色,这就使得U盘上小孔的底部有一种金属剪影的错觉感。同时选择这2个形状,然后复制它们,然后移到右边。然后绘制2个更小的正方形,填充深灰的线性渐变,然后把它们放在另2个正方形的下面。
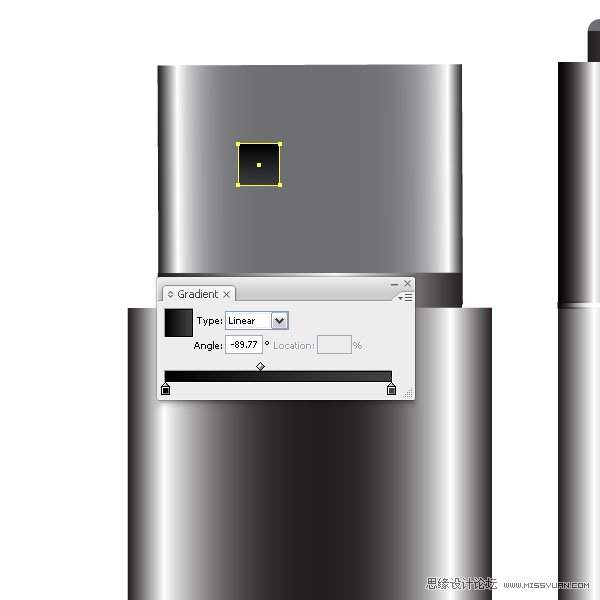
Step 24
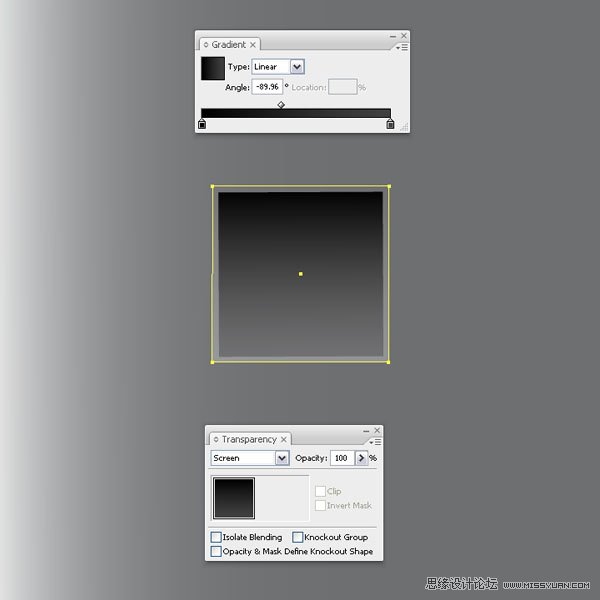
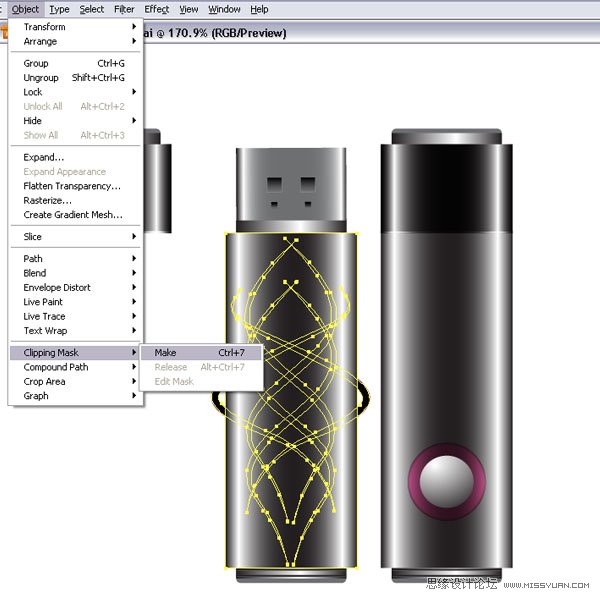
Let’s apply our tattoo style design. Place your tattoo design on top of the flash stick. Then make a copy of the bigger shape and place it on top. Select both, the shape and the tattoo and go to Object > Clipping Mask > Make (Command + 7). This will mask the tattoo design to the flash stick outline.
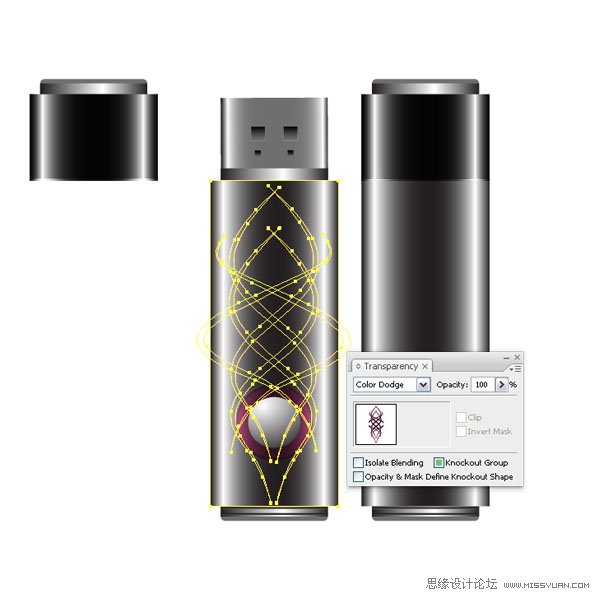
Set the Layer Mode to Color Dodge. Make sure that the circle shapes are on top. I placed another tattoo shape higher and applied another Clipping Mask. I set the Layer Mode to Normal.
24. 现在应用印花设计图案。把印花设计图案放在U盘的上面,然后复制一个大的矩形形状,把它放在印花设计图案的上面。同时选中这2个形状,然后执行对象菜单>剪切蒙版>建立(Ctrl+7)。这样印花设计图案就正好剪切到U盘的外观轮廓。
Step 25
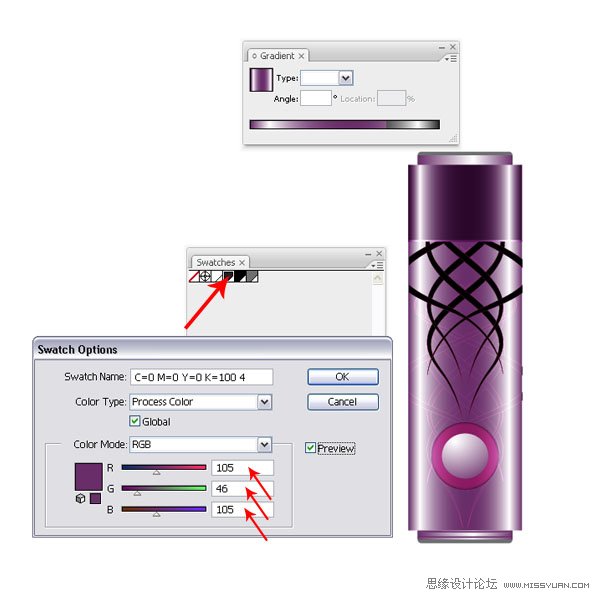
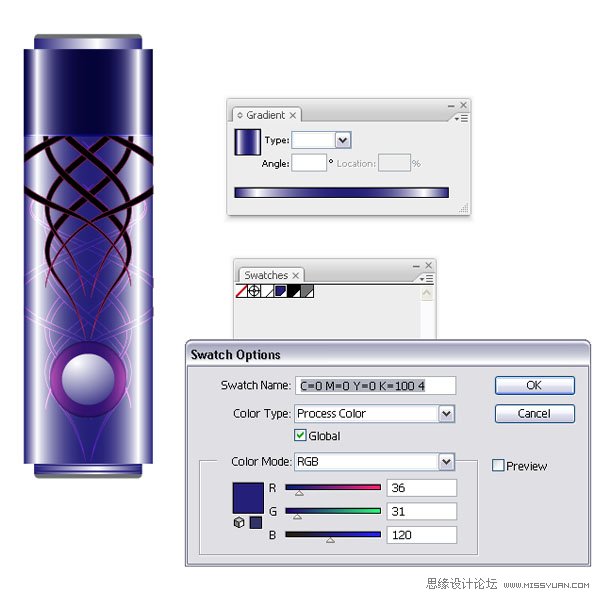
Now we will create another flash stick with different colors. Select your flash stick shapes (you might want to group them). Next, open another document, and paste the shapes onto the artboard. Then open the Swatch Palette and double-click the dark gray color swatch.
Since I have the document setup in RGB, I have three color sliders. I changed them to the settings you can see in the image below. This will give me a pinkish color. Make sure that you have the Preview selected, that way while you change the color, you can see how the color is instantly applied to your shapes. I changed the cap back to black by dragging the black color swatch back onto the gradient sliders. You can choose whatever color you’d like – experiment a little.
25. 现在我们绘制另一个不同色彩的U盘。选择U盘形状(你可以把这些形状编为一组)。然后,新建文档,把U盘形状粘贴到画板上。然后打开色板调板,在深灰色色板上双击。
当我把文档设置为RGB颜色模式时,我就有了3个颜色块,我把它们更改为如下图所示的设置。按照下图的设置,你会得到一个略带桃红的颜色,确认你选中了预览。当你用这个方法更改颜色时,你会看到颜色是如何快速地被应用到了形状上。然后,恢复U盘盖子的颜色,把黑色色板拖移到渐变滑块上。你可以选择任何你喜欢的颜色-多做一些尝试。
Step 26
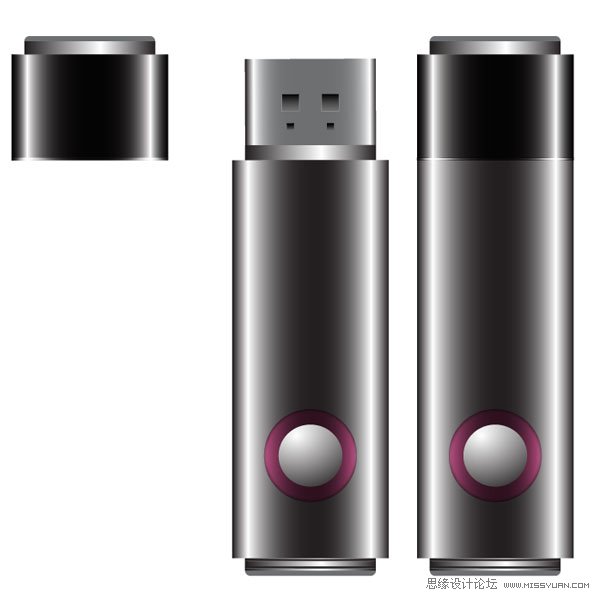
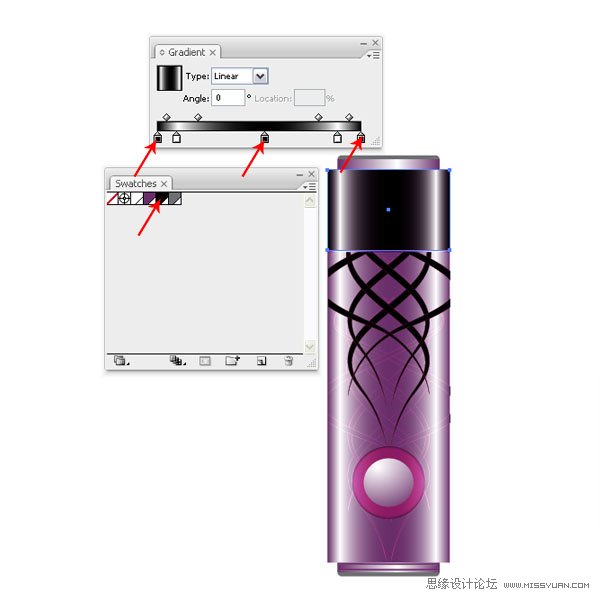
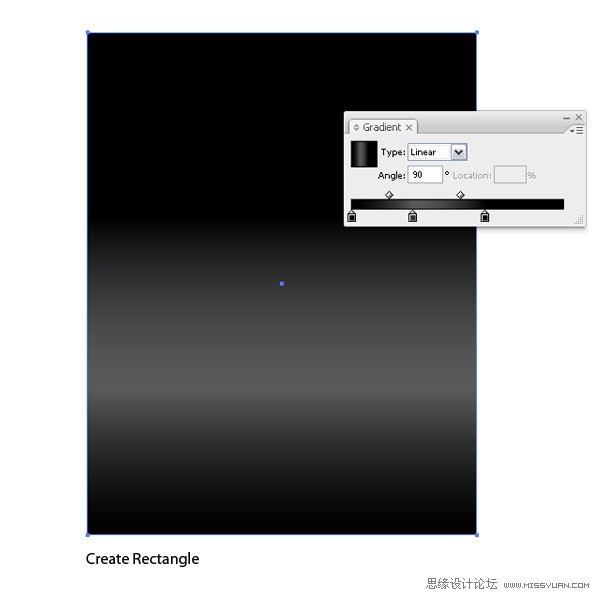
Lets’ create the final image. Create a rectangle in a new document or the just opened one. Fill it with a linear dark gray gradient.
26. 创建最后的图形。新建文档或者就用打开的文档,绘制一个矩形,填充深灰色线性渐变。
相关文章
 偏移文本或偏移路径意味着偏离了原来的位置,虽然听起来可能不太理想或杂乱无章,但在Illustrator中使用偏移技术处理文本可以给您带来一些很酷的效果,详细请看下文介绍2026-03-03
ai怎么混合两种颜色? illustrator混合两个色块的颜色的方法
ai填充不同颜色的图形重叠以后,想要将两种颜色混合,该怎么混合颜色呢?下面我们就来看看详细的教程2024-07-18 ai网格线间距默认的不是很喜欢,想要自己调整一下,该怎么调整呢?今天我们就来看看参考线调整技巧2024-05-28
ai路径平均效果怎么用? illustrator使用平均路径的教程
Adobe Illustrator中有一个路径平均功能,如何使用呢?下面小编为大家演示路径平均功能的一种使用方法2024-05-21ai保存pdf格式出现多余内容怎么解决? 去掉pdf文件多余内容的技巧
ai保存pdf格式出现多余内容怎么解决?ai中的文档保存为pdf文件的时候,发现有多余内容,该怎么操作呢?下面我们就来看看去掉pdf文件多余内容的技巧2023-12-19- ai描边在哪里?ai中想要设置描边,该怎么操作呢?下面我们就来看看ai设置描边的多种方法2023-12-19
- ai原位复制怎么用?复制图形的时候,想要原位复制粘贴,该怎么操作呢?下面我们就来看看ai原位复制快捷键介绍2023-12-19
ai怎么让文字随着路径变形? illustrator区域文字不跟着变换方向问题的
ai怎么让文字随着路径变形?选中文字后,发现文字不跟随变换区域旋转该怎么办呢?下面我们就来看看illustrator区域文字不跟着变换问题的解决办法2023-11-30ai渐变色怎么调方向? illustrator将渐变颜色反向的技巧
ai渐变色怎么调方向?ai中给图形填渐变色,想要进行反向,该怎么操作呢?下面我们就来看看illustrator将渐变颜色反向的技巧2023-11-30
Ai彩色logo怎么做反白反黑效果? ai彩色logo转化为黑白稿的技巧
Ai彩色logo怎么做反白反黑效果?设计的彩色logo想要做黑白稿,就是反黑反白效果,下面我们就来看看ai彩色logo转化为黑白稿的技巧2023-11-12


最新评论