
使用mongoose和bcrypt实现用户密码加密的示例
更新时间:2018年02月11日 08:38:27 作者:小火柴的蓝色理想
下面小编就为大家分享一篇使用mongoose和bcrypt实现用户密码加密的示例,具有很好的参考价值,希望对大家有所帮助。一起跟随小编过来看看吧
前面的话
最近在做的个人项目中,需要对密码进行加密保存,对该操作的详细步骤记录如下
介绍
关于mongoose已经写过博客就不再赘述,下面主要介绍bcrypt
bcrypt是一个由两个外国人根据Blowfish加密算法所设计的密码散列函数。实现中bcrypt会使用一个加盐的流程以防御彩虹表攻击,同时bcrypt还是适应性函数,它可以借由增加迭代之次数来抵御暴力破解法
使用npm安装即可
npm install --save bcrypt
用户模型
下面来创建代码用户user的schema,用户名不能重复
var mongoose = require('mongoose'),
 Schema = mongoose.Schema,
 bcrypt = require('bcrypt');var UserSchema = new Schema({
 username: { type: String, required: true, index: { unique: true } },
 password: { type: String, required: true }
});
module.exports = mongoose.model('User', UserSchema);
加密
下面加入用户模型的是Mongoose的中间件,该中间件使用pre前置钩子,在密码保存之前,自动地把密码变成hash。详细代码如下
let SALT_WORK_FACTOR = 5
UserSchema.pre('save', function(next) {
 var user = this;
 //产生密码hash当密码有更改的时候(或者是新密码)
 if (!user.isModified('password')) return next();
 // 产生一个salt
 bcrypt.genSalt(SALT_WORK_FACTOR, function(err, salt) {
  if (err) return next(err);
  // 结合salt产生新的hash
  bcrypt.hash(user.password, salt, function(err, hash) {
   if (err) return next(err);
   // 使用hash覆盖明文密码
   user.password = hash;
   next();
  });
 });
});
在node.bcrypt.js中SALT_WORK_FACTOR默认使用的是10,这里设置为5
验证
加密之后,密码原文被替换为密文了。我们无法解密,只能通过bcrypt的compare方法,对再次传入的密码和数据库中保存的加密后的密码进行比较,如果匹配,则登录成功
UserSchema.methods.comparePassword = function(candidatePassword, cb) {
 bcrypt.compare(candidatePassword, this.password, function(err, isMatch) {
  if (err) return cb(err);
  cb(null, isMatch);
 });
};
把上面的几个步骤串在一起,完整代码如下
var mongoose = require('mongoose'),
 Schema = mongoose.Schema,
 bcrypt = require('bcrypt'),
 SALT_WORK_FACTOR = 5;
var UserSchema = new Schema({
 username: { type: String, required: true, index: { unique: true } },
 password: { type: String, required: true }
});
UserSchema.pre('save', function(next) {
 var user = this;
 // only hash the password if it has been modified (or is new)
 if (!user.isModified('password')) return next();
 // generate a salt
 bcrypt.genSalt(SALT_WORK_FACTOR, function(err, salt) {
  if (err) return next(err);
  // hash the password using our new salt
  bcrypt.hash(user.password, salt, function(err, hash) {
   if (err) return next(err);
   // override the cleartext password with the hashed one
   user.password = hash;
   next();
  });
 });
});
UserSchema.methods.comparePassword = function(candidatePassword, cb) {
 bcrypt.compare(candidatePassword, this.password, function(err, isMatch) {
  if (err) return cb(err);
  cb(null, isMatch);
 });
};
module.exports = mongoose.model('User', UserSchema);
测试
把上面的代码保存成user-model.js,然后运行下面代码来实际测试
var mongoose = require('mongoose'),
User = require('./user-model');
var connStr = 'mongodb://localhost:27017/mongoose-bcrypt-test';
mongoose.connect(connStr, function(err) {
if (err) throw err;
console.log('Successfully connected to MongoDB');
});
// create a user a new user
var testUser = new User({
username: 'jmar777',
password: 'Password123'
});
// save user to database
testUser.save(function(err) {
if (err) throw err;
// fetch user and test password verification
User.findOne({ username: 'jmar777' }, function(err, user) {
if (err) throw err;
// test a matching password
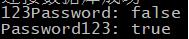
user.comparePassword('Password123', function(err, isMatch) {
if (err) throw err;
console.log('Password123:', isMatch); // -> Password123: true
});
// test a failing password
user.comparePassword('123Password', function(err, isMatch) {
if (err) throw err;
console.log('123Password:', isMatch); // -> 123Password: false
});
});
});
控制台中输入如下数据:
数据库数据如下:

以上这篇使用mongoose和bcrypt实现用户密码加密的示例就是小编分享给大家的全部内容了,希望能给大家一个参考,也希望大家多多支持脚本之家。
相关文章
 MongoDB的分片是一种横向扩展数据库的方式,可以将数据分散存储在多台服务器上,从而提高数据库的处理能力和可用性,本文就来介绍一下如何实现,感兴趣的可以了解一下2023-12-12
 本文整理mongodb的官方文档,介绍mongodb的视图创建和查询,在Mongodb中,允许使用两种方式来创建视图,本文结合实例代码给大家介绍的非常详细,感兴趣的朋友一起看看吧2023-12-12
 下面主要针对MongoDB在Windows下加入本地服务项做一些简单的分享。以方便刚接触MongoDB并在Windows环境下进行开发的同学2014-08-08
 本篇文章主要介绍了Linux下搭建MongoDB环境,小编觉得挺不错的,现在分享给大家,也给大家做个参考。一起跟随小编过来看看吧2016-11-11
2021最新版windows10系统MongoDB数据库安装及配置环境
这篇文章主要介绍了2021最新版MongoDB数据库安装及配置环境(windows10系统),本文通过图文实例相结合给大家介绍的非常详细,对大家的学习或工作具有一定的参考借鉴价值,需要的朋友可以参考下2021-03-03 这篇文章主要介绍了Navicat Premium连接mongodb详细教程,本文通过图文并茂的形式给大家介绍的非常详细,对大家的学习或工作具有一定的参考借鉴价值,需要的朋友可以参考下2021-03-03
 MongoDB可以在以一个主节点处理客户端请求的情况下以其他节点服务器负责映射主节点上的数据,即为我们通常所说的主从复制功能,这里我们就来共同总结MongoDB的主从复制及副本集的replSet配置教程:2016-07-07
 这篇文章主要介绍了MongoDB 关系的相关资料,文中示例代码非常详细,帮助大家更好的理解和学习,感兴趣的朋友可以了解下2020-07-07
 这篇文章主要介绍了SpringBoot 集成MongoDB实现文件上传,主要通过示例代码记录文件上传的步骤,代码简单易懂,对大家的学习或工作具有一定的参考借鉴价值,需要的朋友可以参考下2022-04-04
MongoDB固定集合(capped collection)的知识小结
固定集合指的是事先创建,并且大小固定的集合。下面这篇文章主要给大家总结介绍了MongoDB固定集合(capped collection)的知识,文中介绍的非常详细,需要的朋友可以参考借鉴,下面来一起学习学习吧2018-10-10


最新评论