
redis服务器环境下mysql实现lnmp架构缓存
配置环境:redhat6.5
server1:redis(172.25.254.1)
server2:php(172.25.254.2)
server3:mysql(172.25.254.3)
配置步骤:
server2:
1、server2安装php的redis相应模块

2、nginx安装
[root@server2 php-fpm.d]# rpm -ivh nginx-1.8.0-1.el6.ngx.x86_64.rpm
warning: nginx-1.8.0-1.el6.ngx.x86_64.rpm: Header V4 RSA/SHA1 Signature, key ID 7bd9bf62: NOKEY
Preparing...        ########################################### [100%]
  1:nginx         ########################################### [100%]
----------------------------------------------------------------------
 Thanks for using nginx!

Please find the official documentation for nginx here:
* https://nginx.org/en/docs/
Commercial subscriptions for nginx are available on:
* https://nginx.com/products/

----------------------------------------------------------------------
[root@server2 php-fpm.d]# id nginx
uid=498(nginx) gid=499(nginx) groups=499(nginx)
3、nginx和php配置
1、php配置
[root@server2 php-fpm.d]# cd /etc/php-fpm.d/
[root@server2 php-fpm.d]# id nginx
uid=498(nginx) gid=499(nginx) groups=499(nginx)
[root@server2 php-fpm.d]# vim www.conf
 39 user = nginx
 41 group = nginx
 [root@server2 php-fpm.d]# vim /etc/php.ini
 946 date.timezone = Asia/Shanghai
[root@server2 php-fpm.d]# /etc/init.d/php-fpm start
Starting php-fpm:                     [ OK ]
[root@server2 php-fpm.d]# netstat -antlp | grep php
tcp    0   0 127.0.0.1:9000       0.0.0.0:*          LISTEN   1125/php-fpm
[root@server2 php-fpm.d]# vim /etc/php.ini
2、nginx配置
[root@server2 ~]# cd /etc/nginx/conf.d/
[root@server2 conf.d]# ls
default.conf example_ssl.conf
[root@server2 conf.d]# vim default.conf
 10     index index.php index.html index.htm;
 30   location ~ \.php$ {
 31     root      html;
 32     fastcgi_pass  127.0.0.1:9000;
 33     fastcgi_index index.php;
 34     fastcgi_param SCRIPT_FILENAME /usr/share/nginx/html$fastcgi_script  _name;
 35     include    fastcgi_params;
 36   }
[root@server2 conf.d]# nginx -t
nginx: the configuration file /etc/nginx/nginx.conf syntax is ok
nginx: configuration file /etc/nginx/nginx.conf test is successful
[root@server2 conf.d]# nginx
[root@server2 conf.d]# netstat -anplt |grep nginx
tcp    0   0 0.0.0.0:80         0.0.0.0:*          LISTEN   1141/nginx

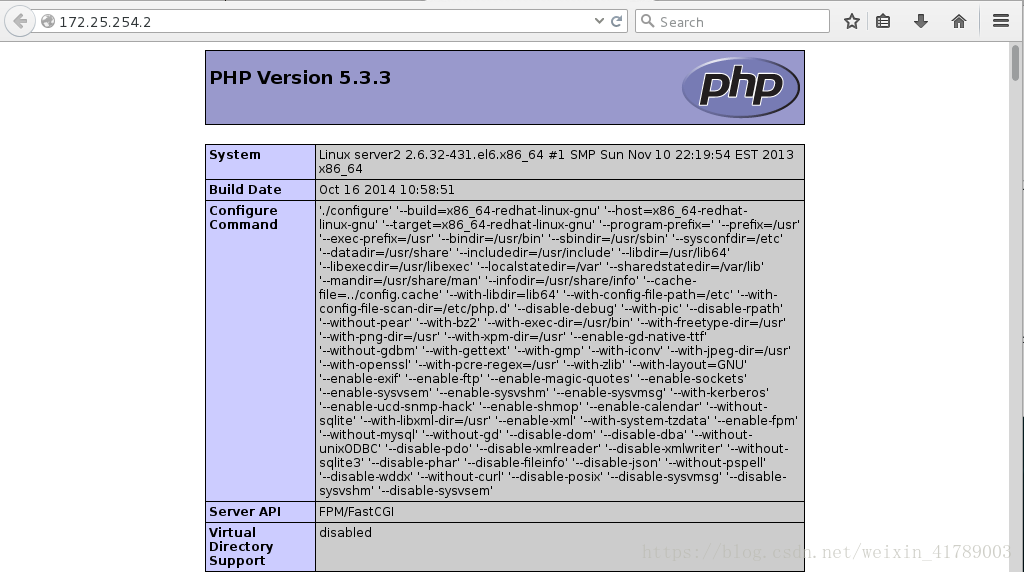
php测试:
[root@server2 conf.d]# cd /usr/share/nginx/html/
[root@server2 html]# vim index.php
[root@server2 html]# cat index.php
<!--php
phpinfo()
-->
[root@server2 html]# /etc/init.d/php-fpm reload
Reloading php-fpm: [14-Jul-2018 01:09:13] NOTICE: configuration file /etc/php-fpm.conf test is successful
                              [ OK ]
物理机访问:
4、php配置redis+mysql
[root@server2 ~]# cd /usr/share/nginx/html/
[root@server2 html]# vim test.php
  <!--php
      $redis = new Redis();
      $redis--->connect('172.25.254.1',6379) or die ("could net connect redi  s server");
   #   $query = "select * from test limit 9";
      $query = "select * from test";
      for ($key = 1; $key < 10; $key++)
      {
          if (!$redis->get($key))
          {
             $connect = mysql_connect('172.25.254.3','redis','wes  tos');
             mysql_select_db(test);
             $result = mysql_query($query);
             //如果没有找到$key,就将该查询sql的结果缓存到redis
             while ($row = mysql_fetch_assoc($result))
             {
                 $redis->set($row['id'],$row['name']);
             }
             $myserver = 'mysql';
             break;
         }
         else
         {
             $myserver = "redis";
             $data[$key] = $redis->get($key);
         }
     }
     echo $myserver;
     echo "
";
     for ($key = 1; $key < 10; $key++)
     {
        echo "number is $key";
        echo "
";
        echo "name is $data[$key]"  ;
        echo "
";
   }
>
5、添加php支持的redis模块
[root@server2 ~]# unzip phpredis-master.zip
[root@server2 ~]# cd phpredis-master
[root@server2 phpredis-master]# phpize
Configuring for:
PHP Api Version:     20090626
Zend Module Api No:   20090626
Zend Extension Api No:  220090626
[root@server2 phpredis-master]# ls
acinclude.m4  config.sub   library.c     README.markdown
aclocal.m4   configure    library.h     redis.c
autom4te.cache configure.in  ltmain.sh     redis_session.c
build      CREDITS     Makefile.global  redis_session.h
common.h    debian     missing      run-tests.php
config.guess  debian.control mkdeb-apache2.sh serialize.list
config.h.in   igbinary    mkinstalldirs   tests
config.m4    install-sh   php_redis.h
[root@server2 phpredis-master]# ./configure
[root@server2 phpredis-master]# make && make install
[root@server2 ~]# cd /etc/php.d/
[root@server2 php.d]# ls
curl.ini   json.ini   mysql.ini   pdo_sqlite.ini zip.ini
fileinfo.ini mbstring.ini pdo.ini    phar.ini
gd.ini    mysqli.ini  pdo_mysql.ini sqlite3.ini
[root@server2 php.d]# cp mysql.ini redis.ini
[root@server2 php.d]# vim redis.ini
 2 extension=redis.so
 [root@server2 php.d]# /etc/init.d/php-fpm reload
Reloading php-fpm: [14-Jul-2018 01:21:56] NOTICE: configuration file /etc/php-fpm.conf test is successful
                              [ OK ]
[root@server2 php.d]# php -m |grep redis
redis
server3:mysql配置
1、安装mysql-server
[root@server3 ~]# rpm -qa | grep mysql
mysql-community-common-5.7.17-1.el6.x86_64
mysql-community-client-5.7.17-1.el6.x86_64
mysql-community-libs-compat-5.7.17-1.el6.x86_64
mha4mysql-node-0.56-0.el6.noarch
mysql-community-libs-5.7.17-1.el6.x86_64
mysql-community-server-5.7.17-1.el6.x86_64
[root@server3 ~]# rpm -e `rpm -qa|grep mysql` --nodeps  ##不考虑依赖性删除mysql
warning: /etc/my.cnf saved as /etc/my.cnf.rpmsave
[root@server3 ~]# rpm -qa | grep mysql
[root@server3 ~]# cd /var/lib/mysql/
[root@server3 mysql]# rm -fr *
[root@server3 mysql]# ls
[root@server3 mysql]# yum install -y mysql-server ##安装
2、开启mysql,并导入测试数据库
[root@server3 ~]# /etc/init.d/mysqld start
[root@server3 ~]# mysql < test.sql
[root@server3 ~]# mysql < test.sql
[root@server3 ~]# cat test.sql
use test;
CREATE TABLE `test` (`id` int(7) NOT NULL AUTO_INCREMENT, `name` char(8) DEFAULT NULL, PRIMARY KEY (`id`)) ENGINE=InnoDB DEFAULT CHARSET=utf8;
INSERT INTO `test` VALUES (1,'test1'),(2,'test2'),(3,'test3'),(4,'test4'),(5,'test5'),(6,'test6'),(7,'test7'),(8,'test8'),(9,'test9');
#DELIMITER $$
#CREATE TRIGGER datatoredis AFTER UPDATE ON test FOR EACH ROW BEGIN
#  SET @RECV=gman_do_background('syncToRedis', json_object(NEW.id as `id`, NEW.name as `name`));
# END$$
#DELIMITER ;
3、数据库授权
[root@server3 ~]# mysql
mysql> grant all on test.* to redis@'%' identified by 'westos';
Query OK, 0 rows affected (0.00 sec)
mysql> select * from test.test;
+----+-------+
| id | name |
+----+-------+
| 1 | test1 |
| 2 | test2 |
| 3 | test3 |
| 4 | test4 |
| 5 | test5 |
| 6 | test6 |
| 7 | test7 |
| 8 | test8 |
| 9 | test9 |
+----+-------+
9 rows in set (0.00 sec)
测试:访问172.25.254.2/test.php
1、php默认从redis 索取数据,第一次redis无缓存,则php从mysql'索取数据
第一次无缓存

第二次索取数据后:

redis节点也可查看
[root@server1 redis-4.0.1]# redis-cli
127.0.0.1:6379> get 2
"test2"
2、将数据库server3节点内容更新并删除节点,则php从数据库索取数据节点更新内容
mysql> update test.test set name='westos' where id=1;
Query OK, 1 row affected (0.05 sec)
Rows matched: 1 Changed: 1 Warnings: 0
mysql> select * from test.test;
+----+--------+
| id | name  |
+----+--------+
| 1 | westos |
| 2 | test2 |
| 3 | test3 |
| 4 | test4 |
| 5 | test5 |
| 6 | test6 |
| 7 | test7 |
| 8 | test8 |
| 9 | test9 |
+----+--------+
9 rows in set (0.00 sec)
redis的master主机删除节点内容
[root@server1 redis-4.0.1]# redis-cli
127.0.0.1:6379> get 2
"test2"
127.0.0.1:6379> del 1
(integer) 1
127.0.0.1:6379> get 1
(nil)
刷新页面,再次访问

以上redis 作为 mysql 的缓存服务器,但是如果更新了 mysql,redis中仍然会有对应的 KEY,数据就不会更新,此时就会出现 mysql 和 redis 数据不一致的情况。
总结
以上所述是小编给大家介绍的redis服务器环境下mysql实现lnmp架构缓存,希望对大家有所帮助,如果大家有任何疑问请给我留言,小编会及时回复大家的。在此也非常感谢大家对脚本之家网站的支持!
相关文章

mysql_connect(): Connection using old (pre-4.1.1) authentica
MySQL错误提示:Connection using old (pre-4.1.1) authentication protocol refused (client option ‘secure_auth’ enabled)解决办法,需要的朋友可以参考下2014-04-04 事务(Transaction)是访问和更新数据库的程序执行单元;事务中可能包含一个或多个sql语句,这些语句要么都执行,要么都不执行,下面这篇文章主要给大家介绍了关于MySQL基础教程之事务异常情况的相关资料,需要的朋友可以参考下2022-10-10
 这篇文章主要介绍了mysql行转列与列传行的使用方法,帮助大家更好的理解和学习MySQL的使用,语句不难,但有一定的知识参考价值,需要的朋友可以参考一下,希望给你的学习带来帮助2022-02-02
mysql中find_in_set()函数的使用及in()用法详解
这篇文章主要介绍了mysql中find_in_set()函数的使用以及in()用法详解,需要的朋友可以参考下2018-07-07 文章介绍了MySQL存储过程的概念、创建与删除、调用、变量使用、参数、流程控制、管理和案例,存储过程可以封装SQL指令,提高执行效率,但也有一定局限性,感兴趣的朋友跟随小编一起看看吧2025-02-02
 最近在工作中发现一个问题,是关于mysql中url时区的,发现这个陷阱如果大家不注意可能都会遇到,所以给大家总结下,这篇文章主要给大家介绍了关于mysql中url时区的陷阱该如何规避的相关资料,需要的朋友可以参考借鉴,下面来一起看看吧。2017-08-08
 MySQL空间索引是一种用于优化地理空间数据查询的数据结构,通过为几何数据类型创建空间索引,可以高效地对空间数据进行查询和操作,感兴趣的可以了解一下2024-11-11
MySQL迁移中explicit_defaults_for_timestamp参数影响
在MySQL数据库迁移过程中,explicit_defaults_for_timestamp参数设置为off可能导致数据写入行为变化,本文就来介绍一下explicit_defaults_for_timestamp参数影响,感兴趣的可以了解一下2024-09-09 在数据库设计中,时间戳字段(如 create_time 和 update_time)是非常常见的需求,它们通常用于记录数据的创建时间和最后更新时间,以便于数据追踪和分析,本文将深入探讨如何在 MySQL 中设置自动生成和更新时间戳字段,需要的朋友可以参考下2025-02-02
window10系统下mysql5.7安装审计插件(亲测有用)
mysql有没oracle这样的审计功能,突然想在mysql做审计怎么办,下面带大家从零开始给mysql安装审计插件,亲测绝对可用哦,需要的朋友可以参考下2022-09-09


最新评论