

Redis安装教程:如何在Ubuntu上一步步安装Redis?
此文章的教程源于旧版本Redis官网。目前Redis官网的页面已经天差地别,但文章内容依然有效。
一、安装Redis
首先,访问Redis官网,点击首页的【Get Started】,然后点击Install Redis on Linux

然后按照页面内容提示,在Ubuntu上安装redis
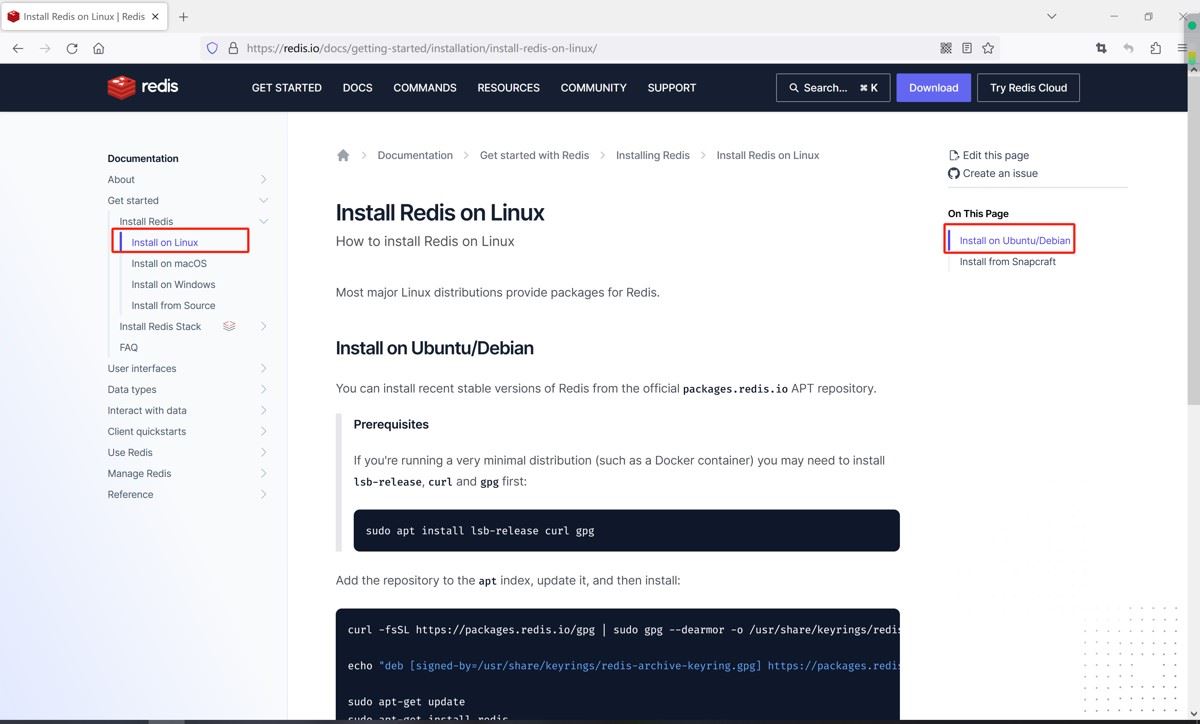
只需要在终端依次输入以下命令,如果过程中没有错误提示,则redis安装完成。
sudo apt install lsb-release curl gpg
curl -fsSL https://packages.redis.io/gpg | sudo gpg --dearmor -o /usr/share/keyrings/redis-archive-keyring.gpg
echo "deb [signed-by=/usr/share/keyrings/redis-archive-keyring.gpg] https://packages.redis.io/deb $(lsb_release -cs) main" | sudo tee /etc/apt/sources.list.d/redis.list
sudo apt-get update
sudo apt-get install redis
二、使用Redis
在终端输入redis-cli,会进入到redis的命令行模式,这时候就可以愉快地使用redis的各种命令了。
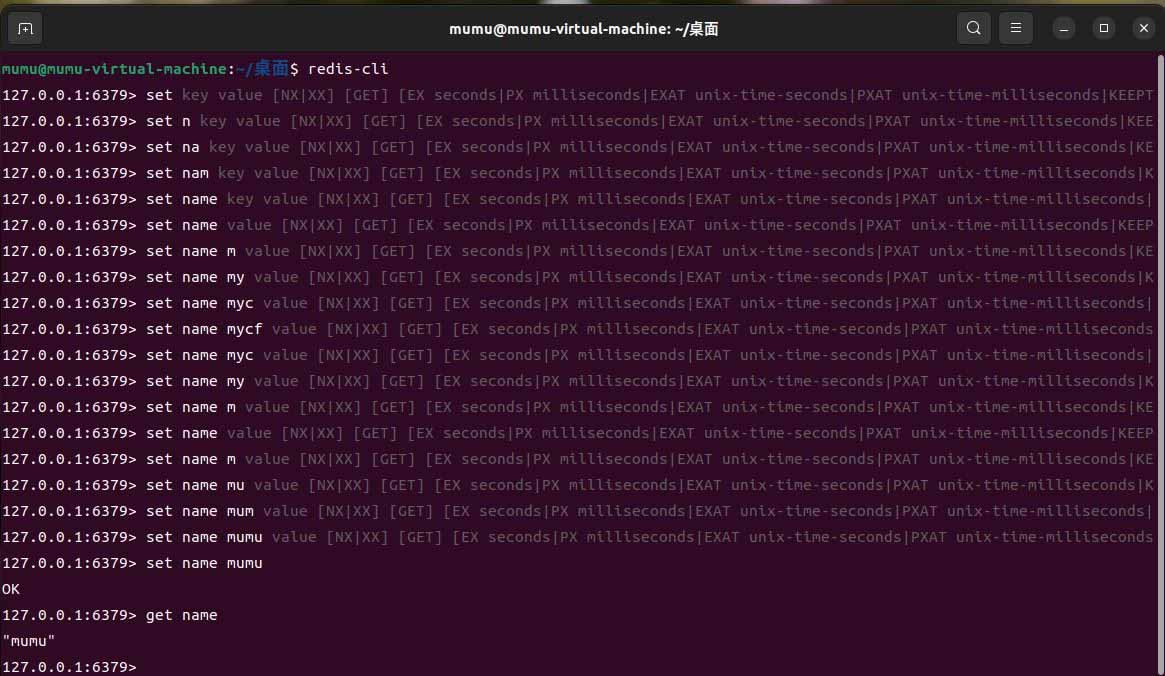
三、操作Redis
启动Redis
启动方式一
/etc/init.d/redis-server start

启动方式二
systemctl start redis-server
启动方式三
service redis-server start
重启Redis
service redis-server restart
关闭Redis
service redis-server stop
查看Redis状态
service redis-server status
四、在宿主机连接Redis
根据以上步骤安装启动redis后,默认只能在虚拟机内访问redis,如果在其他机器上.访问,需要修改配置文件。
默认情况下,redis的配置文件在/etc/redis/redis.conf,打开这个文件,注释掉下面这行配置。
bind 127.0.0.1 -::1
五、通过java连接Redis
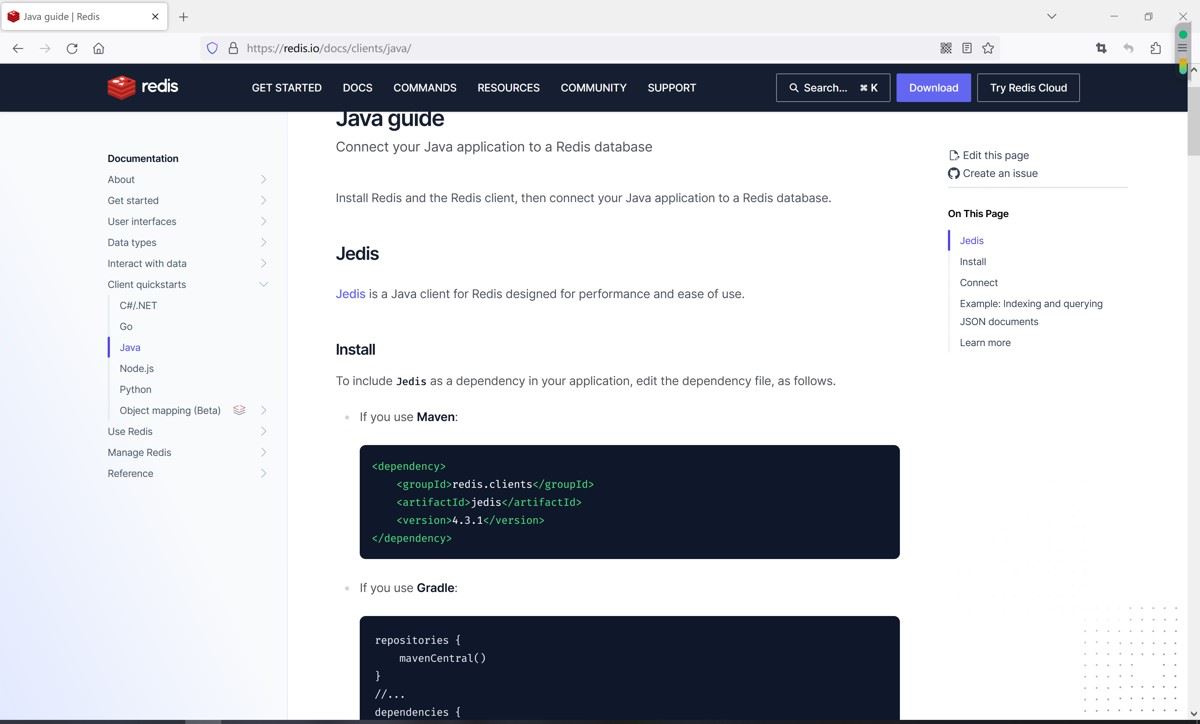
Redis官网推荐通过jedis来操作redis。
Jedis is a Java client for Redis designed for performance and ease of use.
jedis是一个专门设计用于操作和快速使用redis的Java客户端。
点击Client quikstart,在点击展开的Java。

官网已经给出了操作redis的方法
创建项目
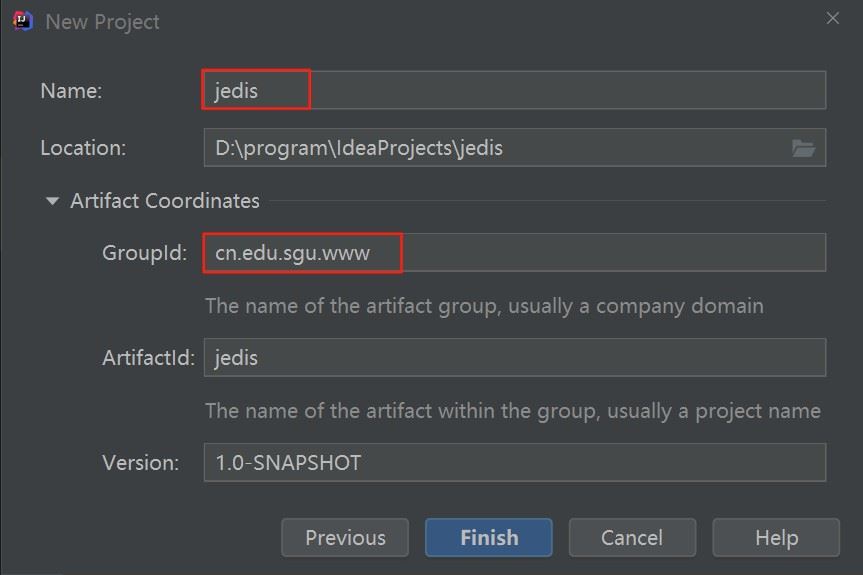
在IntelliJ IDEA中依次File => New => Project...创建一个Maven项目
然后在左侧选择Maven,然后点击Next
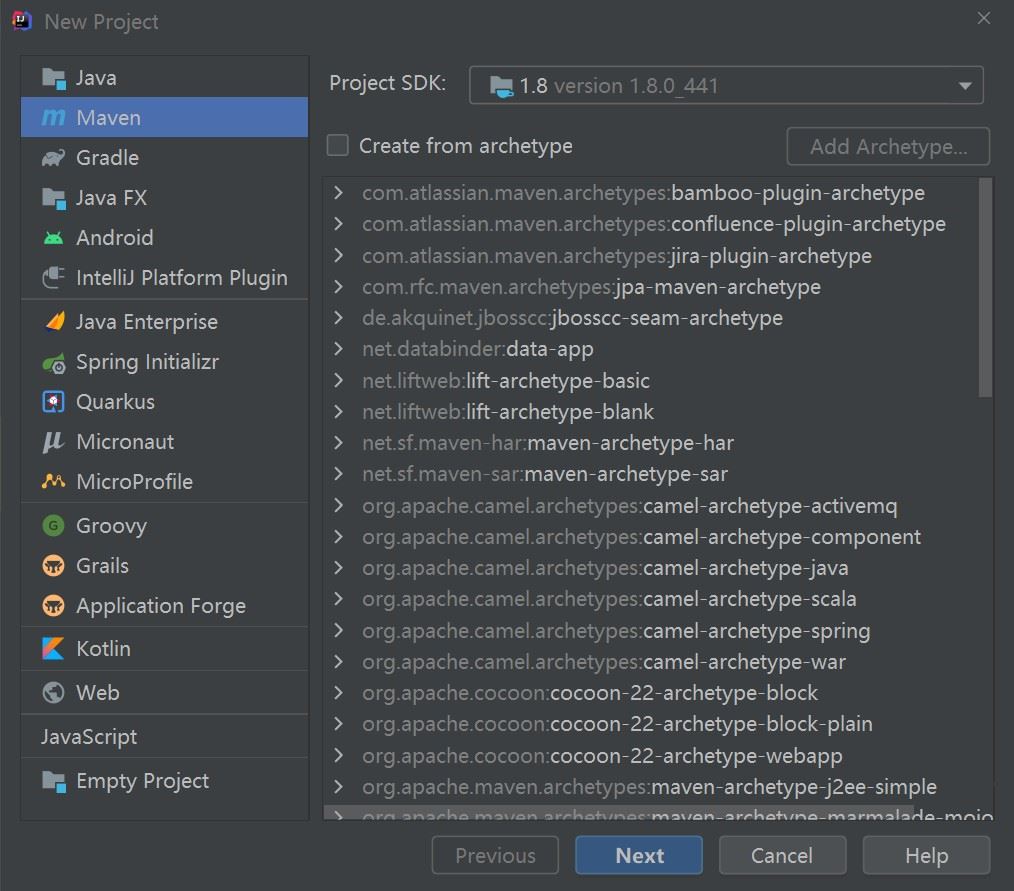
填写项目名jedis和分组ID:cn.edu.sgu.www,点击Finish创建Maven项目。
添加依赖
在pom.xml中添加jedis客户端依赖
<dependency>
    <groupId>redis.clients</groupId>
    <artifactId>jedis</artifactId>
    <version>4.3.1</version>
</dependency>
完整的pom.xml
<?xml version="1.0" encoding="UTF-8"?>
<project xmlns="http://maven.apache.org/POM/4.0.0"
         xmlns:xsi="http://www.w3.org/2001/XMLSchema-instance"
         xsi:schemaLocation="http://maven.apache.org/POM/4.0.0 http://maven.apache.org/xsd/maven-4.0.0.xsd">
    <modelVersion>4.0.0</modelVersion>
    <groupId>cn.edu.sgu.www</groupId>
    <artifactId>jedis</artifactId>
    <version>1.0-SNAPSHOT</version>
    <properties>
        <maven.compiler.source>8</maven.compiler.source>
        <maven.compiler.target>8</maven.compiler.target>
    </properties>
    <dependencies>
        <dependency>
            <groupId>redis.clients</groupId>
            <artifactId>jedis</artifactId>
            <version>4.3.1</version>
        </dependency>
        <dependency>
            <groupId>junit</groupId>
            <artifactId>junit</artifactId>
            <version>RELEASE</version>
            <scope>test</scope>
        </dependency>
    </dependencies>
</project>
案例代码
package cn.edu.sgu.www;

import org.junit.Test;
import redis.clients.jedis.Jedis;
import redis.clients.jedis.JedisPool;

import java.util.HashMap;
import java.util.Map;

/**
 * @author 沐雨橙风
 * @version 1.0
 */
public class JedisTests {

    @Test
    public void test() {
        JedisPool pool = new JedisPool("192.168.65.128", 6379);

        try (Jedis jedis = pool.getResource()) {
            // set key value
            jedis.set("foo", "bar");

            System.out.println(jedis.get("foo"));

            // hmset key field value field1 value1 ... ...
            Map<String, String> hash = new HashMap<>();

            hash.put("age", "18");
            hash.put("name", "mumu");
            hash.put("height", "18");

            jedis.hmset("user-session:123", hash);

            System.out.println(jedis.hgetAll("user-session:123"));
        }
    }

}
关闭保护模式
运行上面测试类,正常来说会看到绿条,但是运行的时候发生了异常

以下是控制台打印的异常信息
redis.clients.jedis.exceptions.JedisDataException: DENIED Redis is running in protected mode because protected mode is enabled and no password is set for the default user. In this mode connections are only accepted from the loopback interface. If you want to connect from external computers to Redis you may adopt one of the following solutions: 1) Just disable protected mode sending the command 'CONFIG SET protected-mode no' from the loopback interface by connecting to Redis from the same host the server is running, however MAKE SURE Redis is not publicly accessible from internet if you do so. Use CONFIG REWRITE to make this change permanent. 2) Alternatively you can just disable the protected mode by editing the Redis configuration file, and setting the protected mode option to 'no', and then restarting the server. 3) If you started the server manually just for testing, restart it with the '--protected-mode no' option. 4) Set up an authentication password for the default user. NOTE: You only need to do one of the above things in order for the server to start accepting connections from the outside.
抓到其中的一个关键词:protected-mode,很显然,这应该是一个配置
'CONFIG SET protected-mode no'
于是我们到redis.conf下搜索一下这个设置,果然找到了

把这个yes改成no
重启一下Redis
service redis-server restart
重新运行代码
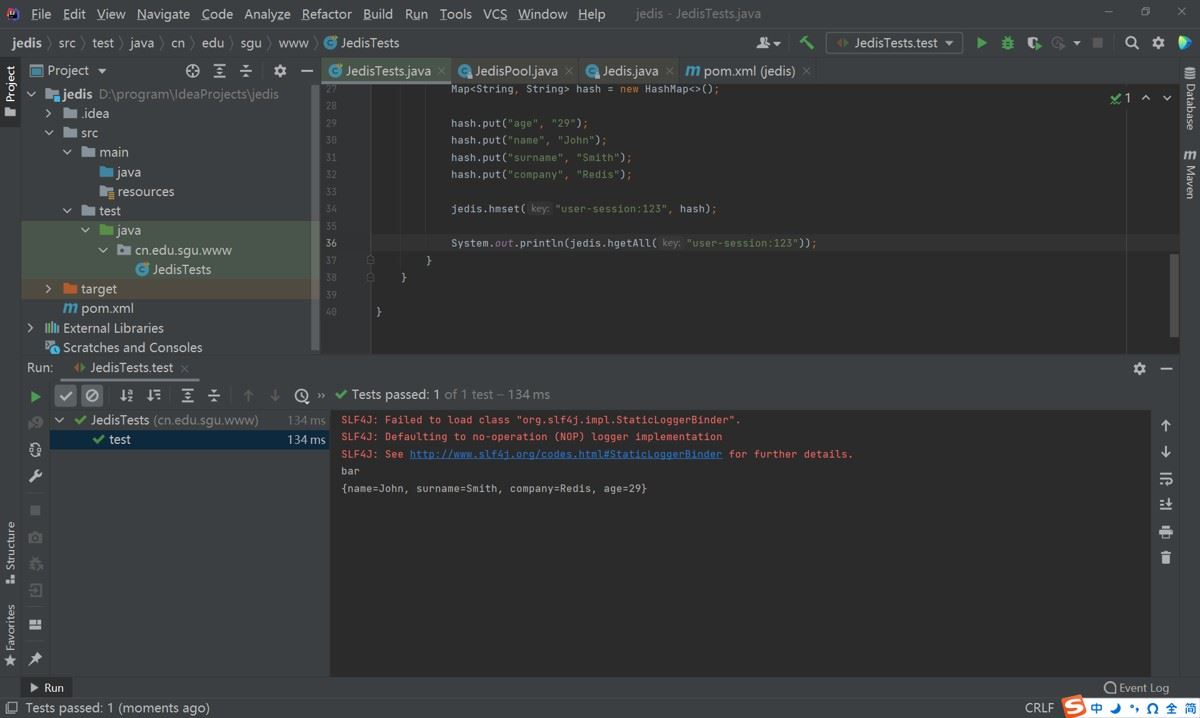
再次运行之前的代码,这一次成功了
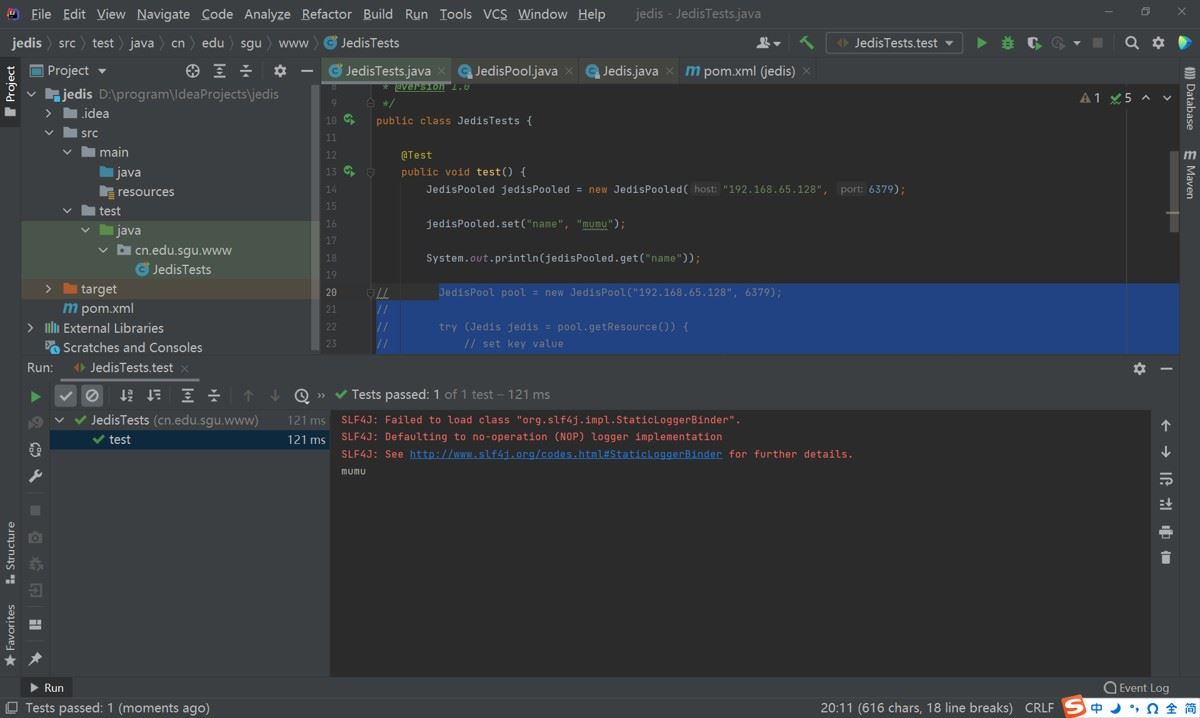
然后接着往下看,redis还提供了不用写try...catch块的方式操作redis,这样代码看起来更简洁了

同样,复制代码运行一次,也运行成功了
最后,通过Another Redis Desktop Manager连接虚拟机上的redis,能看到刚刚运行设置的key
总结
以上为个人经验,希望能给大家一个参考,也希望大家多多支持脚本之家。
相关文章
 两级缓存Redis+Caffeine可以解决缓存雪等问题也可以提高接口的性能,但是可能会出现缓存一致性问题,如果数据频繁的变更,可能会导致Redis和Caffeine数据不一致的问题,所以本文给大家介绍了Redis+Caffeine多级缓存数据一致性解决方案,需要的朋友可以参考下2024-12-12
 Hash 是一个 String 类型的 field(字段) 和 value(值) 的映射表,hash 特别适合用于存储对象,这篇文章主要介绍了redis的hash类型的详解,本文通过实例代码给大家介绍的非常详细,对大家的学习或工作具有一定的参考借鉴价值,需要的朋友可以参考下2023-06-06
 由于考虑到linux服务器的性能,所以经常需要把一些中间件安装在linux服务上,今天通过本文给大家介绍下在Centos 8.0中安装Redis服务器的详细过程,感兴趣的朋友一起看看吧2022-03-03
 这篇文章主要介绍了同一份数据Redis为什么要存两次,本文给大家介绍的非常详细,对大家的学习或工作具有一定的参考借鉴价值,需要的朋友可以参考下2021-01-01
 本文主要介绍了Redis分布式限流生产环境落地方案,文中通过示例代码介绍的非常详细,对大家的学习或者工作具有一定的参考学习价值,需要的朋友们下面随着小编来一起学习学习吧2026-02-02
Redis中StringRedisTemplate中HashOperations的使用详解
文章介绍了Spring Boot 2中使用Lettuce框架访问Redis的基本步骤和常用操作,包括添加依赖、注入`StringRedisTemplate`实例以及进行字符串、哈希、集合、列表和有序集合的基本操作,文章还提供了一个登录案例,并总结了个人经验,鼓励读者参考和支持2026-03-03 这篇文章主要介绍了深入理解 Redis Template及4种序列化方式,文中通过示例代码介绍的非常详细,对大家的学习或者工作具有一定的参考学习价值,需要的朋友们下面随着小编来一起学习学习吧2021-03-03
 热 Key是指在 Redis 中被高频访问的某个 Key,其访问频率远超其他 Key,导致该 Key 所在的 Redis 实例或节点成为系统瓶颈,下面就来介绍一下热key的问题解决,感兴趣的可以了解一下2026-02-02
 本文主要介绍了Redis消息队列的三种实现方式,主要包括List实现消息队列,PubSub消息队列,Stream消息队列,具有一定的参考价值,感兴趣的可以了解一下2023-12-12
 本文主要介绍了k8s部署redis哨兵的实现,文中通过示例代码介绍的非常详细,对大家的学习或者工作具有一定的参考学习价值,需要的朋友们下面随着小编来一起学习学习吧2022-07-07
最新评论