js实现鼠标移入图片放大效果
更新时间:2022年07月13日 08:27:40 作者:checkMa
这篇文章主要为大家详细介绍了js实现鼠标移入图片放大效果,文中示例代码介绍的非常详细,具有一定的参考价值,感兴趣的小伙伴们可以参考一下
使用原生js编写一个鼠标移入图片放大效果,供大家参考,具体内容如下
目标
给图片添加鼠标移动放大方法效果,移到哪里放大哪里
先看看效果是不是你想要的,再看代码
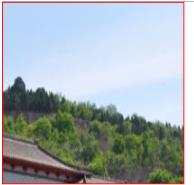
移入前

移入后

html
<!-- css看着写 -->
    <div class="Box" style="width:200px;height:200px;border:1px solid #f00;position: relative;top:0;left:0;overflow: hidden;">
        <Img  src="../image/lingtai.jpg" alt="" style="width:200px;height:200px;position:absolute;left:0;top:0;">
</div>
javascript
// 图片放大镜
// @params Class 目标class string
// @params Scale 放大倍数 number
function ScaleImg(Class, Scale){

        this.Box = document.querySelector(Class);

        this.Img = this.Box.querySelector('img');

        this.scale = Scale || 3 ;

        // 盒子中心点
        this.BoxX = this.Box.offsetWidth / 2;
        this.BoxY = this.Box.offsetHeight / 2;

        // 获取盒子初始定位
        this.Left = parseFloat( this.Box.offsetLeft );
        this.Top = parseFloat(this.Box.offsetTop );

        this.Init();

    }

    ScaleImg.prototype = {

        // 鼠标移入
        Mouseover: function(e){

            var e = e || window.event;

            // 放大图片
            this.Img.style.width = this.Img.offsetWidth * this.scale + "px";
            this.Img.style.height = this.Img.offsetHeight * this.scale + "px";

            // 设置放大后的图片定位
            this.Img.style.left = (this.Box.offsetWidth - this.Img.offsetWidth) / 2 + "px";
            this.Img.style.top = (this.Box.offsetHeight - this.Img.offsetHeight) / 2 + "px";

            // 获取图片放大后定位值
            this.ImgLeft = parseFloat(this.Img.style.left);
            this.ImgTop = parseFloat(this.Img.style.top);

            this.Box.left = (this.Box.offsetWidth - this.Img.offsetWidth) / 2;
            this.Box.top = (this.Box.offsetHeight - this.Img.offsetHeight) / 2;

            // 阻止默认事件
            return ;

        },

        // 鼠标移除
        Mouseout: function(e){

            var e = e || window.event;

            // 重置css
            this.Img.style.width = this.Img.offsetWidth / this.scale + "px";
            this.Img.style.height =this.Img.offsetHeight / this.scale + "px";

            this.Img.style.left = Math.floor((this.Box.offsetWidth - this.Img.offsetWidth) / 2) + "px";
            this.Img.style.top = Math.floor((this.Box.offsetHeight - this.Img.offsetHeight) / 2) + "px";

            return  ;
        },

        // 鼠标移动
        Mousemove: function(e){

            var e = e || window.event;

            // 图片鼠标位置
            var ImgXY = {"x": this.Left + this.BoxX, "y": this.Top + this.BoxY};

            // 获取偏移量
            var left = (ImgXY.x - e.clientX ) / this.BoxX * this.ImgLeft ,
                top = (ImgXY.y - e.clientY) / this.BoxY * this.ImgTop ;

            this.Img.style.left = Math.floor(this.Box.left - left) + "px";
            this.Img.style.top = Math.floor(this.Box.top - top) + "px";

            return ;
        },

        // 初始化
        Init: function(e){

            var that = this;

            this.Box.onmouseover = function(e){
                that.Mouseover(e);
            }
            this.Box.onmouseout = function(e){
                that.Mouseout(e);
            }
            this.Box.onmousemove = function(e){
                that.Mousemove(e);
            }

        }
    }

    // 实例一个对象
    new ScaleImg('.Box');
以上就是本文的全部内容,希望对大家的学习有所帮助,也希望大家多多支持脚本之家。
相关文章

发布BlueShow v1.0 图片浏览器(类似lightbox)blueshow.js 打包下载
发布BlueShow v1.0 图片浏览器(类似lightbox)blueshow.js 打包下载...2007-07-07


最新评论